In my two decades of wrenching and modding cars, I’ve never actually made my cars better. Sure, they were faster and handled better (my Golf R) or were a lot louder (my FR-S with a Nameless rally exhaust). But I’ve never done that and didn’t sacrifice some level of comfort. With the mods I’ve now made to the Can-Am, I haven’t sacrificed anything. I’ve actually made it better and I can’t believe it—immediately knocks on wood.
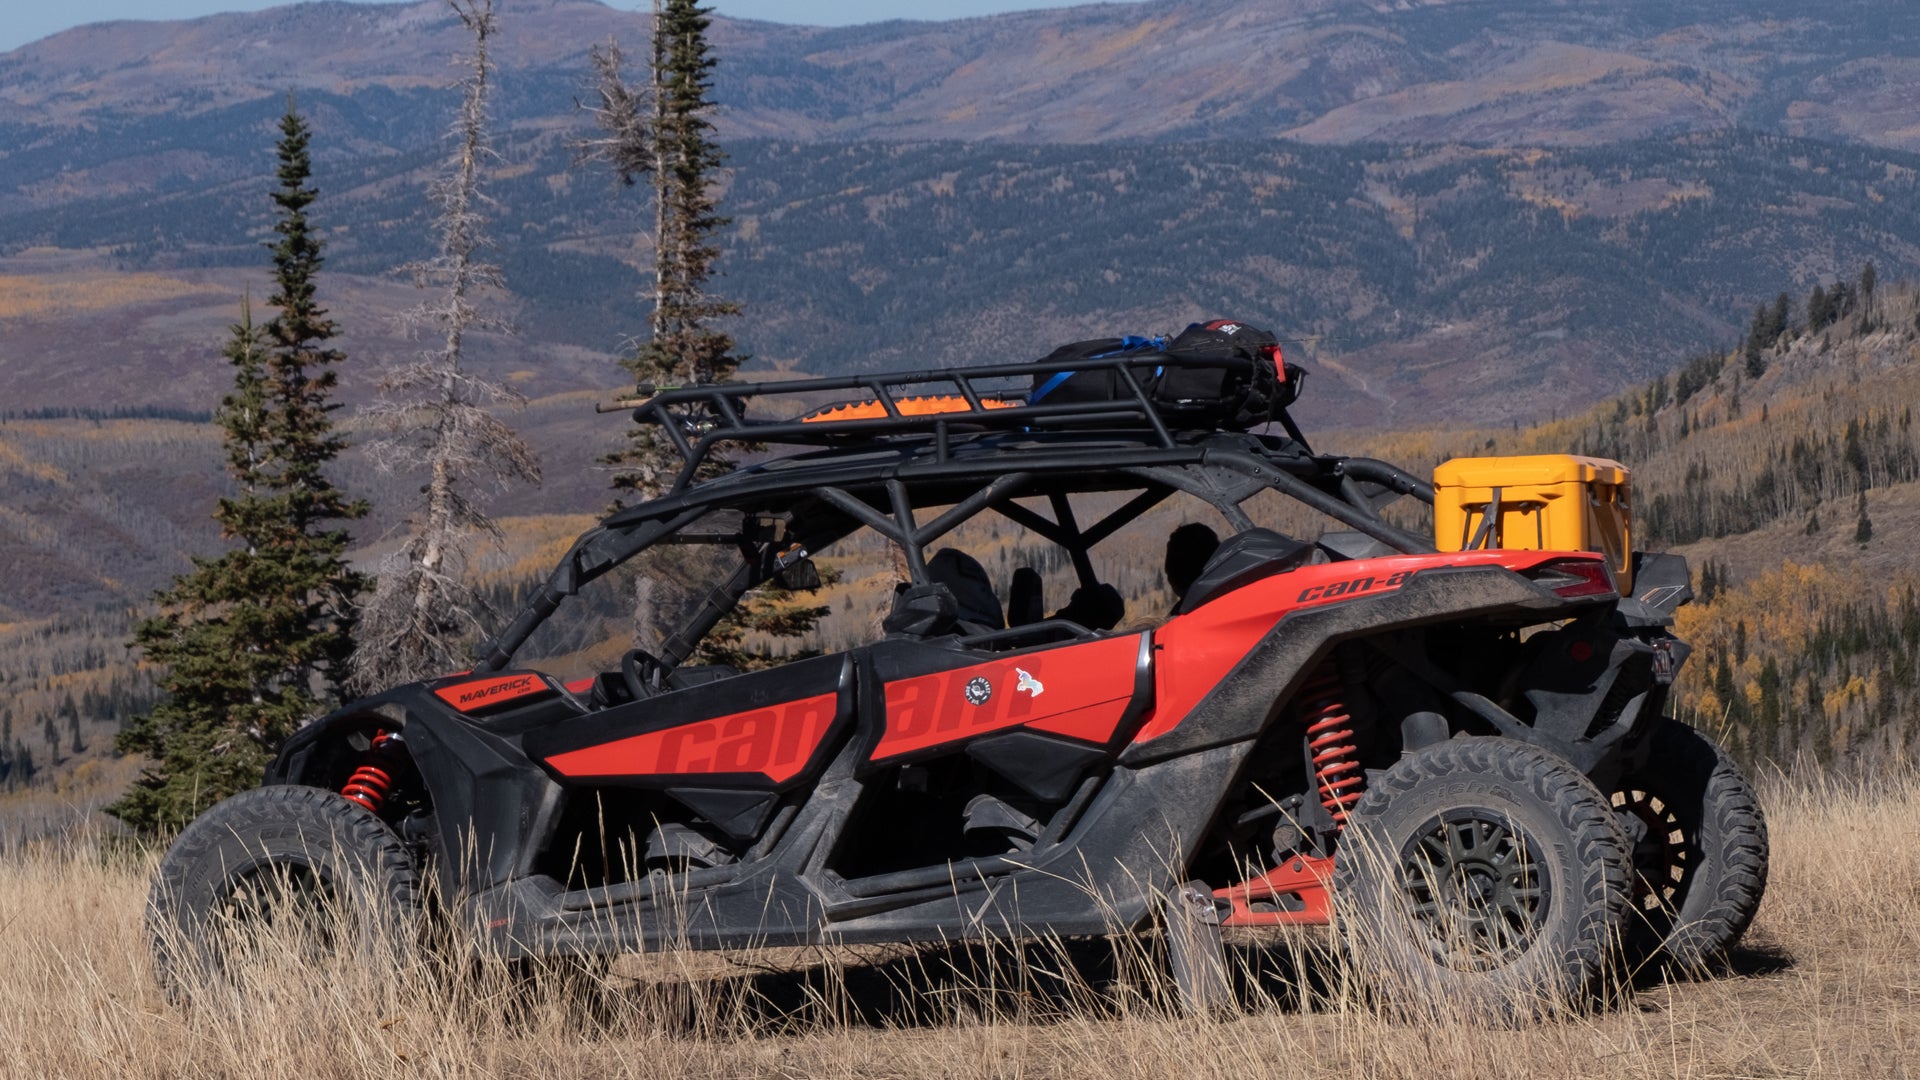
I’ve detailed the steady progress on my Can-Am Maverick X3 Max project since I started in earnest a few months ago. I’ve told you about its windshield, roof, roof rack, cooler, Maxtrax, how I made some small seat adjustments, and more. It’s also seen its 250 and 1,000-mile services without any big issues.
But I wanted to go further. I wanted to start making it even more capable. I was concerned my modifications would follow previous modification journeys and make the Can-Am worse. A new exhaust, along with wheels and tires, certainly has that possibility. They didn’t and actually made it better. A completely novel modding experience. Let’s get into it.
There’s been an exhaust rattle since we purchased the Can-Am a year ago. I’d asked the dealership to look at it, but they couldn’t find it. I’d ripped the rear of the UTV apart and couldn’t find it either. And every damn screw or bolt was as tight as I dared tighten it to try and alleviate the issue. There was also this reverberative resonance whenever I lifted and let the engine braking slow the Can-Am.
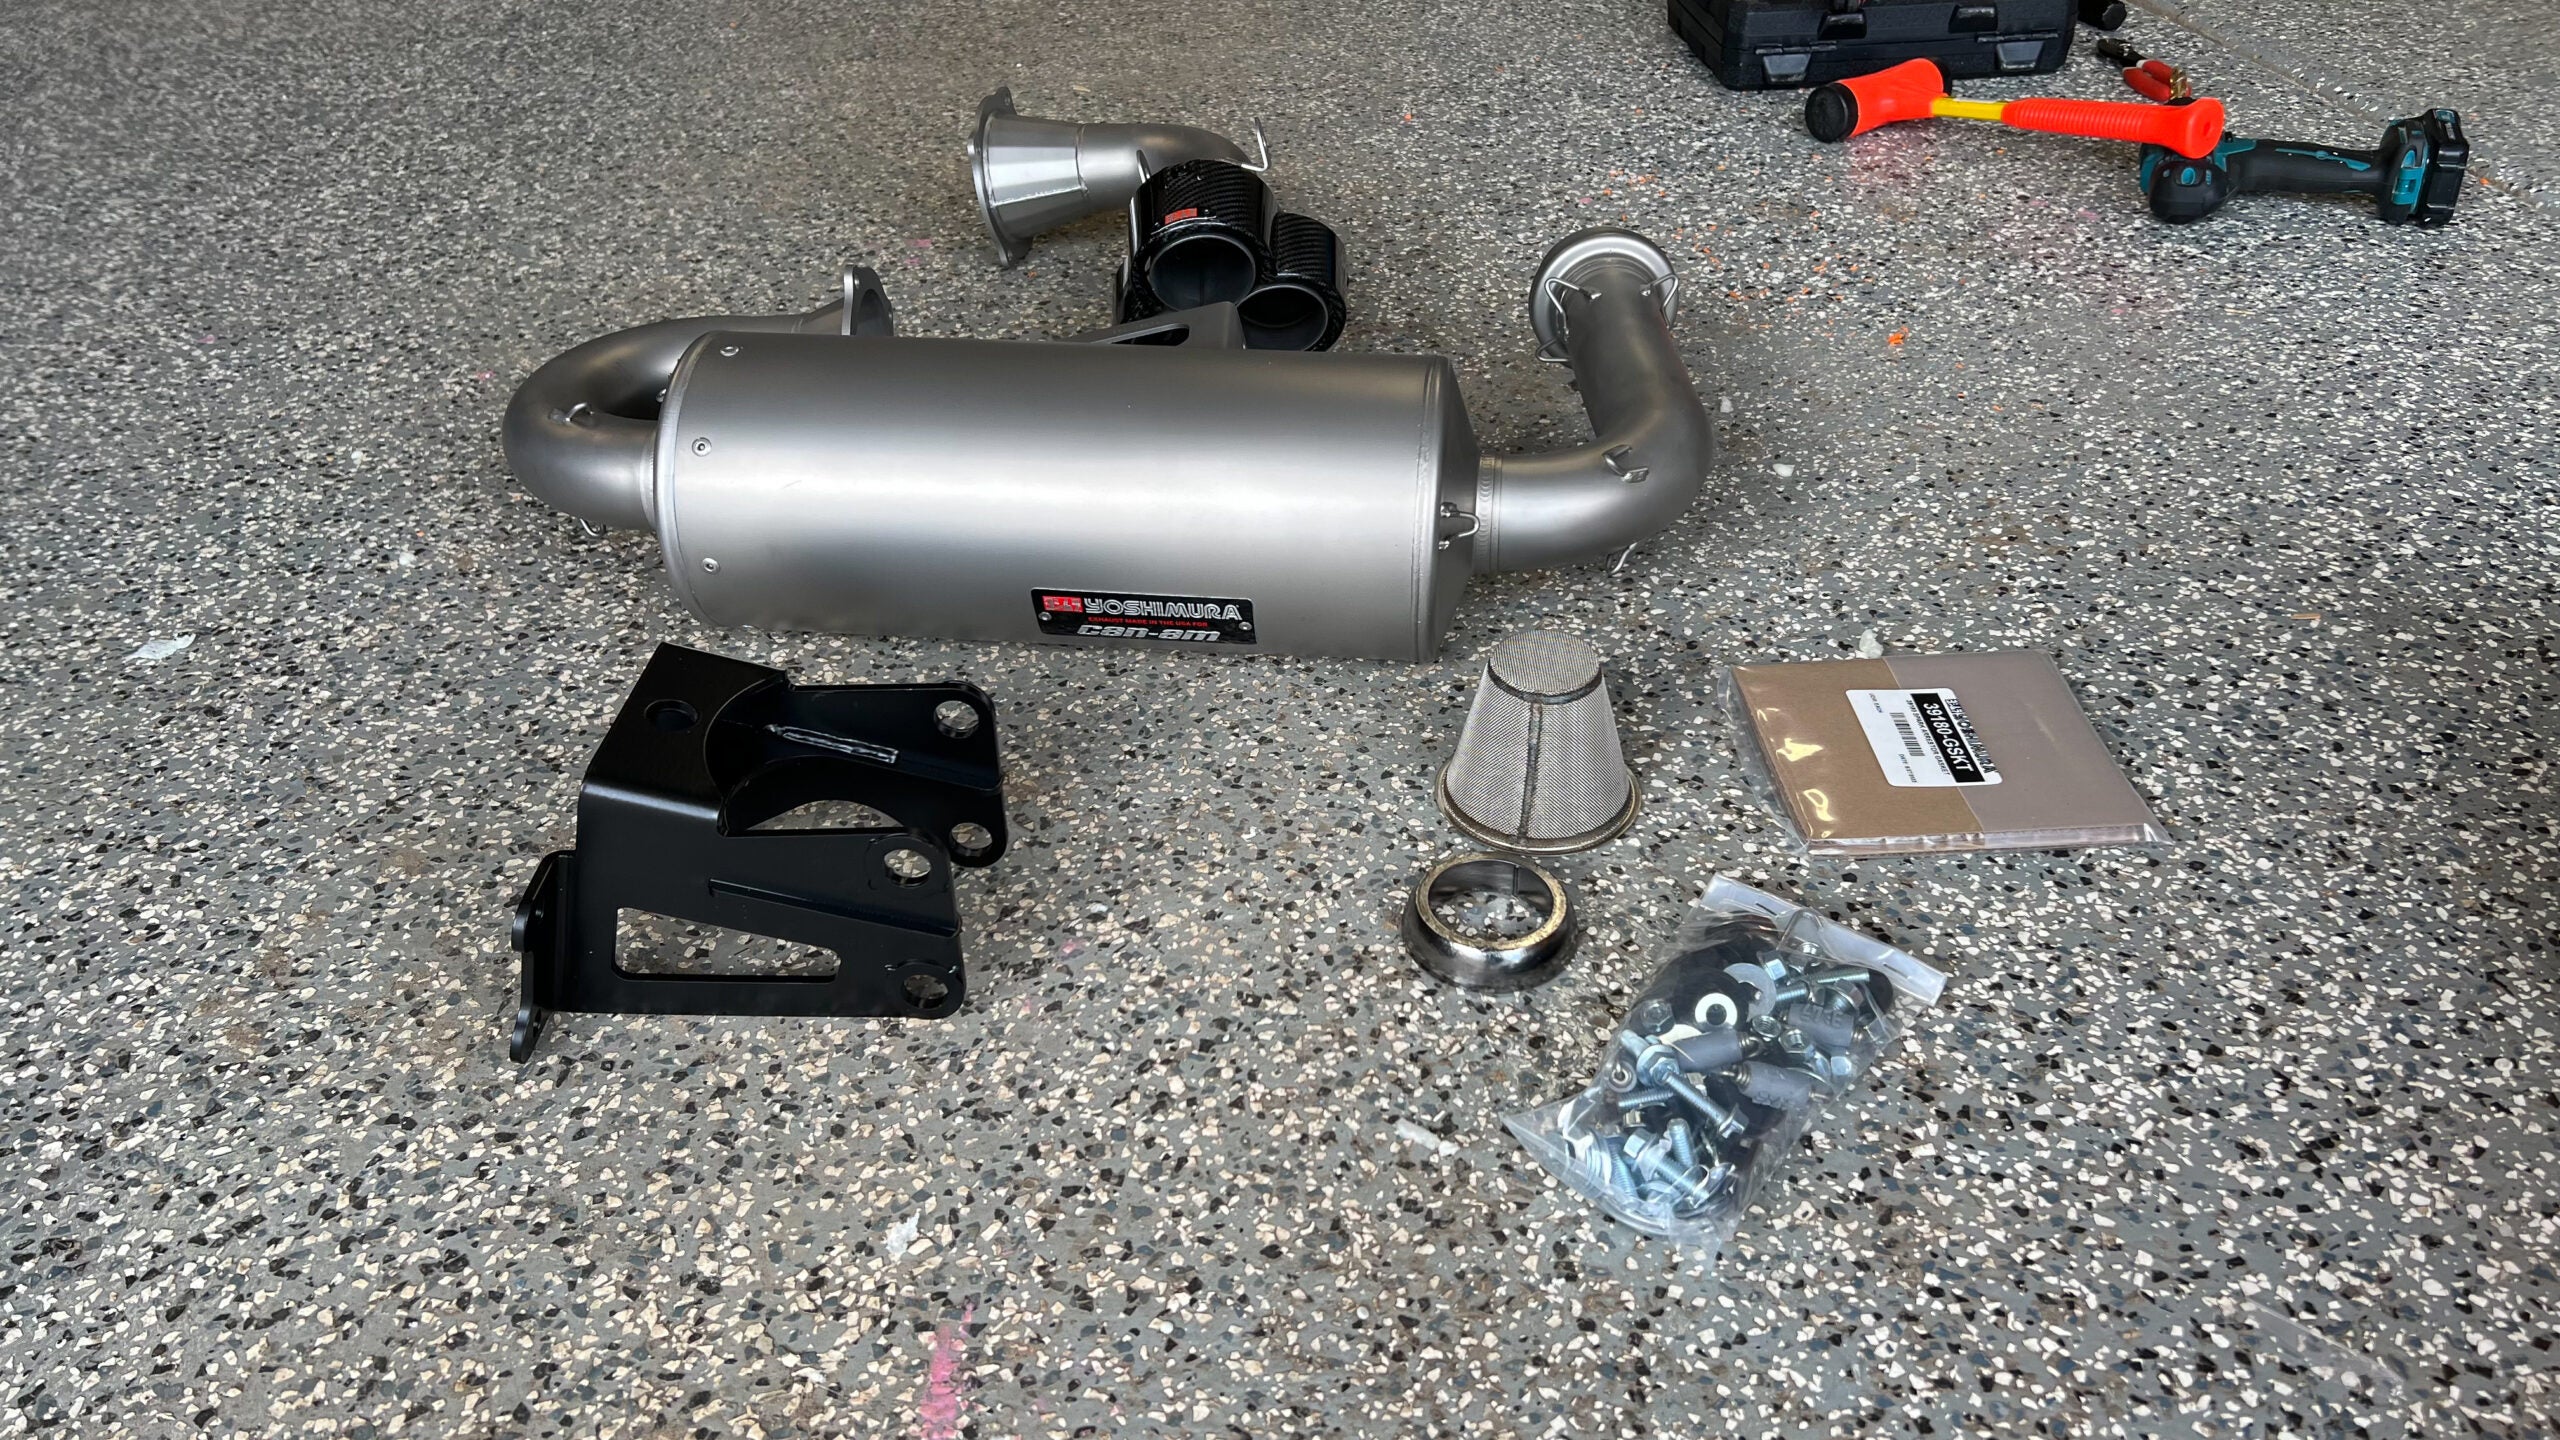
Nothing I did worked until I swapped it for a Yoshimura unit that Can-Am sent me. It’s very nice and very expensive and solved both issues immediately.
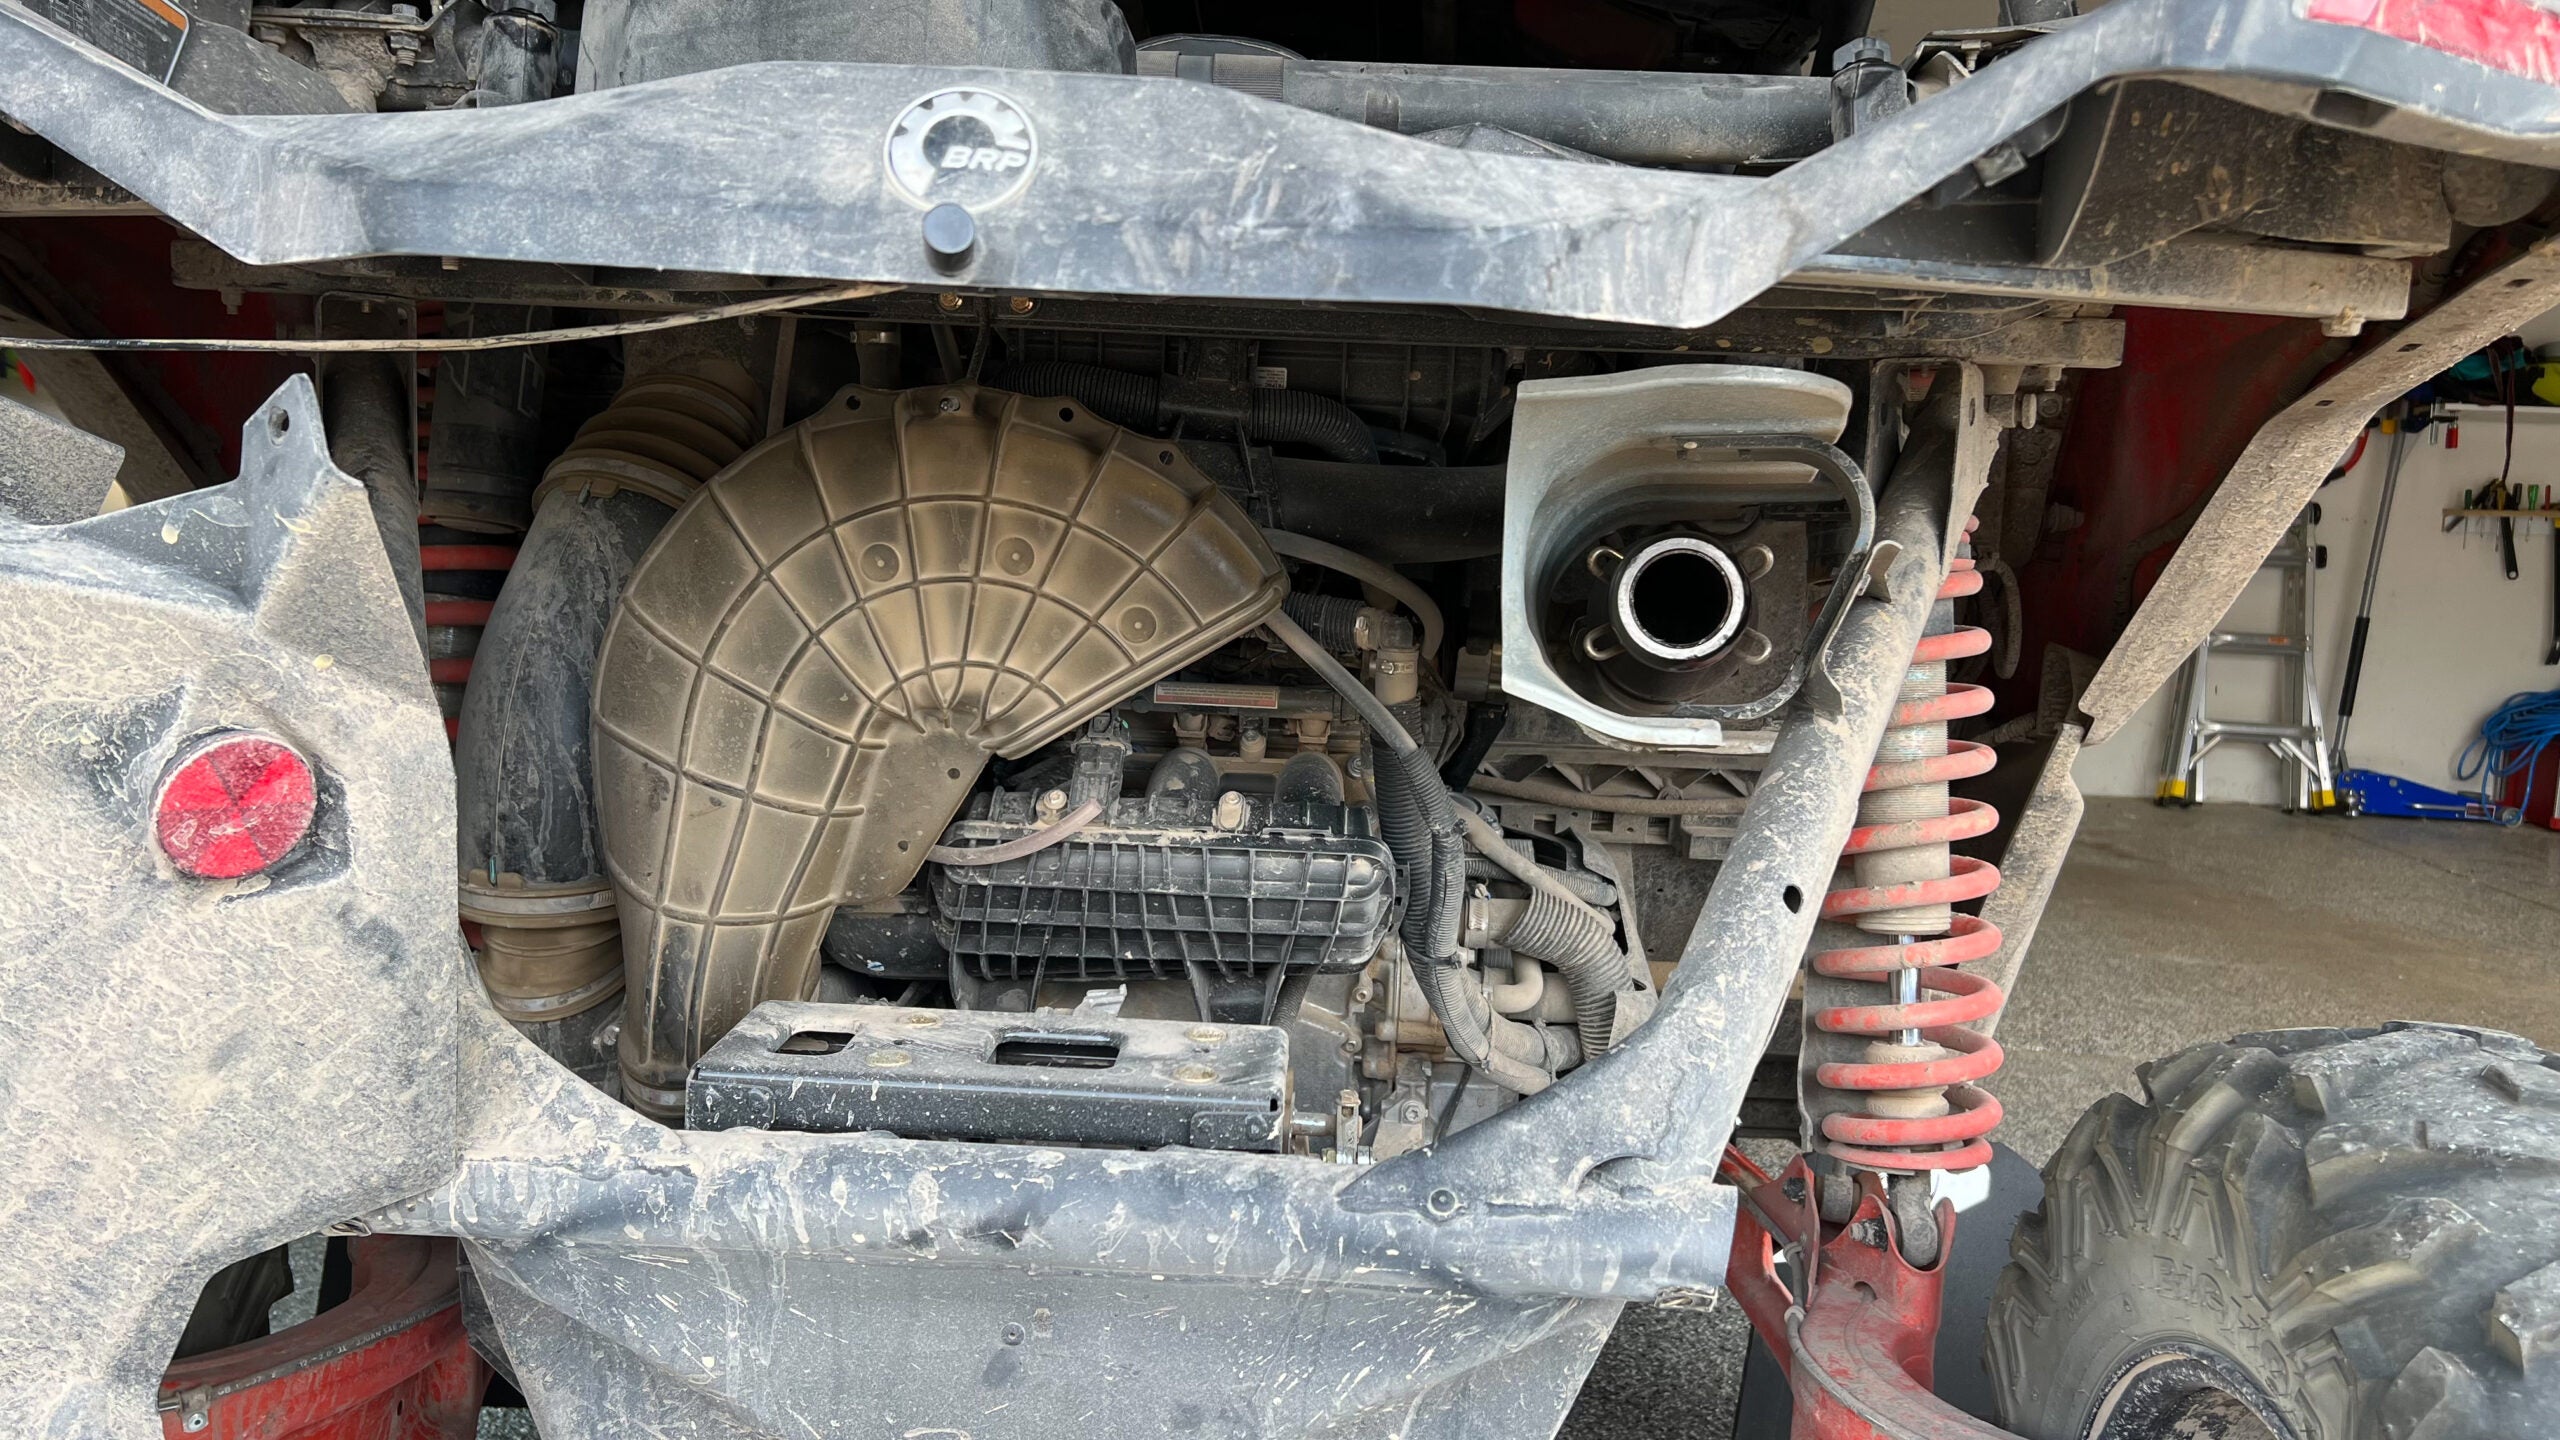
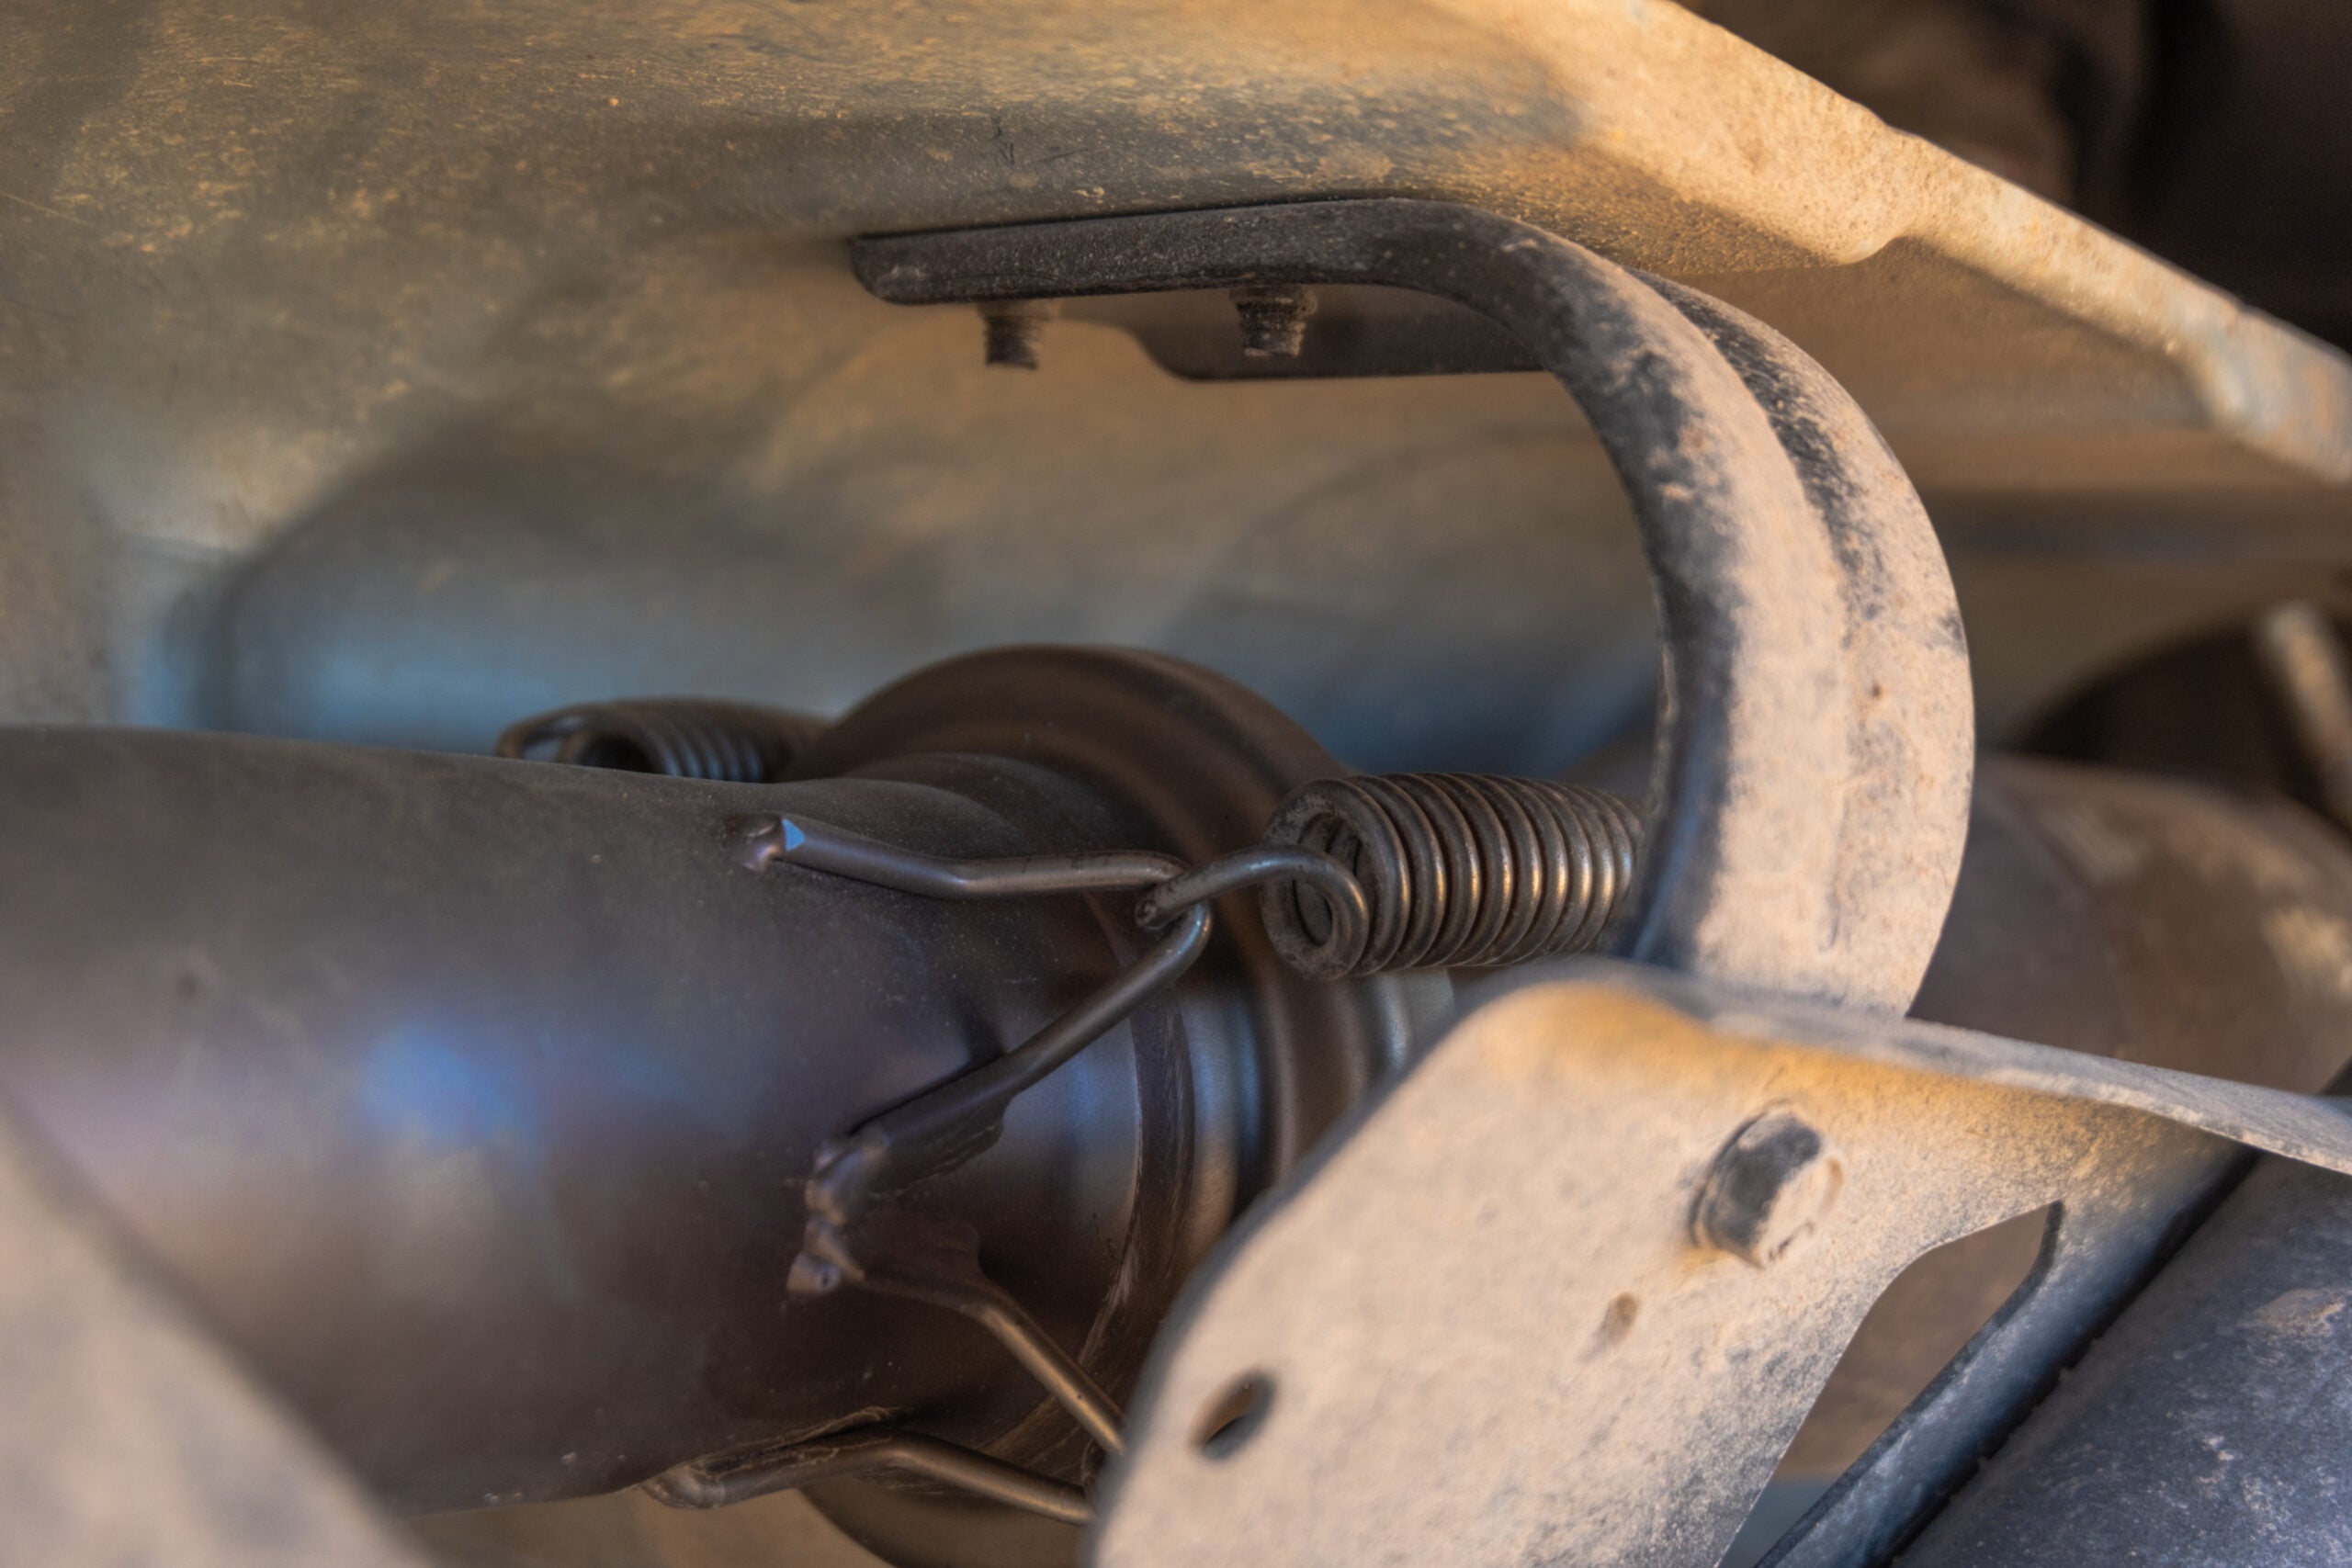
Removing the stock unit was quick and painless, and with the stock exhaust on my garage workbench, I found that nothing I could’ve done would’ve solved the rattle. The heat shield around the exhaust is a thin metal sheet, but not a full circle. It overlaps with itself, so rattle between the ends was all but ensured. The Yoshi, however, woof.
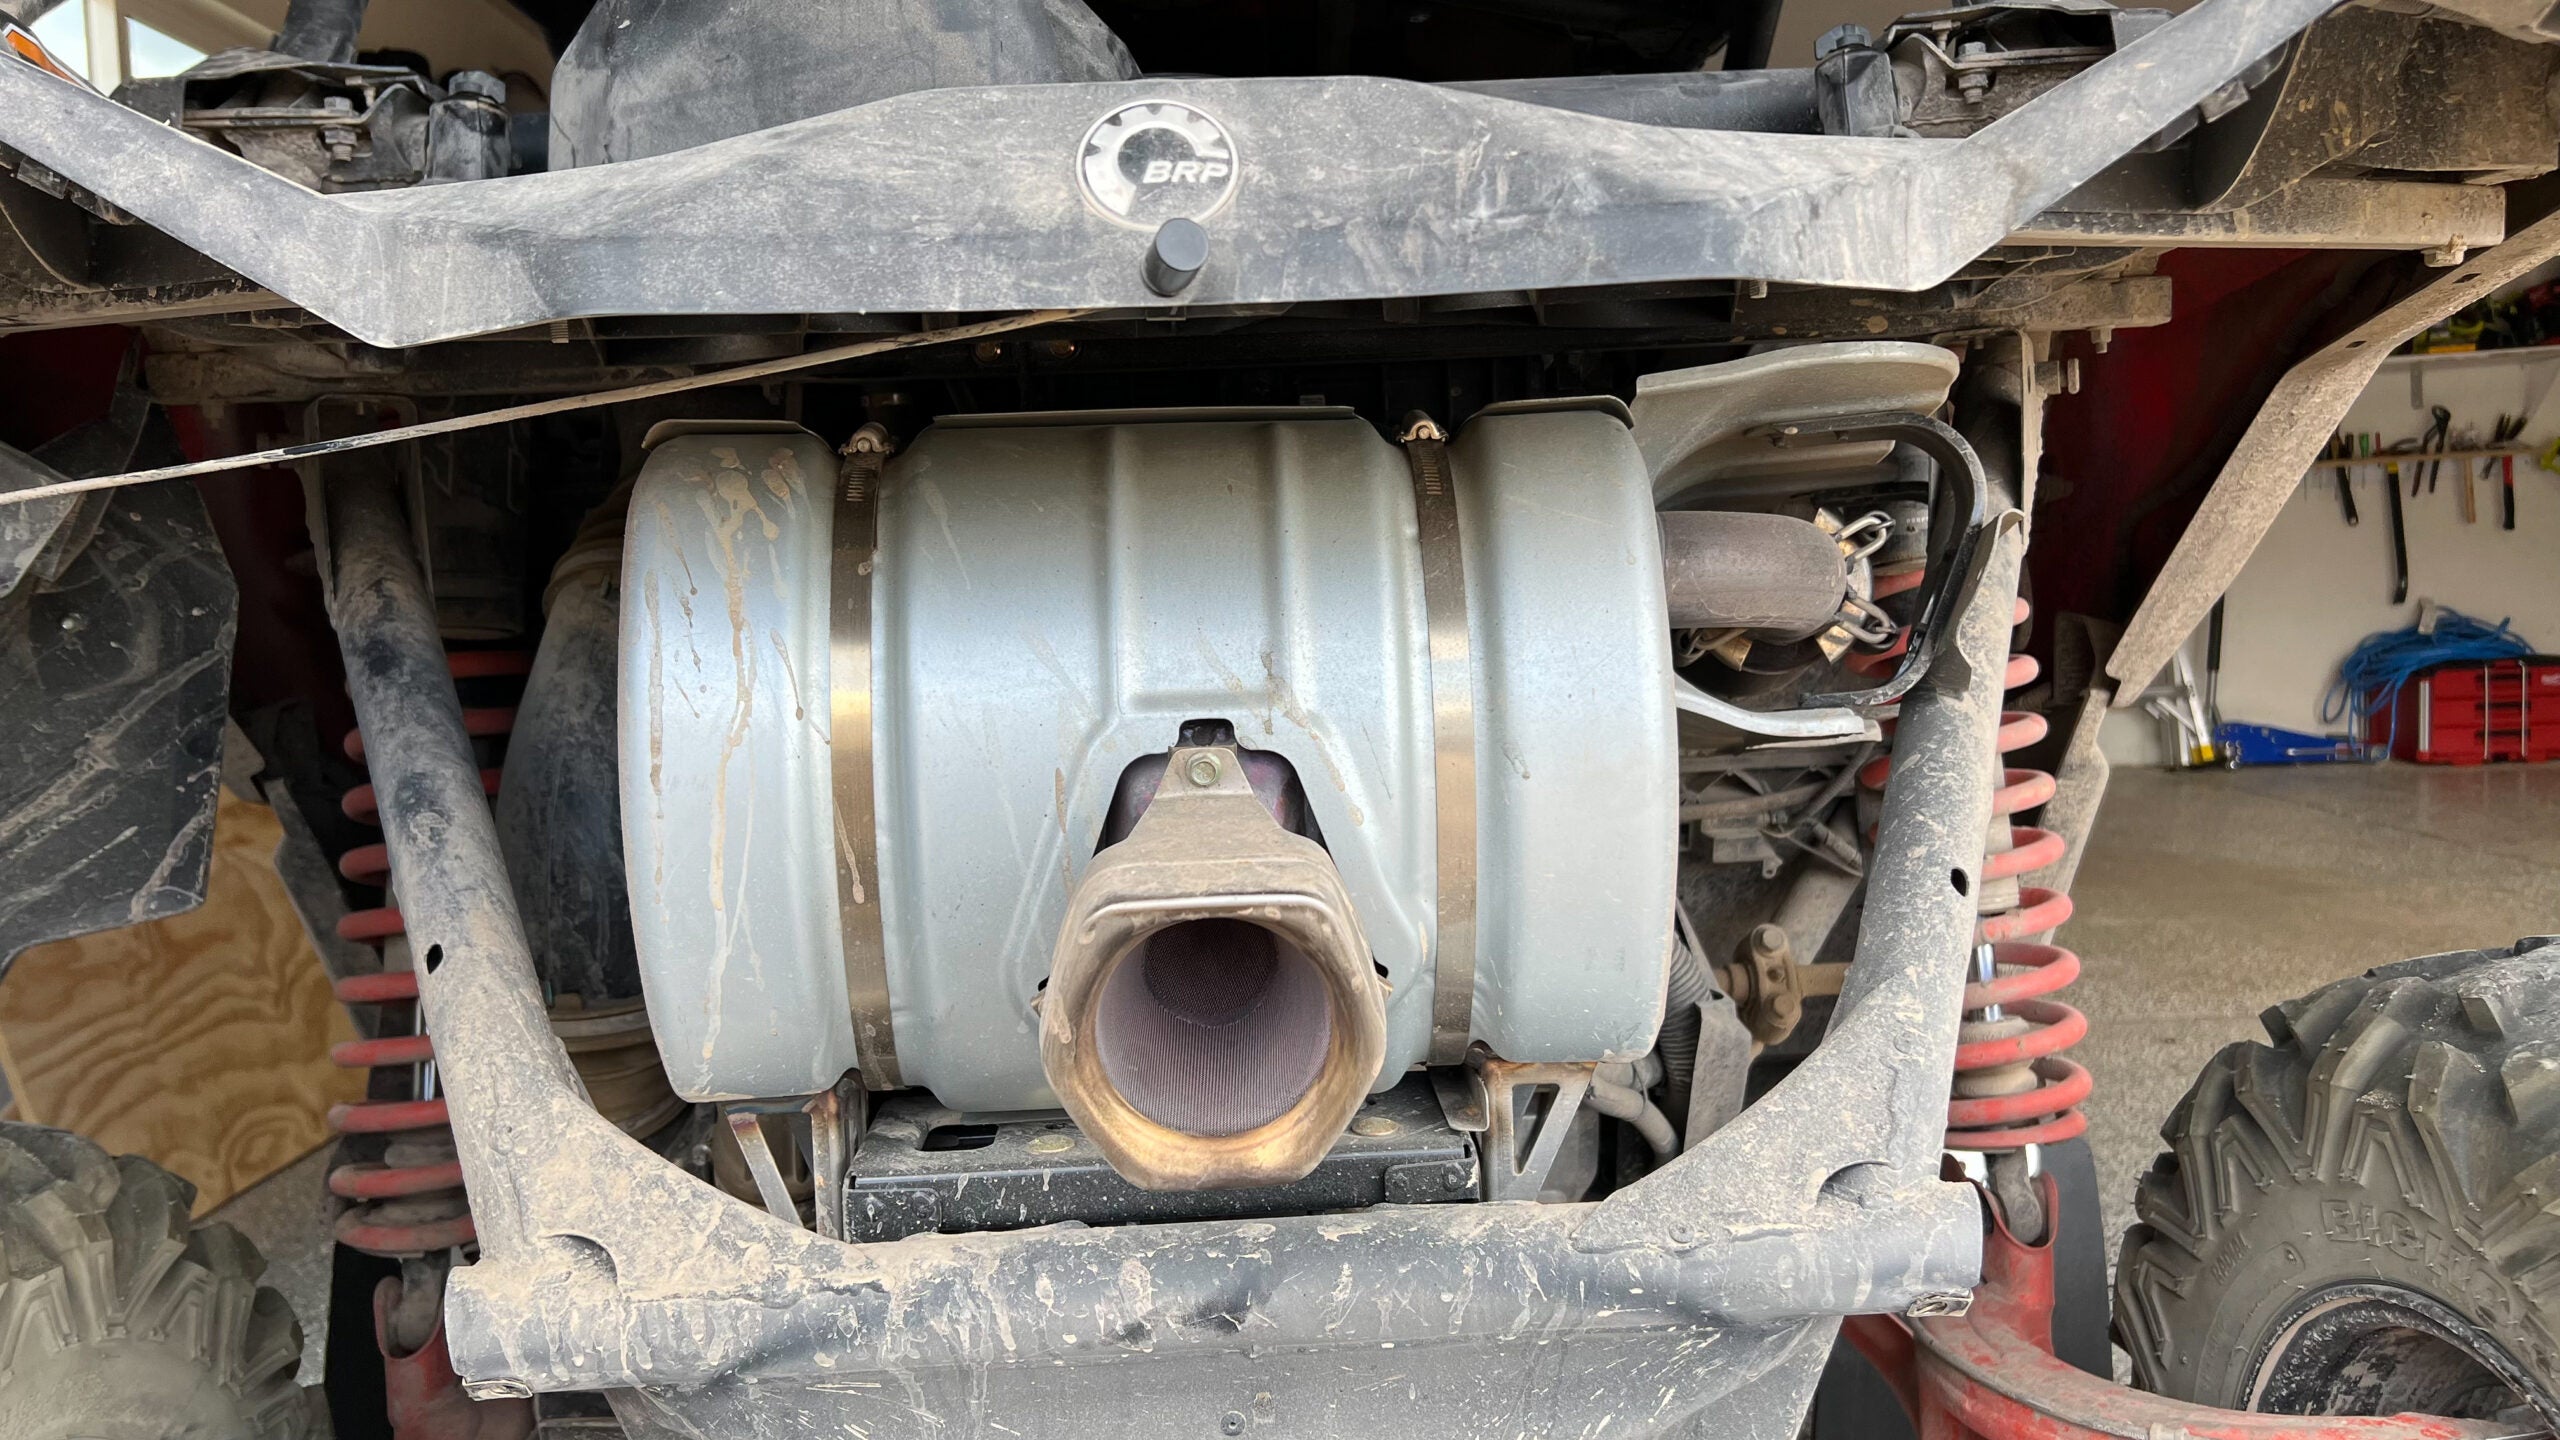
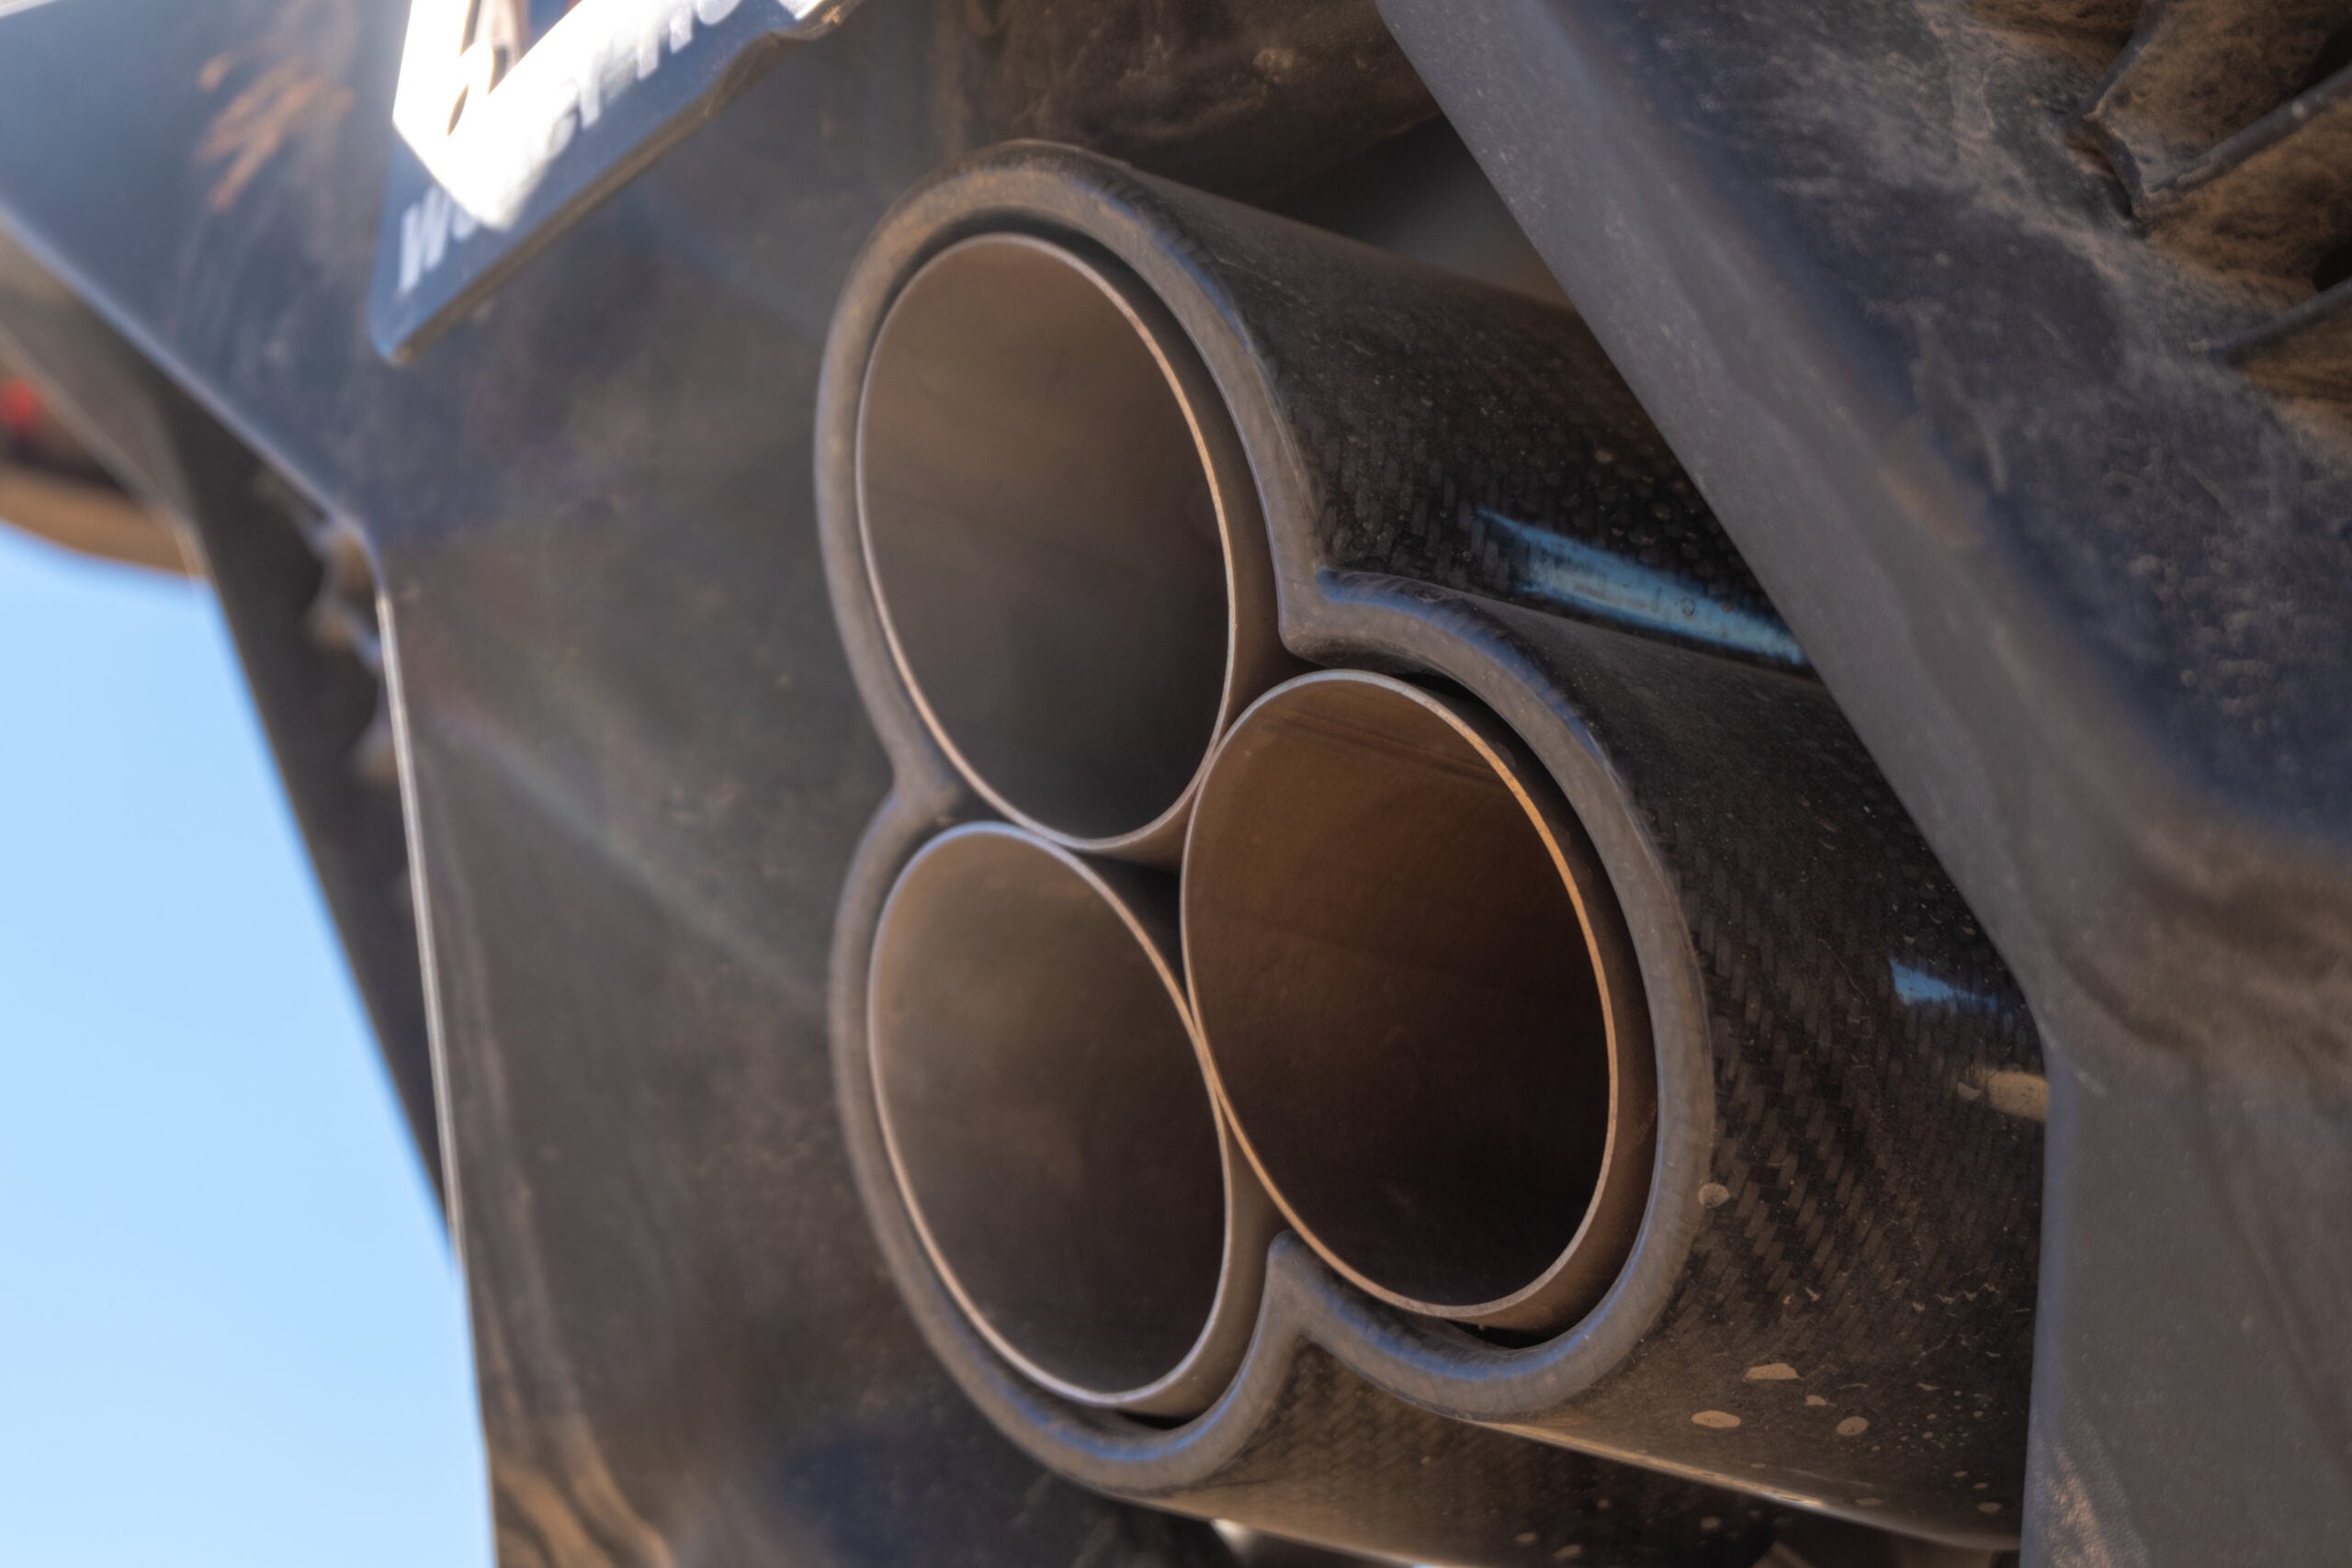
Yoshimura is a name known the world over for its race-spec components in motorcycles, but mostly for its exhausts. I’ve had them installed on my motorcycles before and like those, this one didn’t disappoint. Not only did it solve the rattle, but the drone is gone too. It’s throaty, angry, and I love how it accentuates the motor’s idle. Foot to the floor, it has a very cool three-cylinder scream.
Installation was a headache, though.
While Can-Am’s roof rack instructions were straightforward, the Yoshimura’s wasn’t. There are a number of available exhaust upgrades through Can-Am. As such, there a host of instructions on BRP’s site. But they’re not clearly labeled and this specific set of instructions weren’t complete.
Removing the old exhaust is there, as well as installing the new exhaust bracket, and then dropping the new exhaust onto that bracket. The actual build of the exhaust, where the bolts, flanges, rubber mounts, and heat-proof mounts, however, isn’t there. As such, what probably should’ve taken an hour to two hours, took four. I ended up putting the exhaust together and then taking it apart again a number of times. I think five times in total before all the pieces were in their correct position and all parts used.
One specific task vexed me: installing the exhaust springs. These (insert your favorite expletive here) nearly sent me to the ER as no matter what I did, no matter what tool I used, the hooks wouldn’t latch. I struggled with them for at least 45 minutes alone and took a war wound across my palm as one let go of the pry hook I was using and launched the tool into my hand. The end result was worth the scar.
We’ve now put just under 100 miles off-road with the new exhaust and haven’t had an issue yet. It still puts a smile on my face whenever I start it up, as the idle’s burble sounds fantastic. I do wish you could see the Yoshimura label, but it’s a small price to pay for something that fixed two issues and makes the entire machine sound that much more badass.
The wheels and tires were much easier.
Can-Am’s stock Maxxis Bighorn 2.0 off-road tires are beastly pieces of kit. They’ll plow through mud, snow, and dirt and they served us well throughout our first 1,000 miles of off-road fun. But they are loud and wear quickly.
Maxxis’ Bighorn 2.0s are off-off off-road tires, with big asymmetric knobs designed to dig into loose surfaces and provide the most traction possible. They’re built for sand, soft dirt, mud, and light snow, not Northern Utah’s hard-packed dirt trails. Nor are they built for pavement which isn’t an issue for most, but most don’t plate UTVs. Utah does.
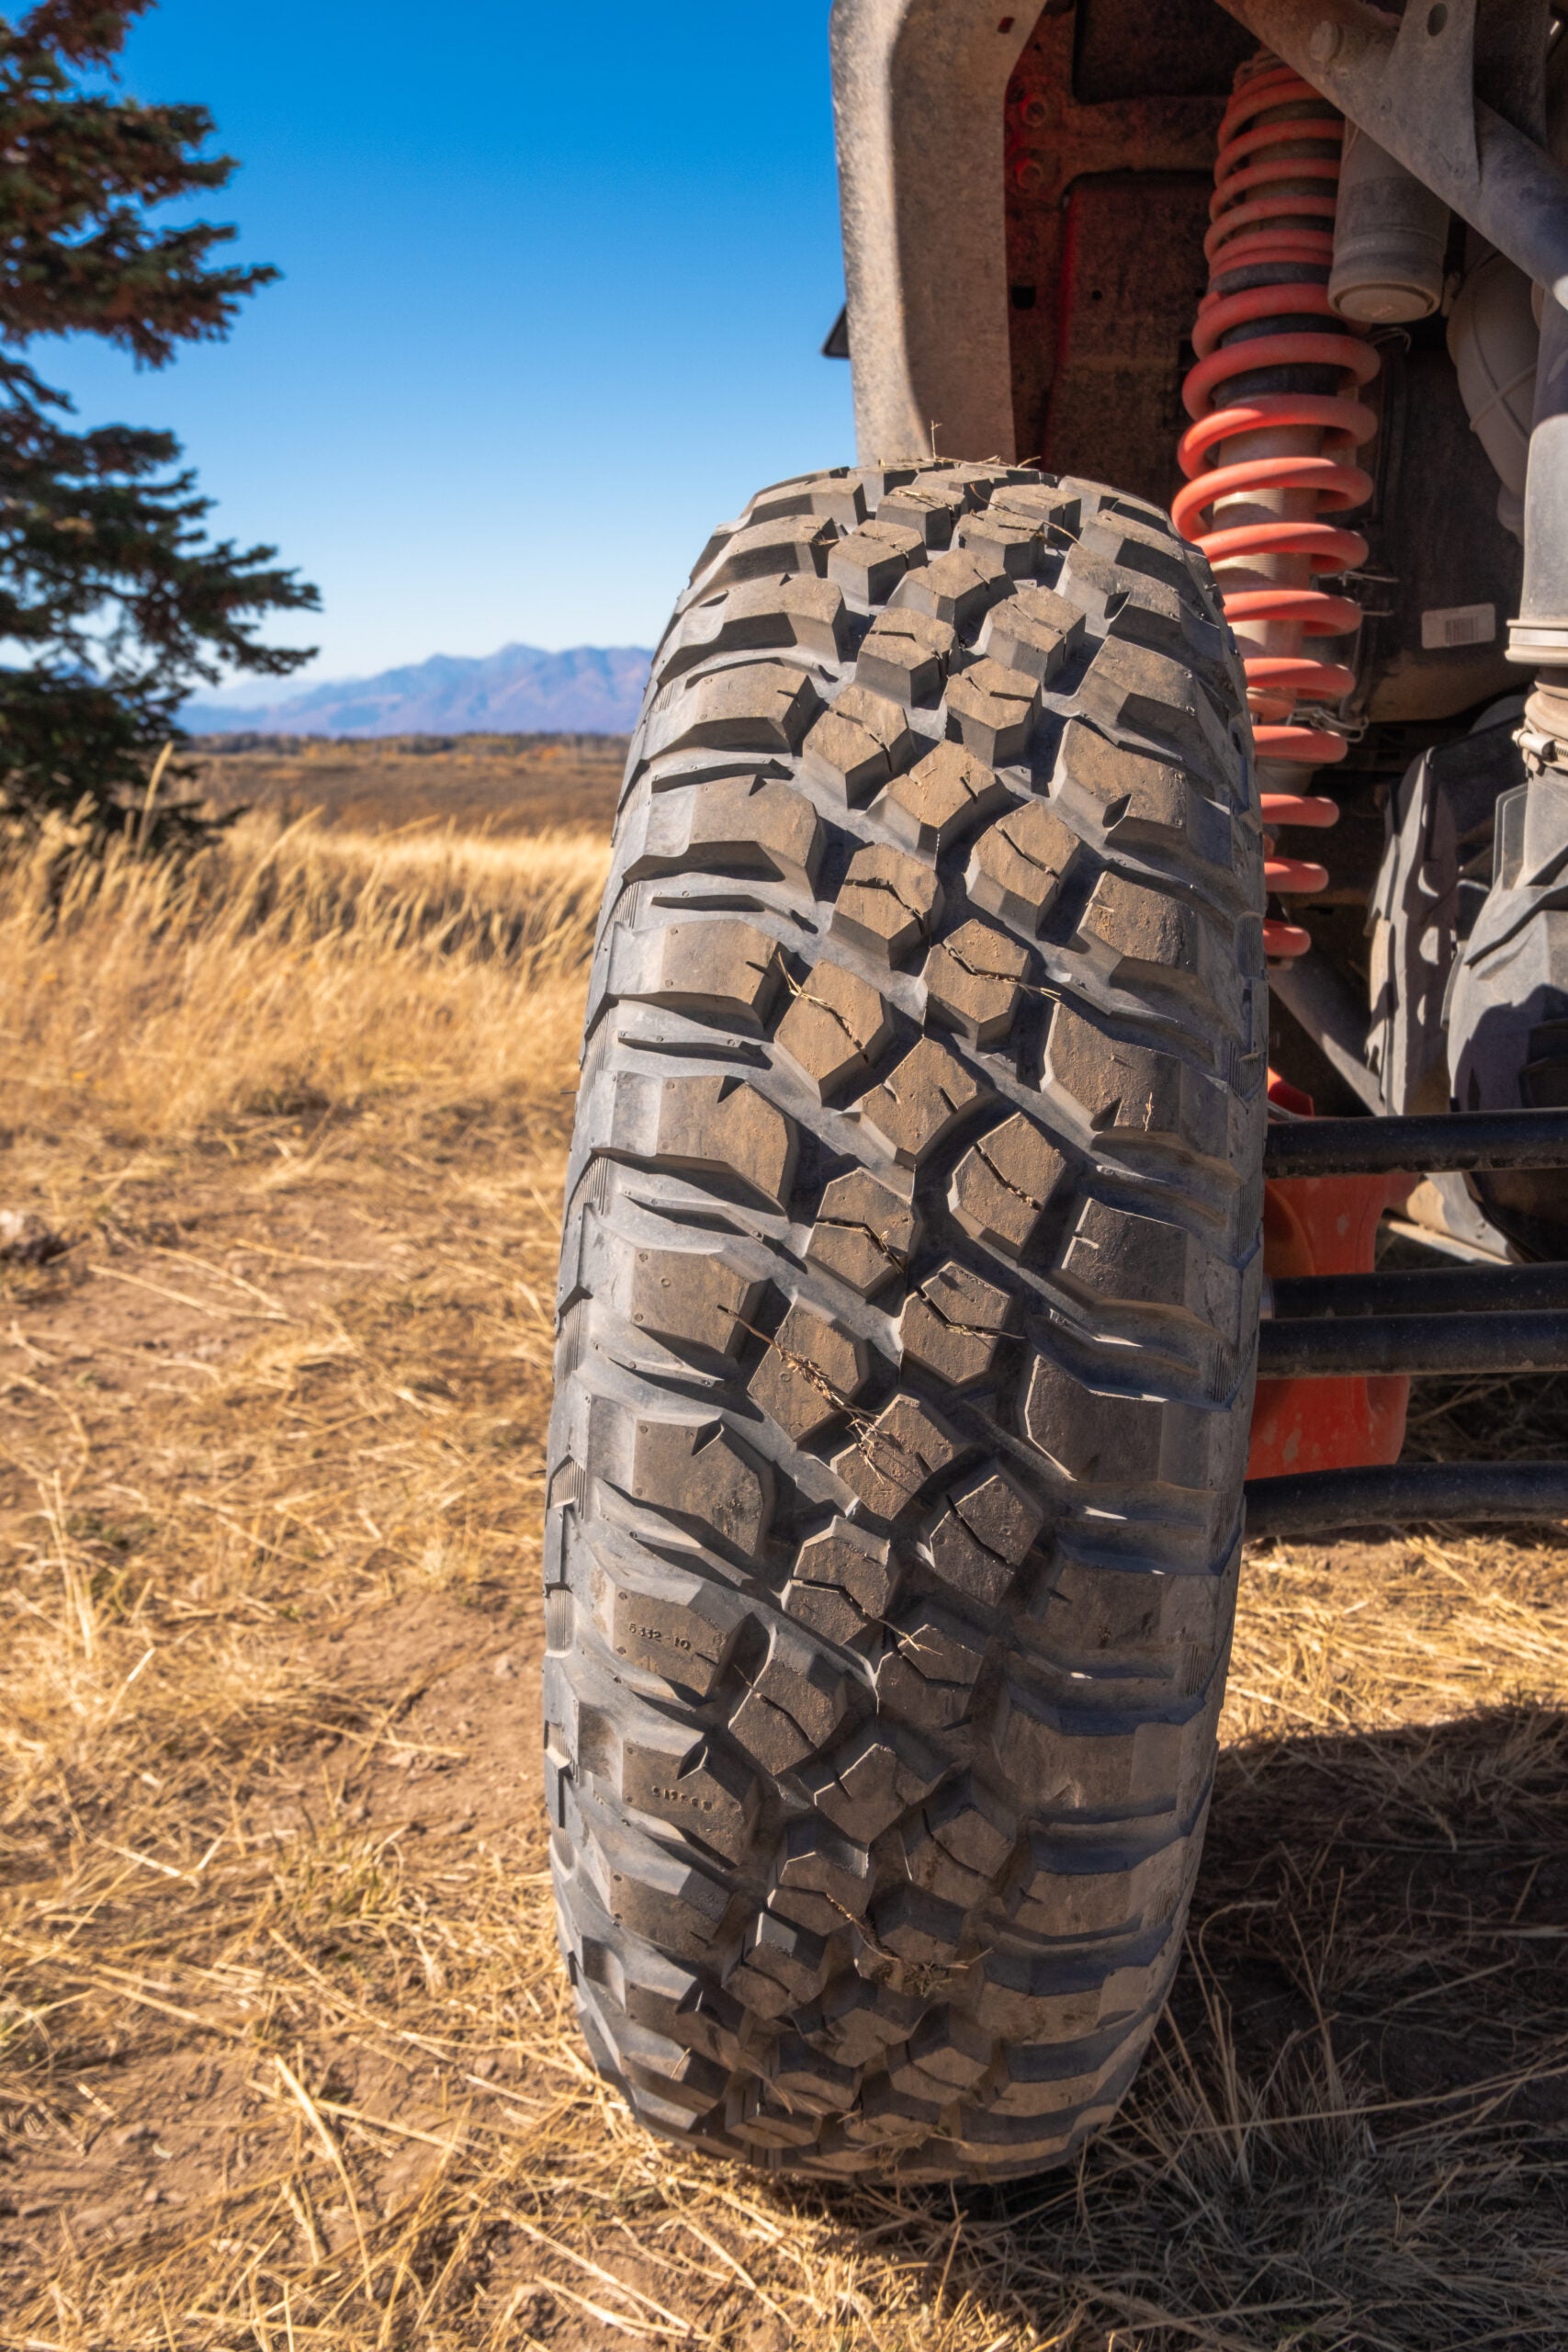
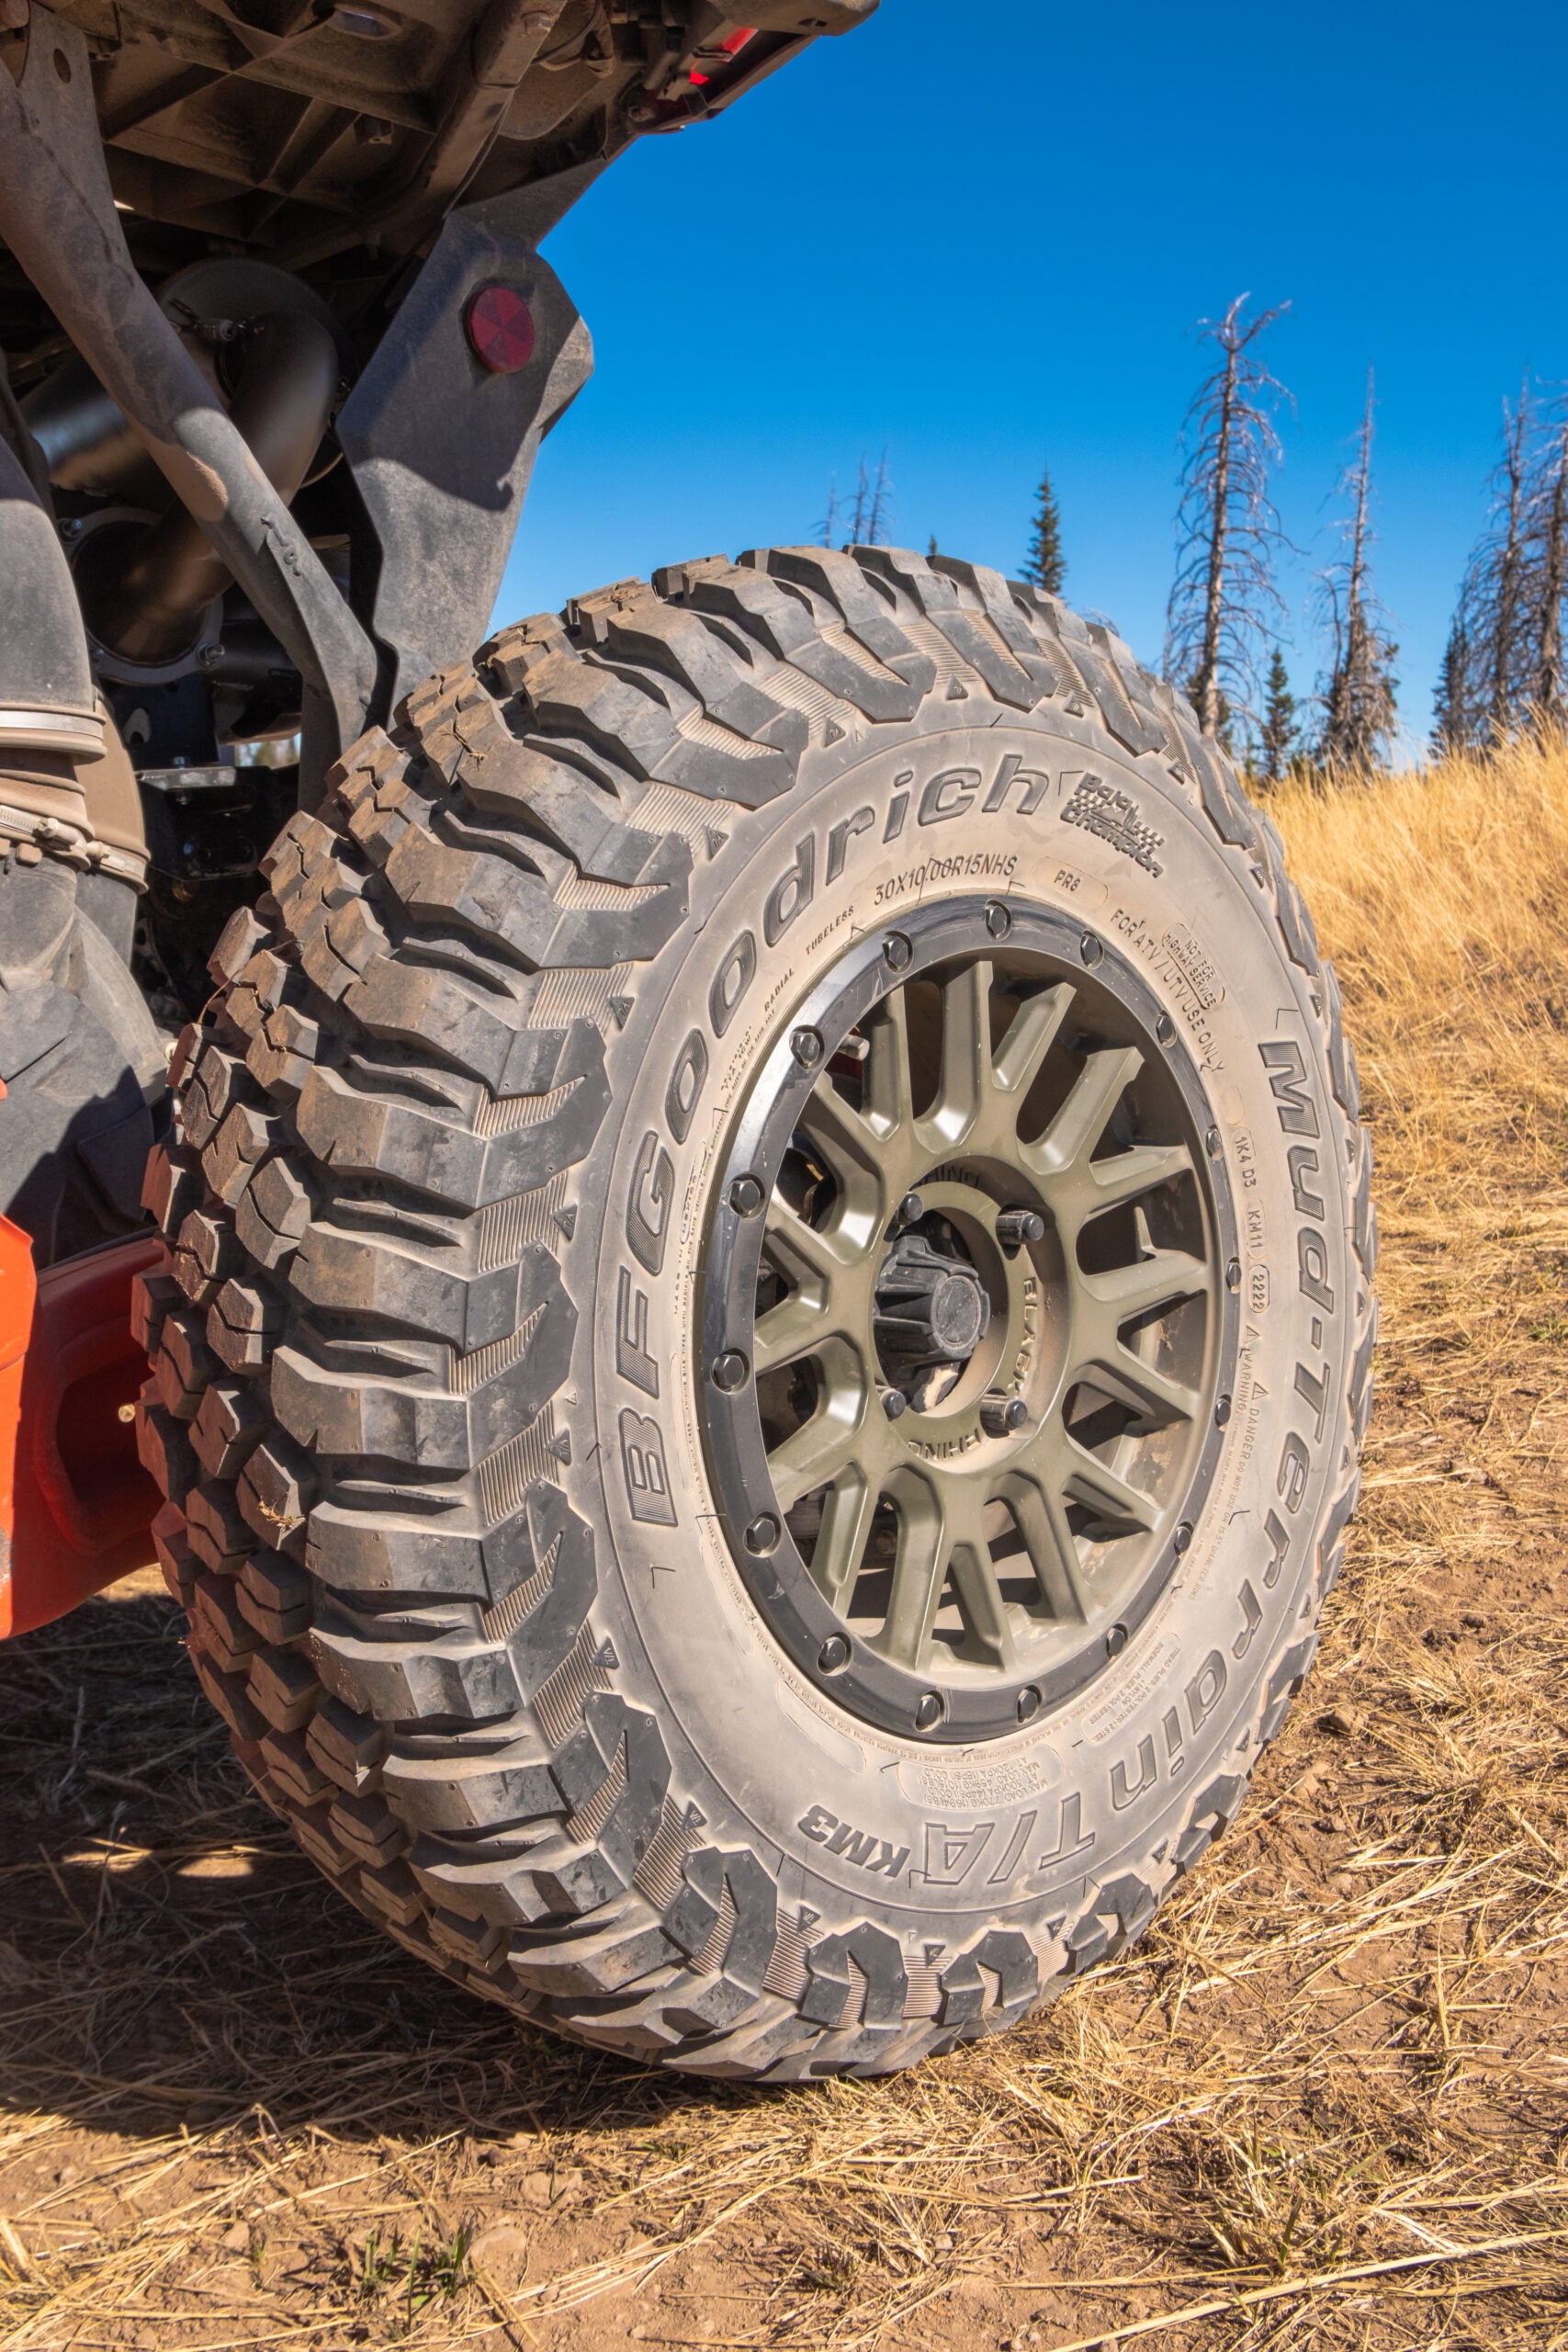
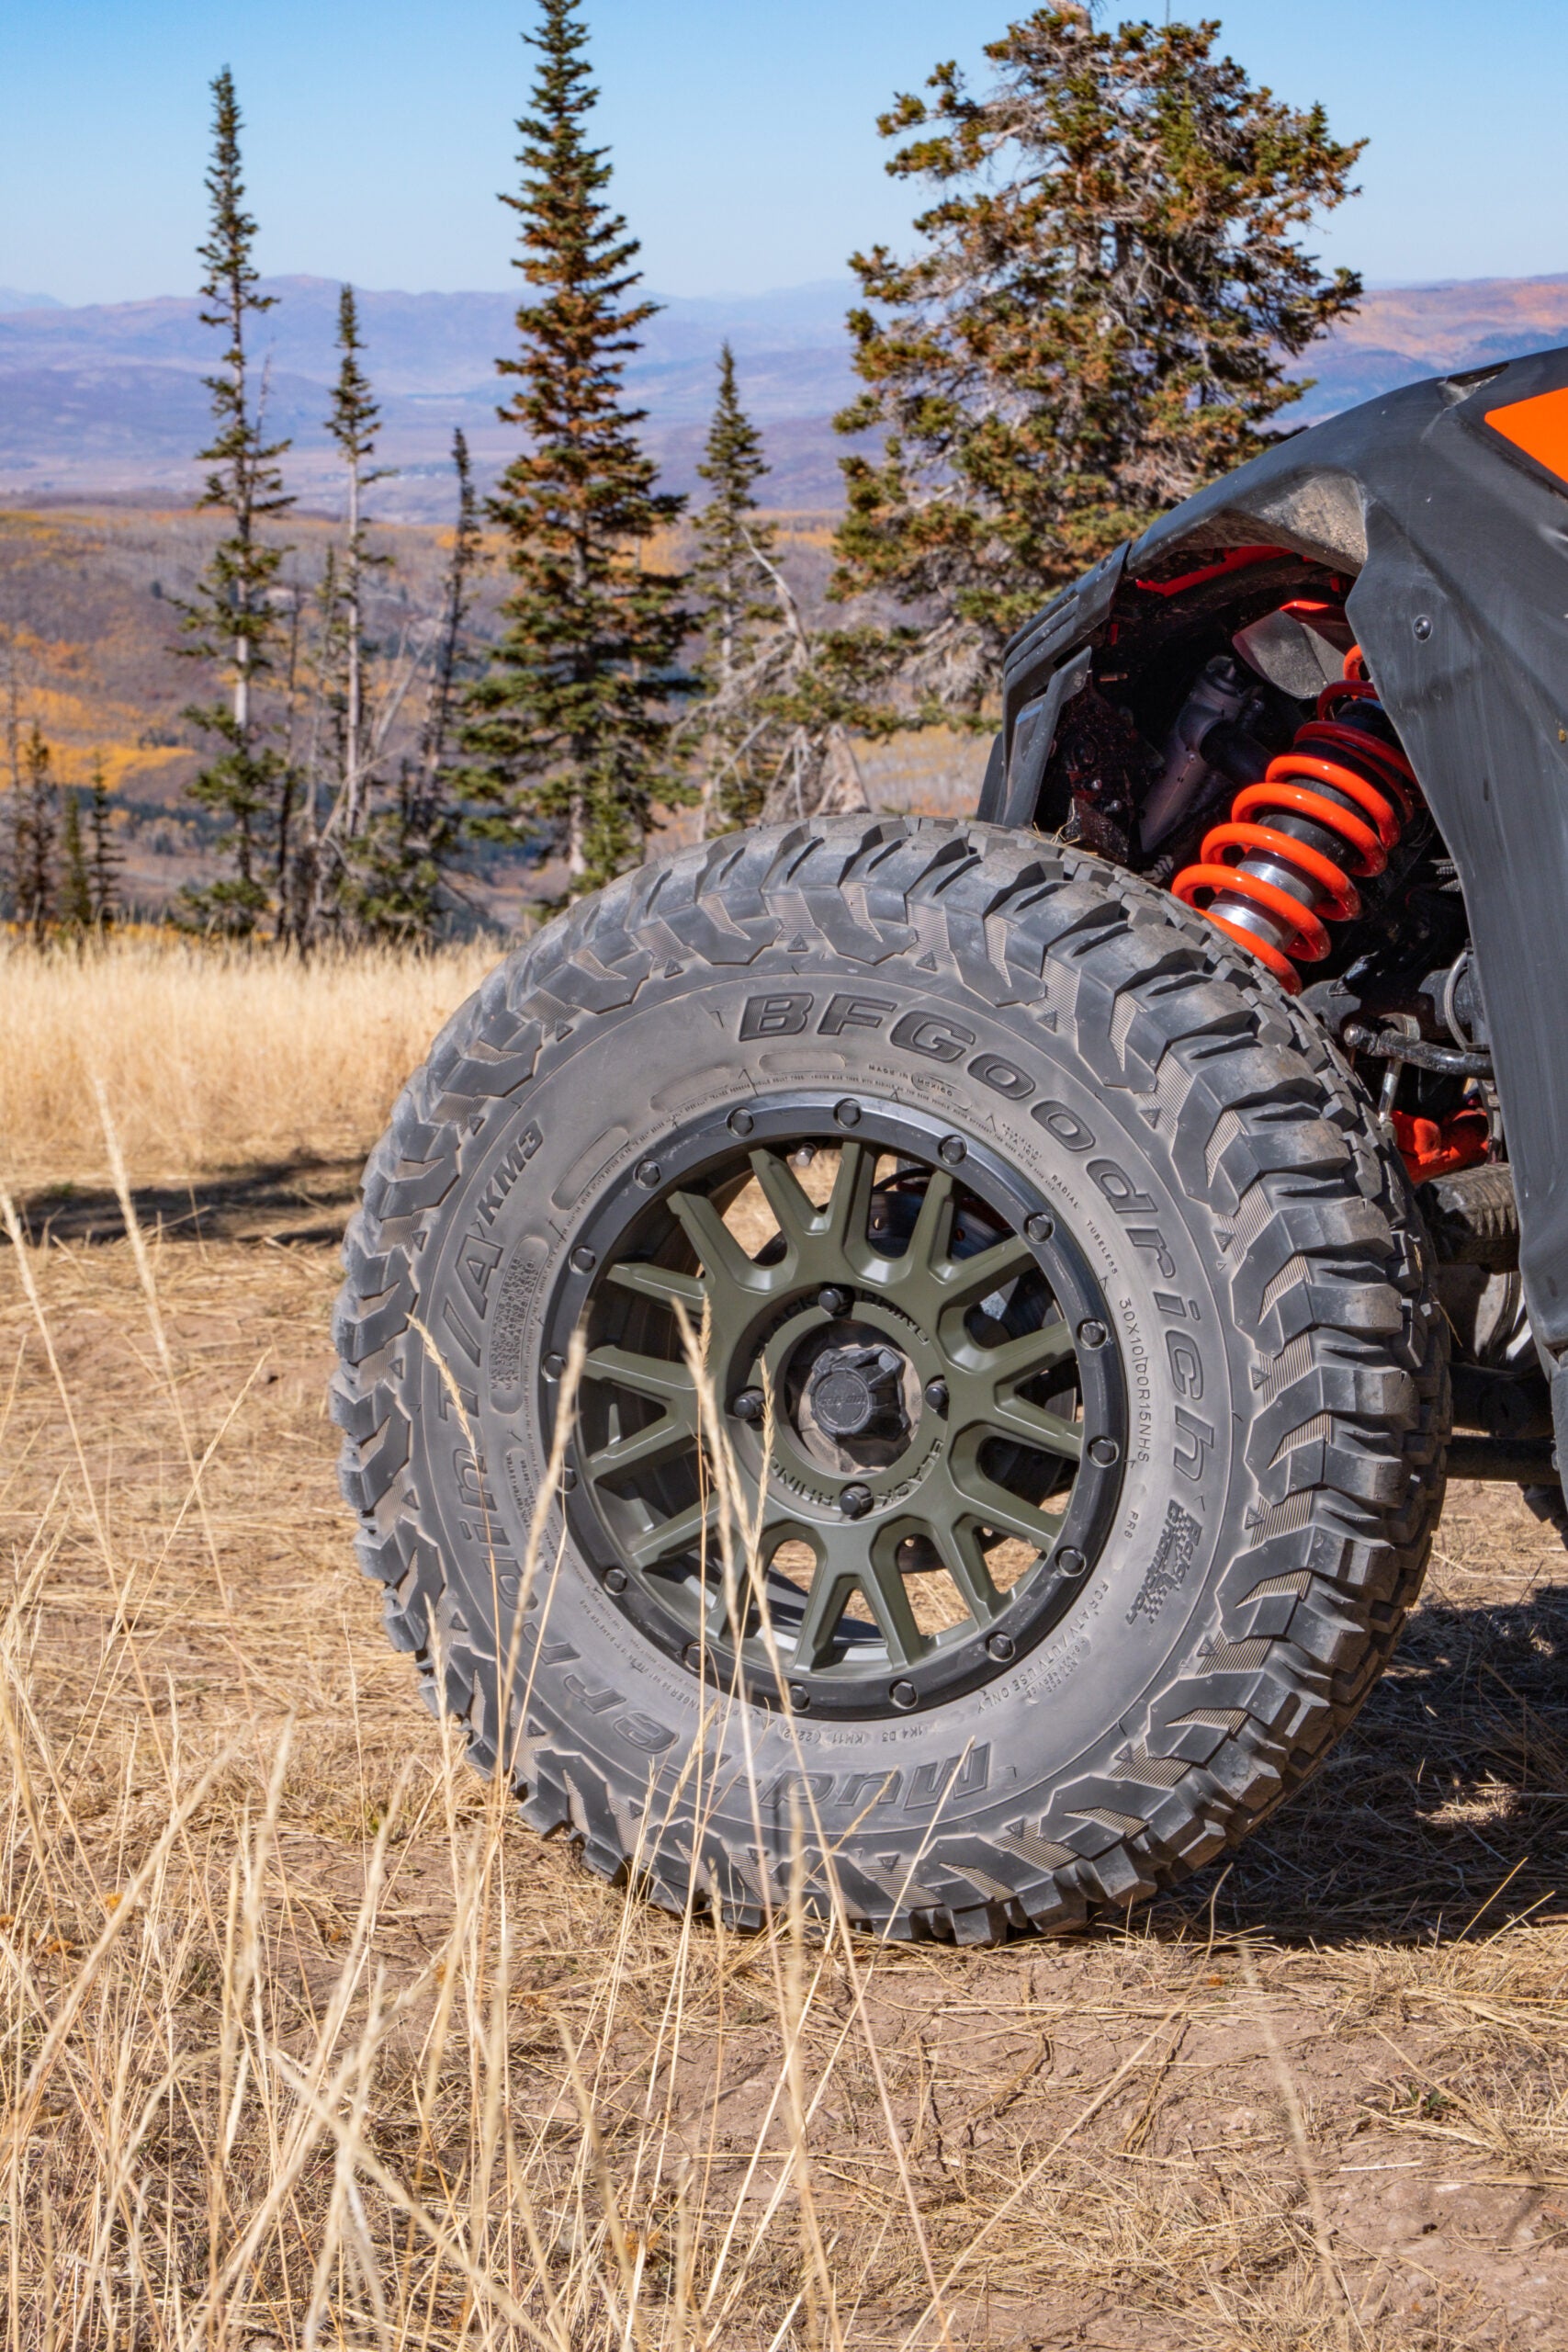
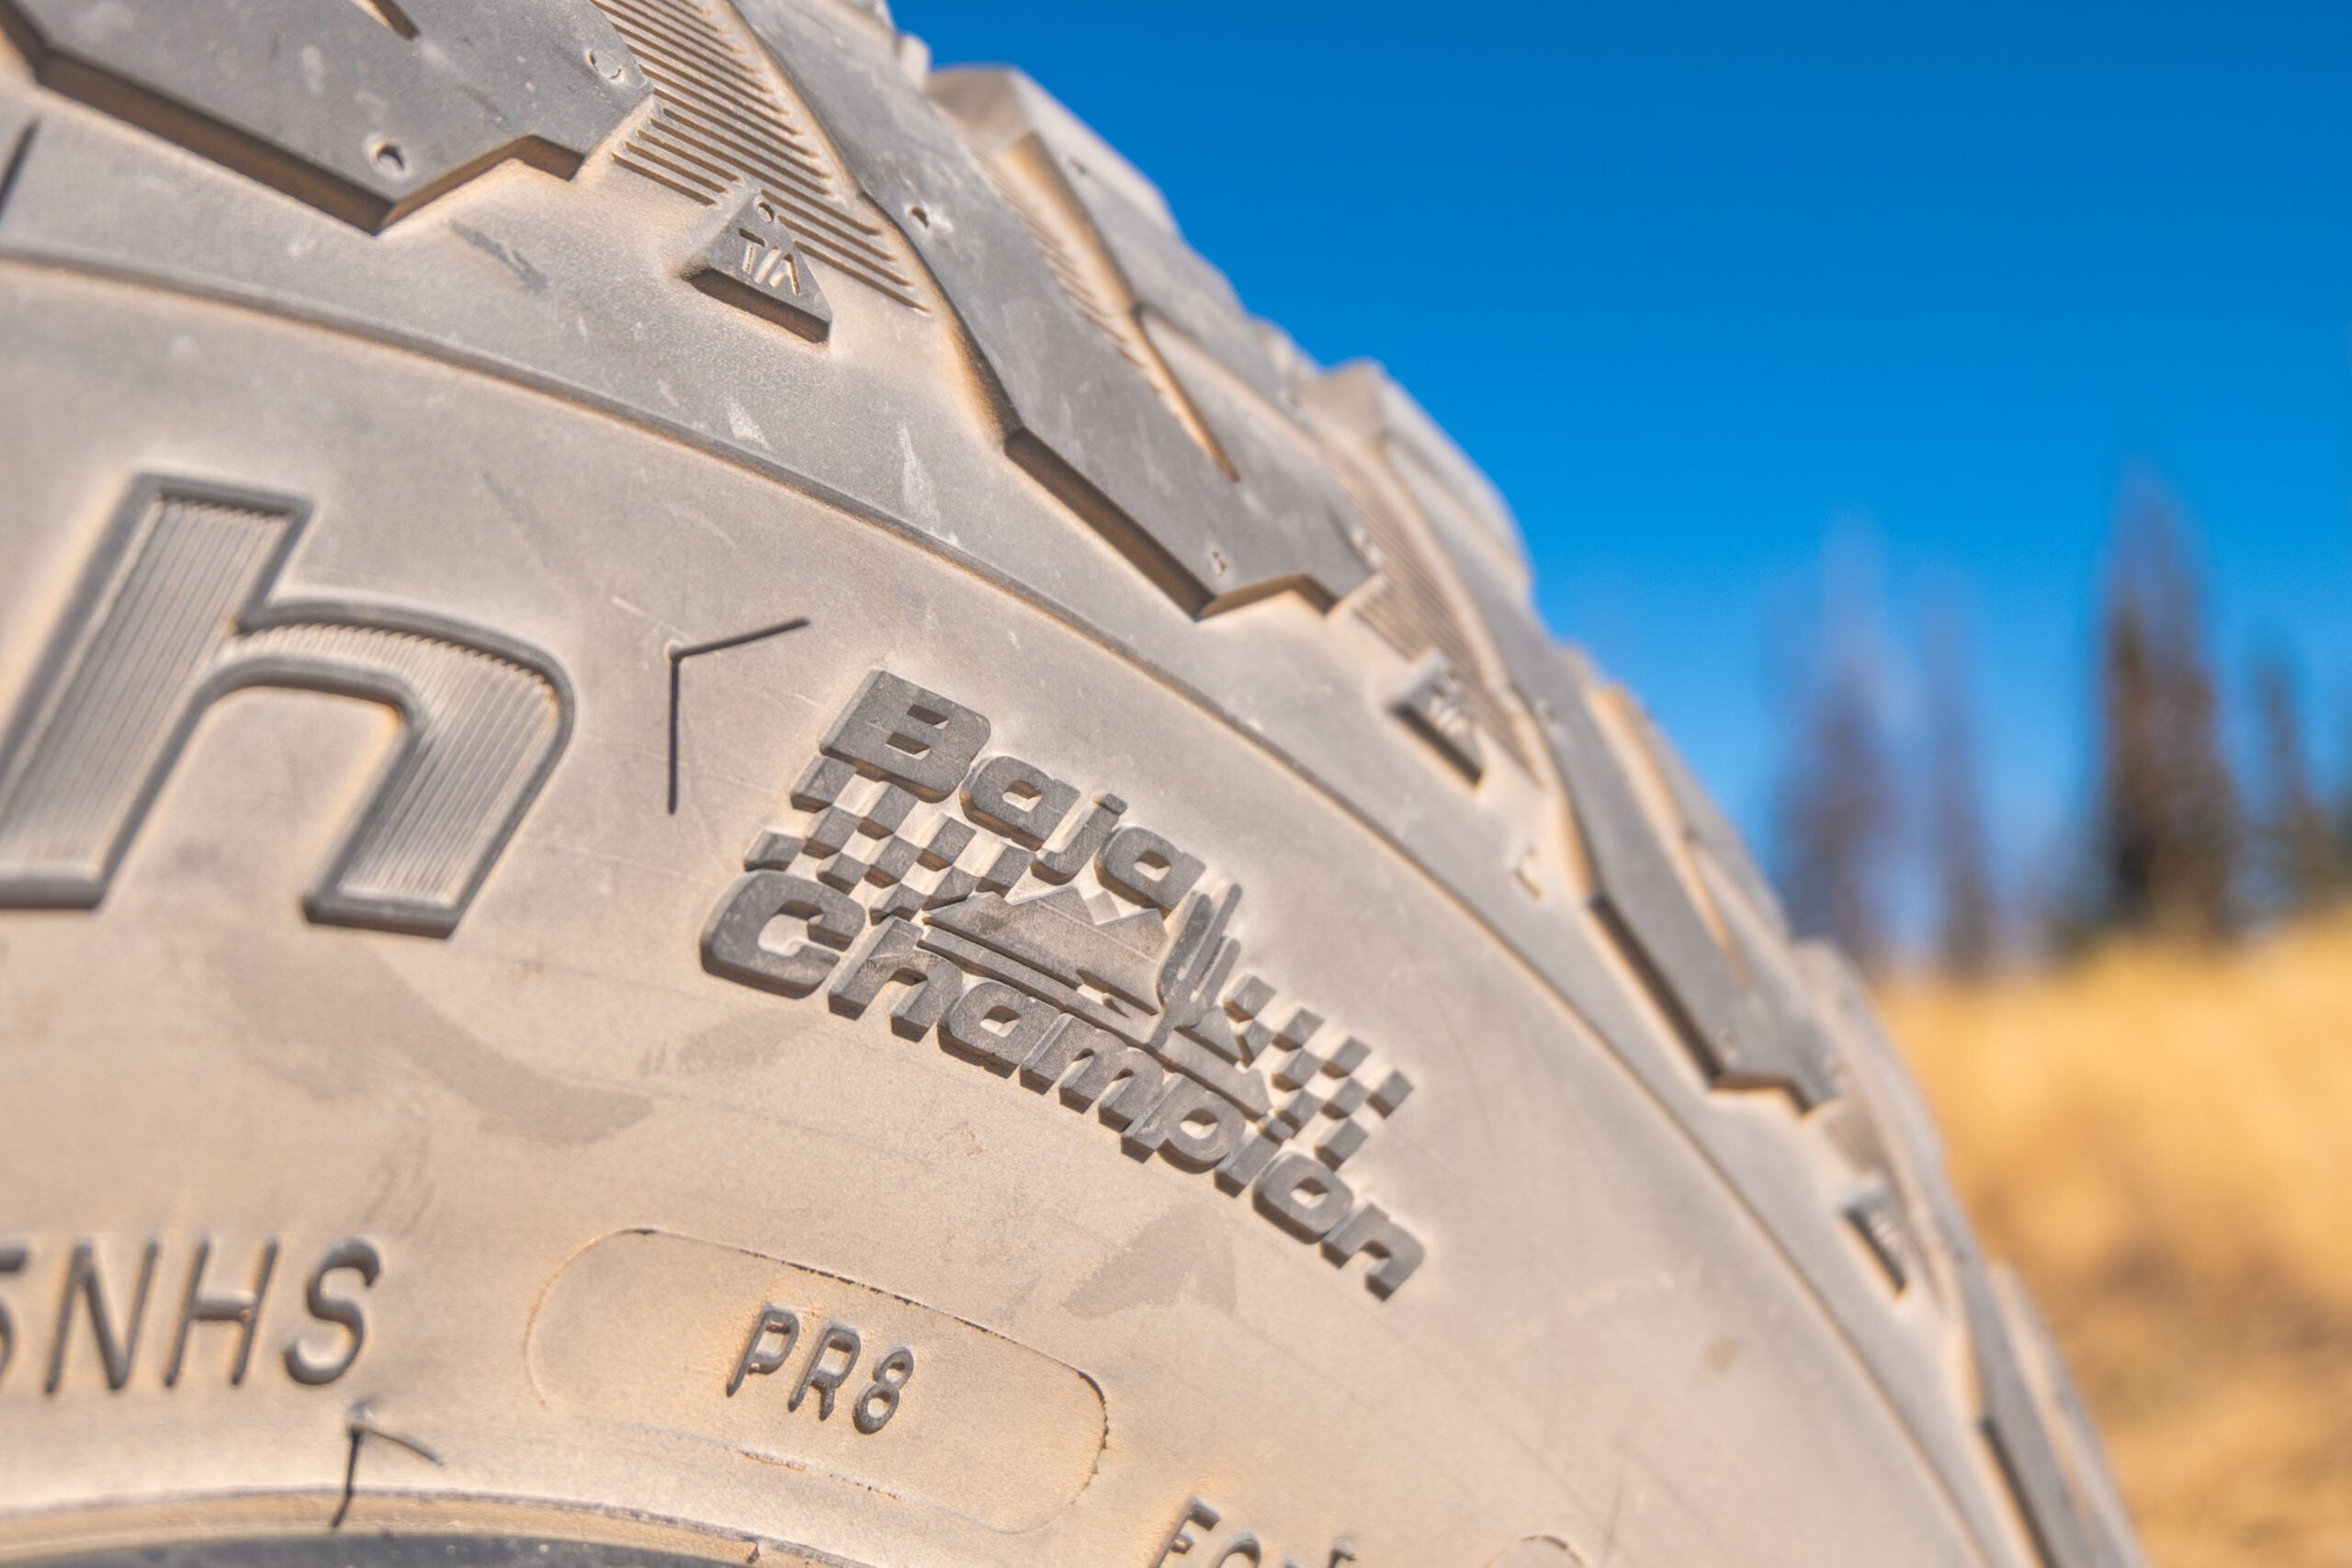
What I wanted was a tire that would still give me similar low-grip capability, but wouldn’t wear as quickly, be stronger, and wouldn’t be nearly as loud as the Maxxis’. BFGoodrich answered the call with a set of 30-inch MudTerrain T/A KM3 UTV tires.
These monsters are two inches taller than the stock 28-inch Maxxis’, three inches wider in the front, while two inches narrower in the rear. They’re also square, so I can rotate them and ensure wear is even and are related to the tires UTV teams use to compete in KoH, Baja, and the Mint 400. I did have some concerns about sizing, however.
The stock Can-Am rims are 14 inches and I’d be moving up to a 15-inch wheel to fit the BFGs. What concerned me was the offset as our Maverick X3 Max DS Turbo R has a rear trailing arm that curves around the wheel. If I didn’t get the offset right, a 30-inch tire might rub against it.
The folks over at Wheel Pros, who have a background in UTV wheels, helped guide me through the process, though it took a few emails to determine the right wheel. The company is in the process of building an on-site tool that’ll let you input your year, make, and model and help you select the right wheel for your UTV, as the company already has one for street cars.
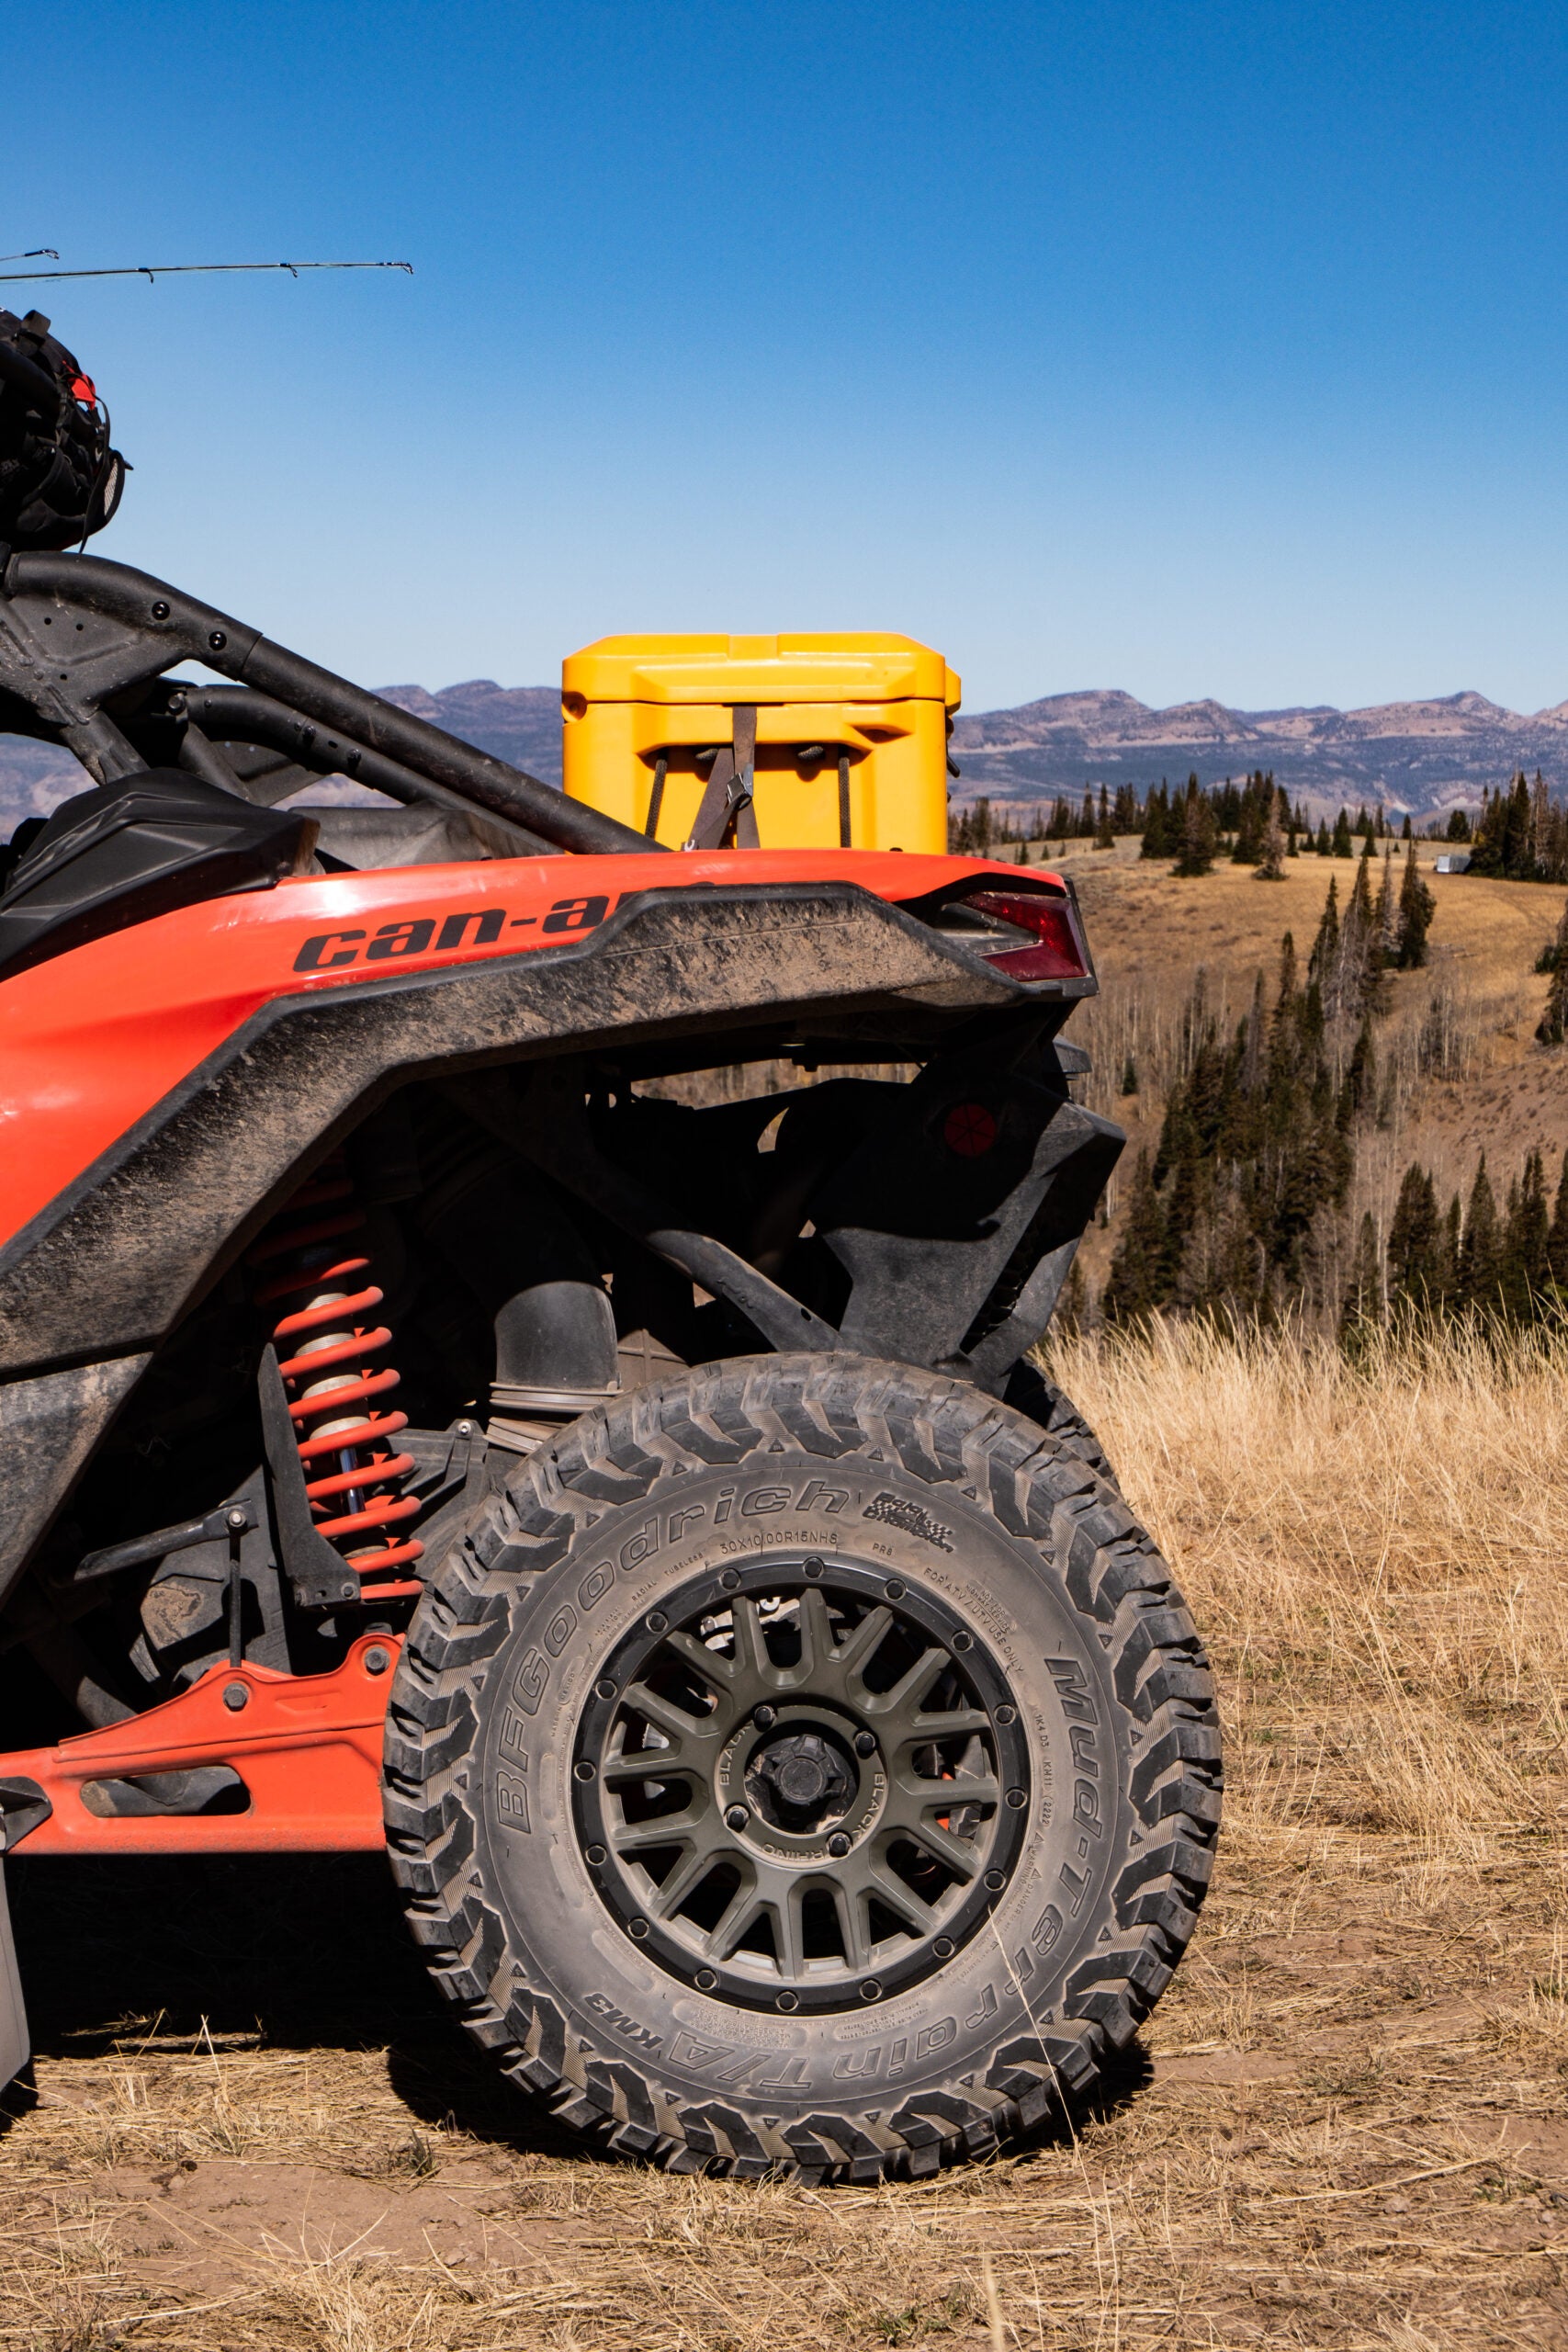
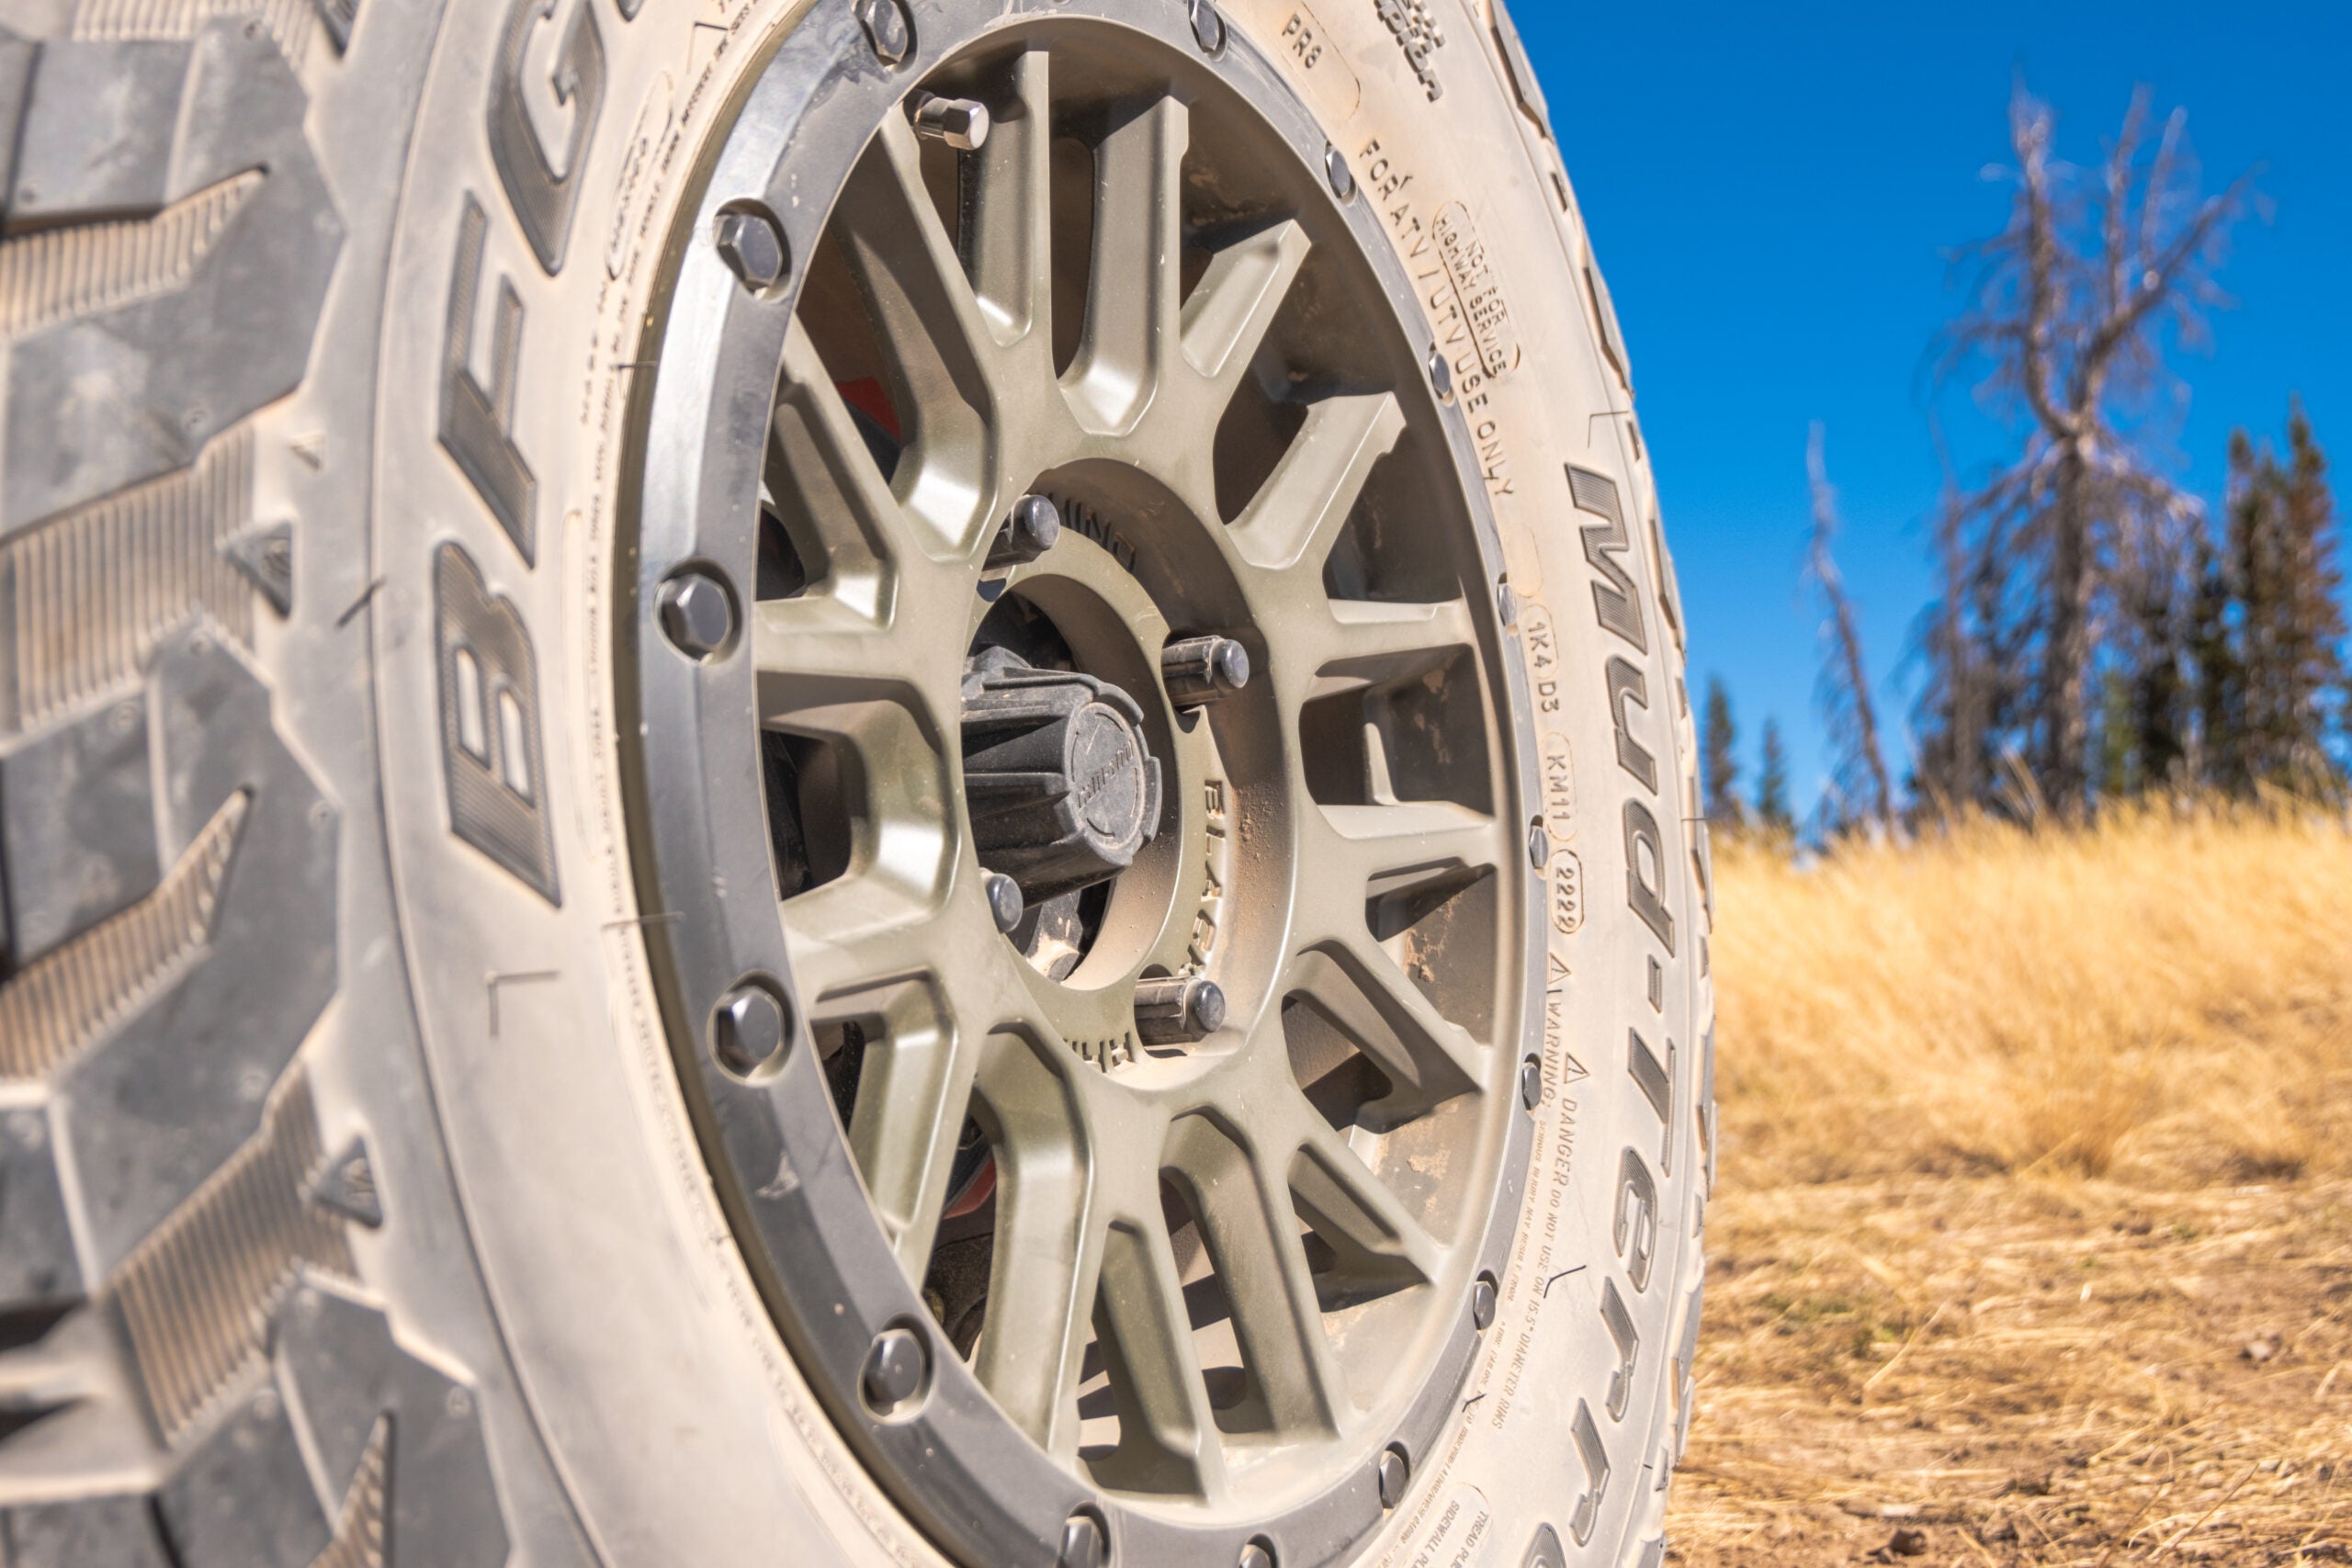
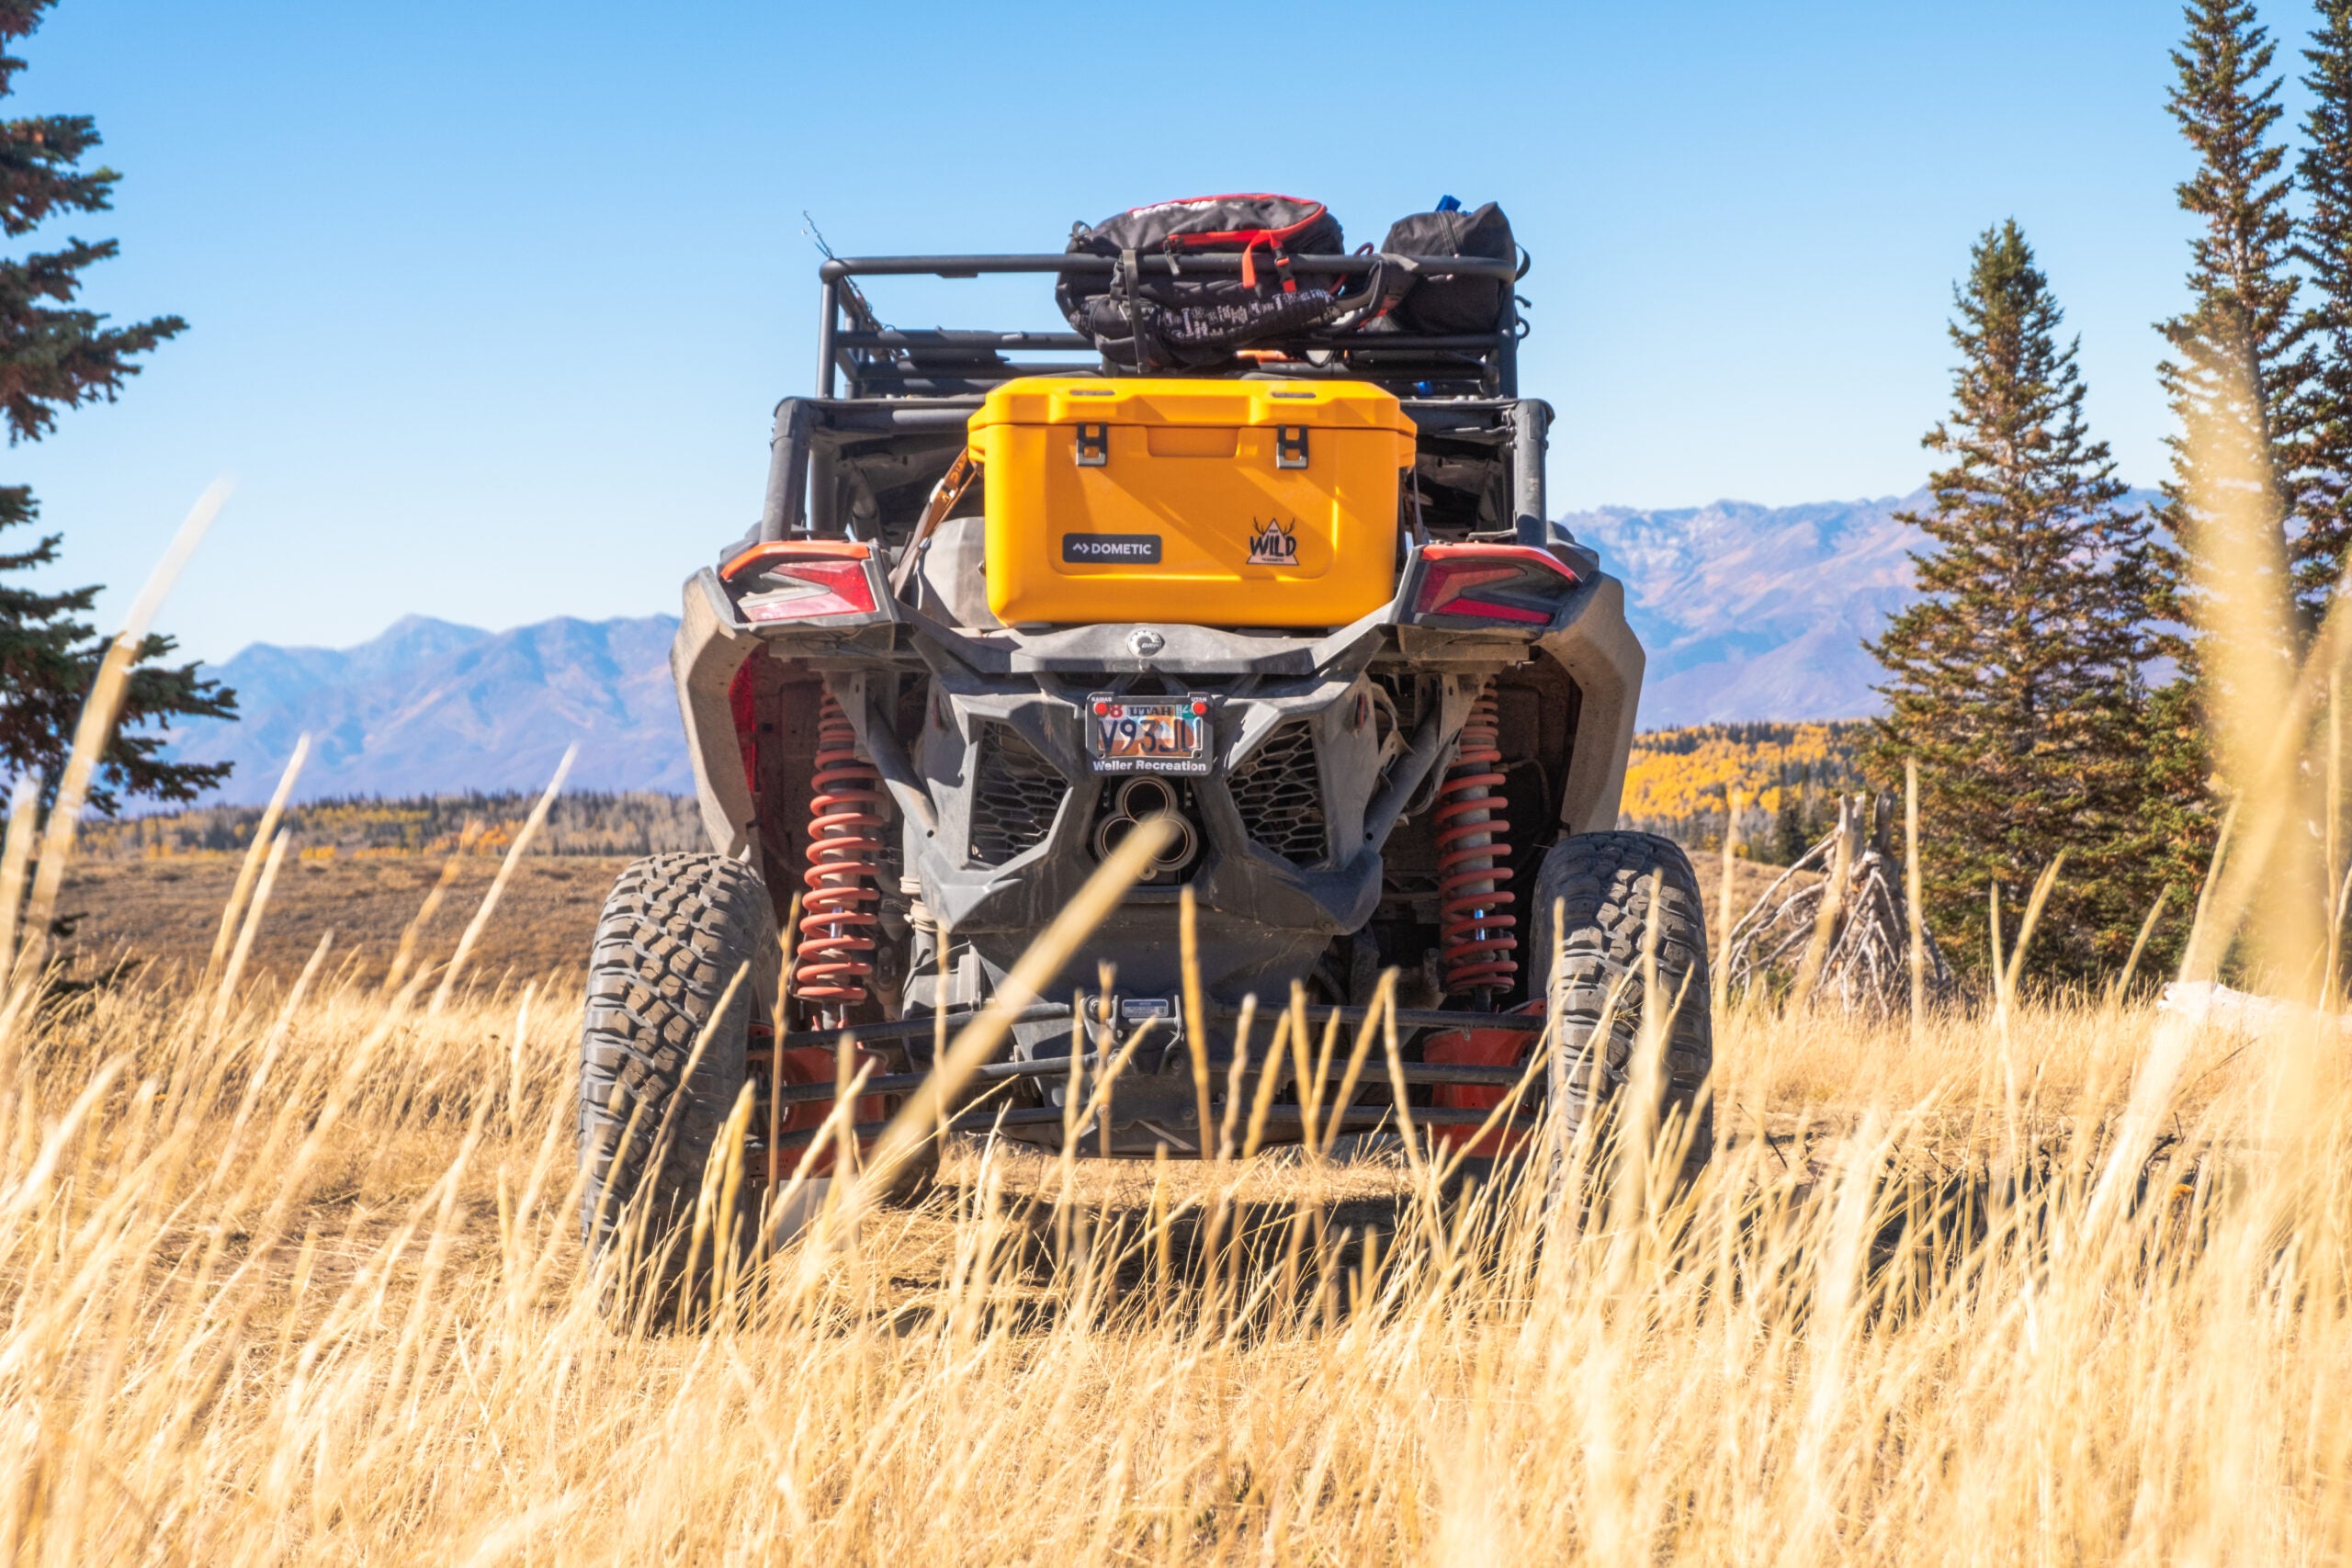
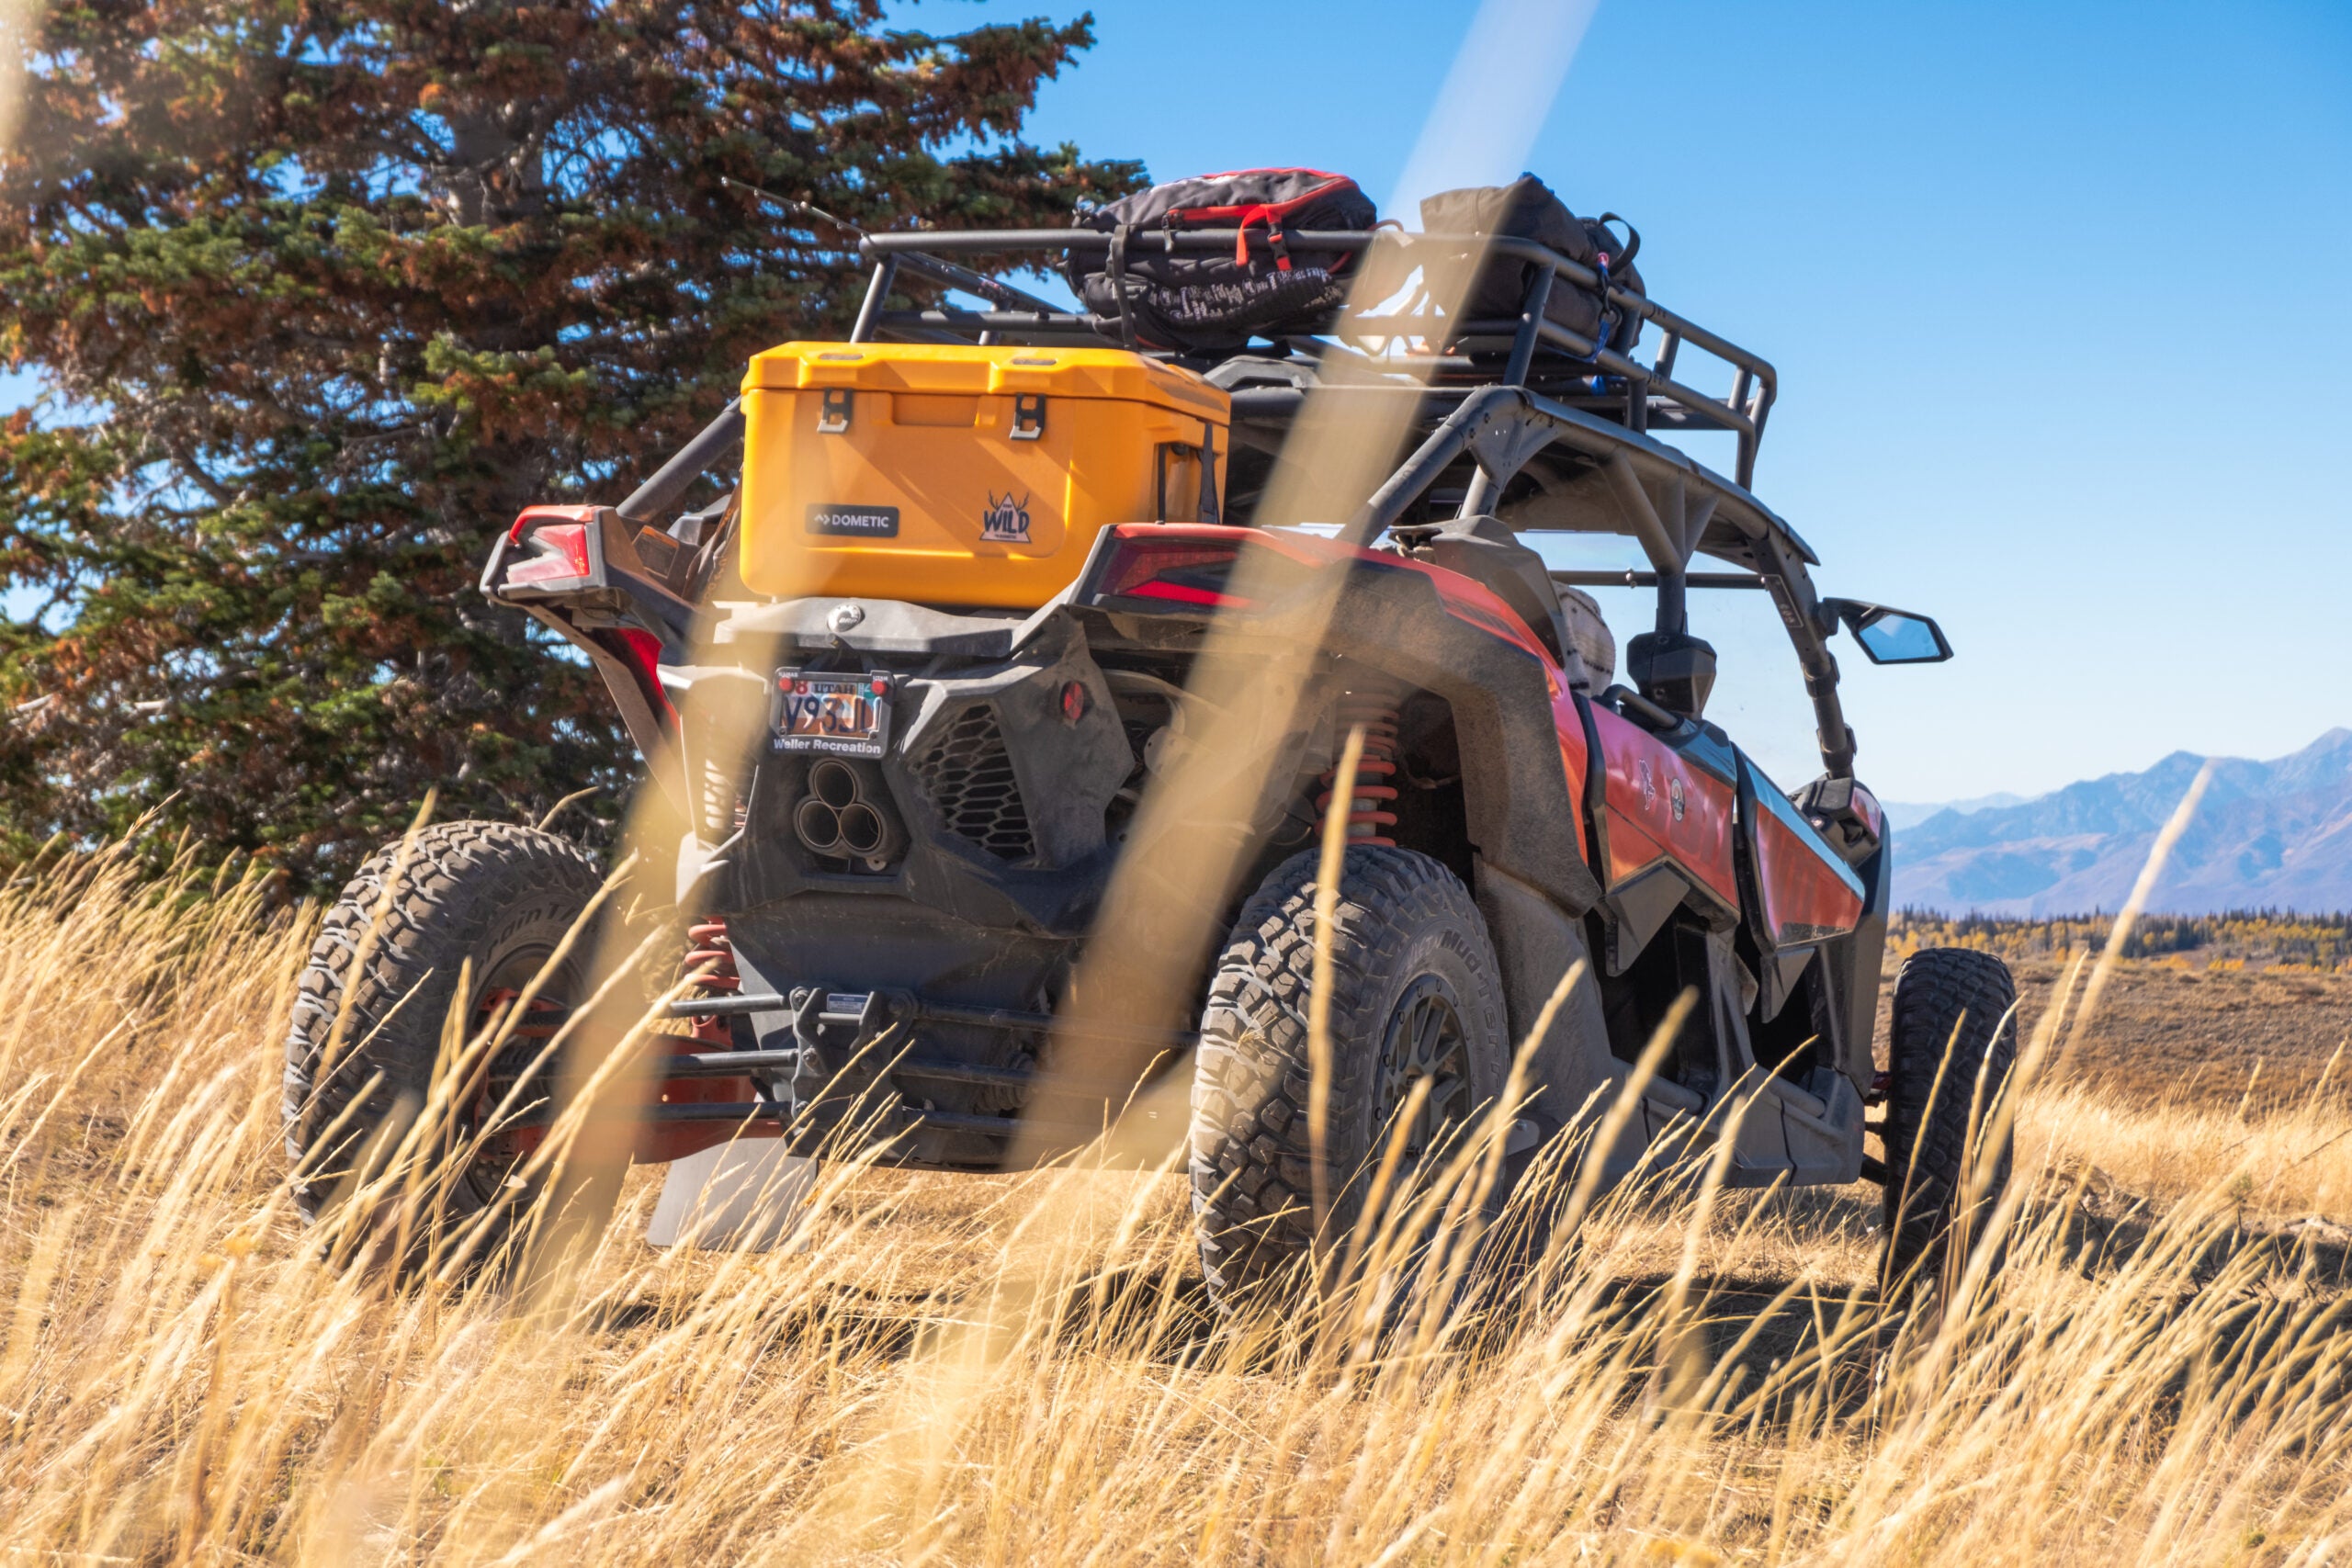
I settled on a set of Black Rhino La Paz UTV wheels that are 15x7 with a 36mm offset. They’re also Olive Drab Green because I like it and coupled with the BFGs, they give the Can-Am a menacing vibe. The wheels and tires also increase the Maverick’s track width and stance just enough that it doesn’t look as upright as it did on the stock wheels and tires.
A set of Gorilla lugnuts were also ordered to keep everything secure.
As for my initial reactions, does giggling like a schoolboy count? Not only do the wheels and tires make it look hard, but it feels more stable at speed. The old Maxxis’ used to spin up whenever we left our driveway and got onto the gravel hill going up to the main road, but these don’t. And there’s not a hint of roar from the tires when we hit pavement.
So far, the setup is exactly what I wanted. That said, the BFGs do kick up more rocks than the Maxxis’ did. That’s due to them having a tighter tread pattern and rocks lodging themselves into the tread blocks. But I’ve already purchased a set of Kemimoto fender flares to keep all those rocks at bay. But what I really need to do is a lot more driving to really test the whole setup, so stay tuned for a more in-depth review of the tires soon.
This setup is also quite a bit heavier than stock. The rims themselves weigh five pounds more than the stock Can-Am wheels, while the tires are about eight pounds heavier. That’s a lot of toll on the driveline, so I’ll be paying attention to the axles. What I didn’t expect was even though I’ve gained about three inches of ground clearance, because the added weight is lower down, it has made the entire machine feel more planted.
Mein gott.
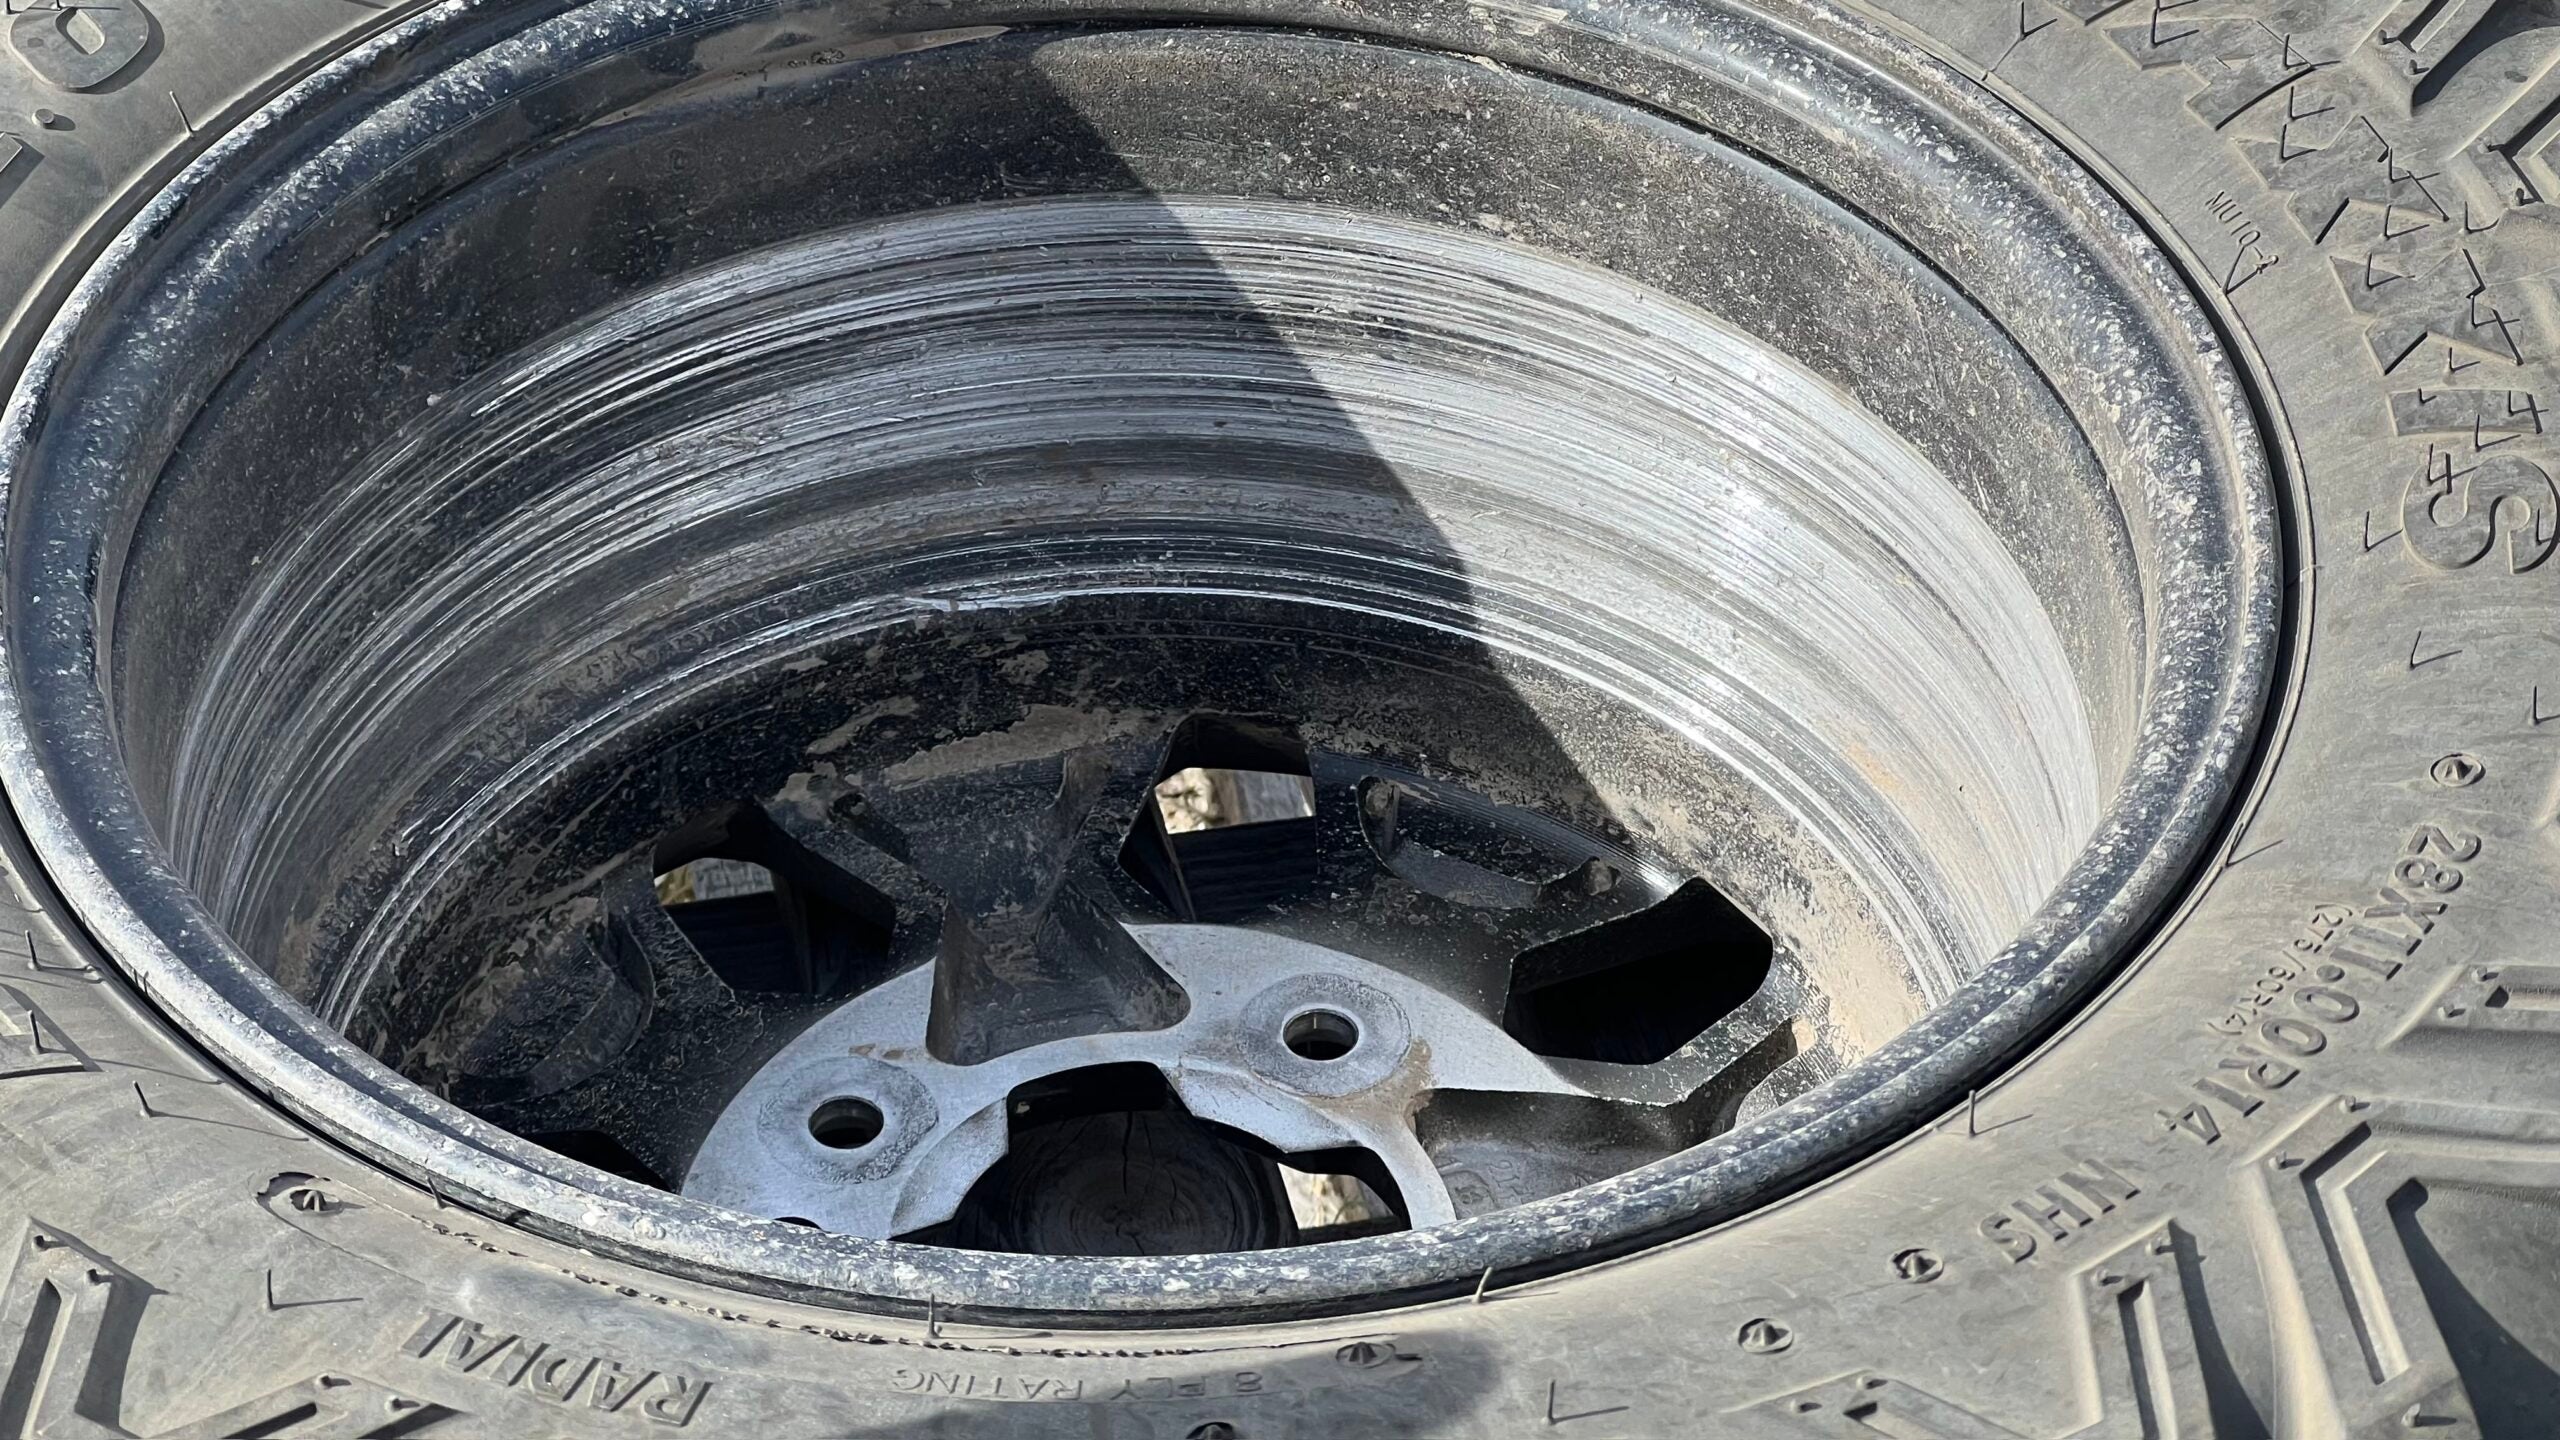
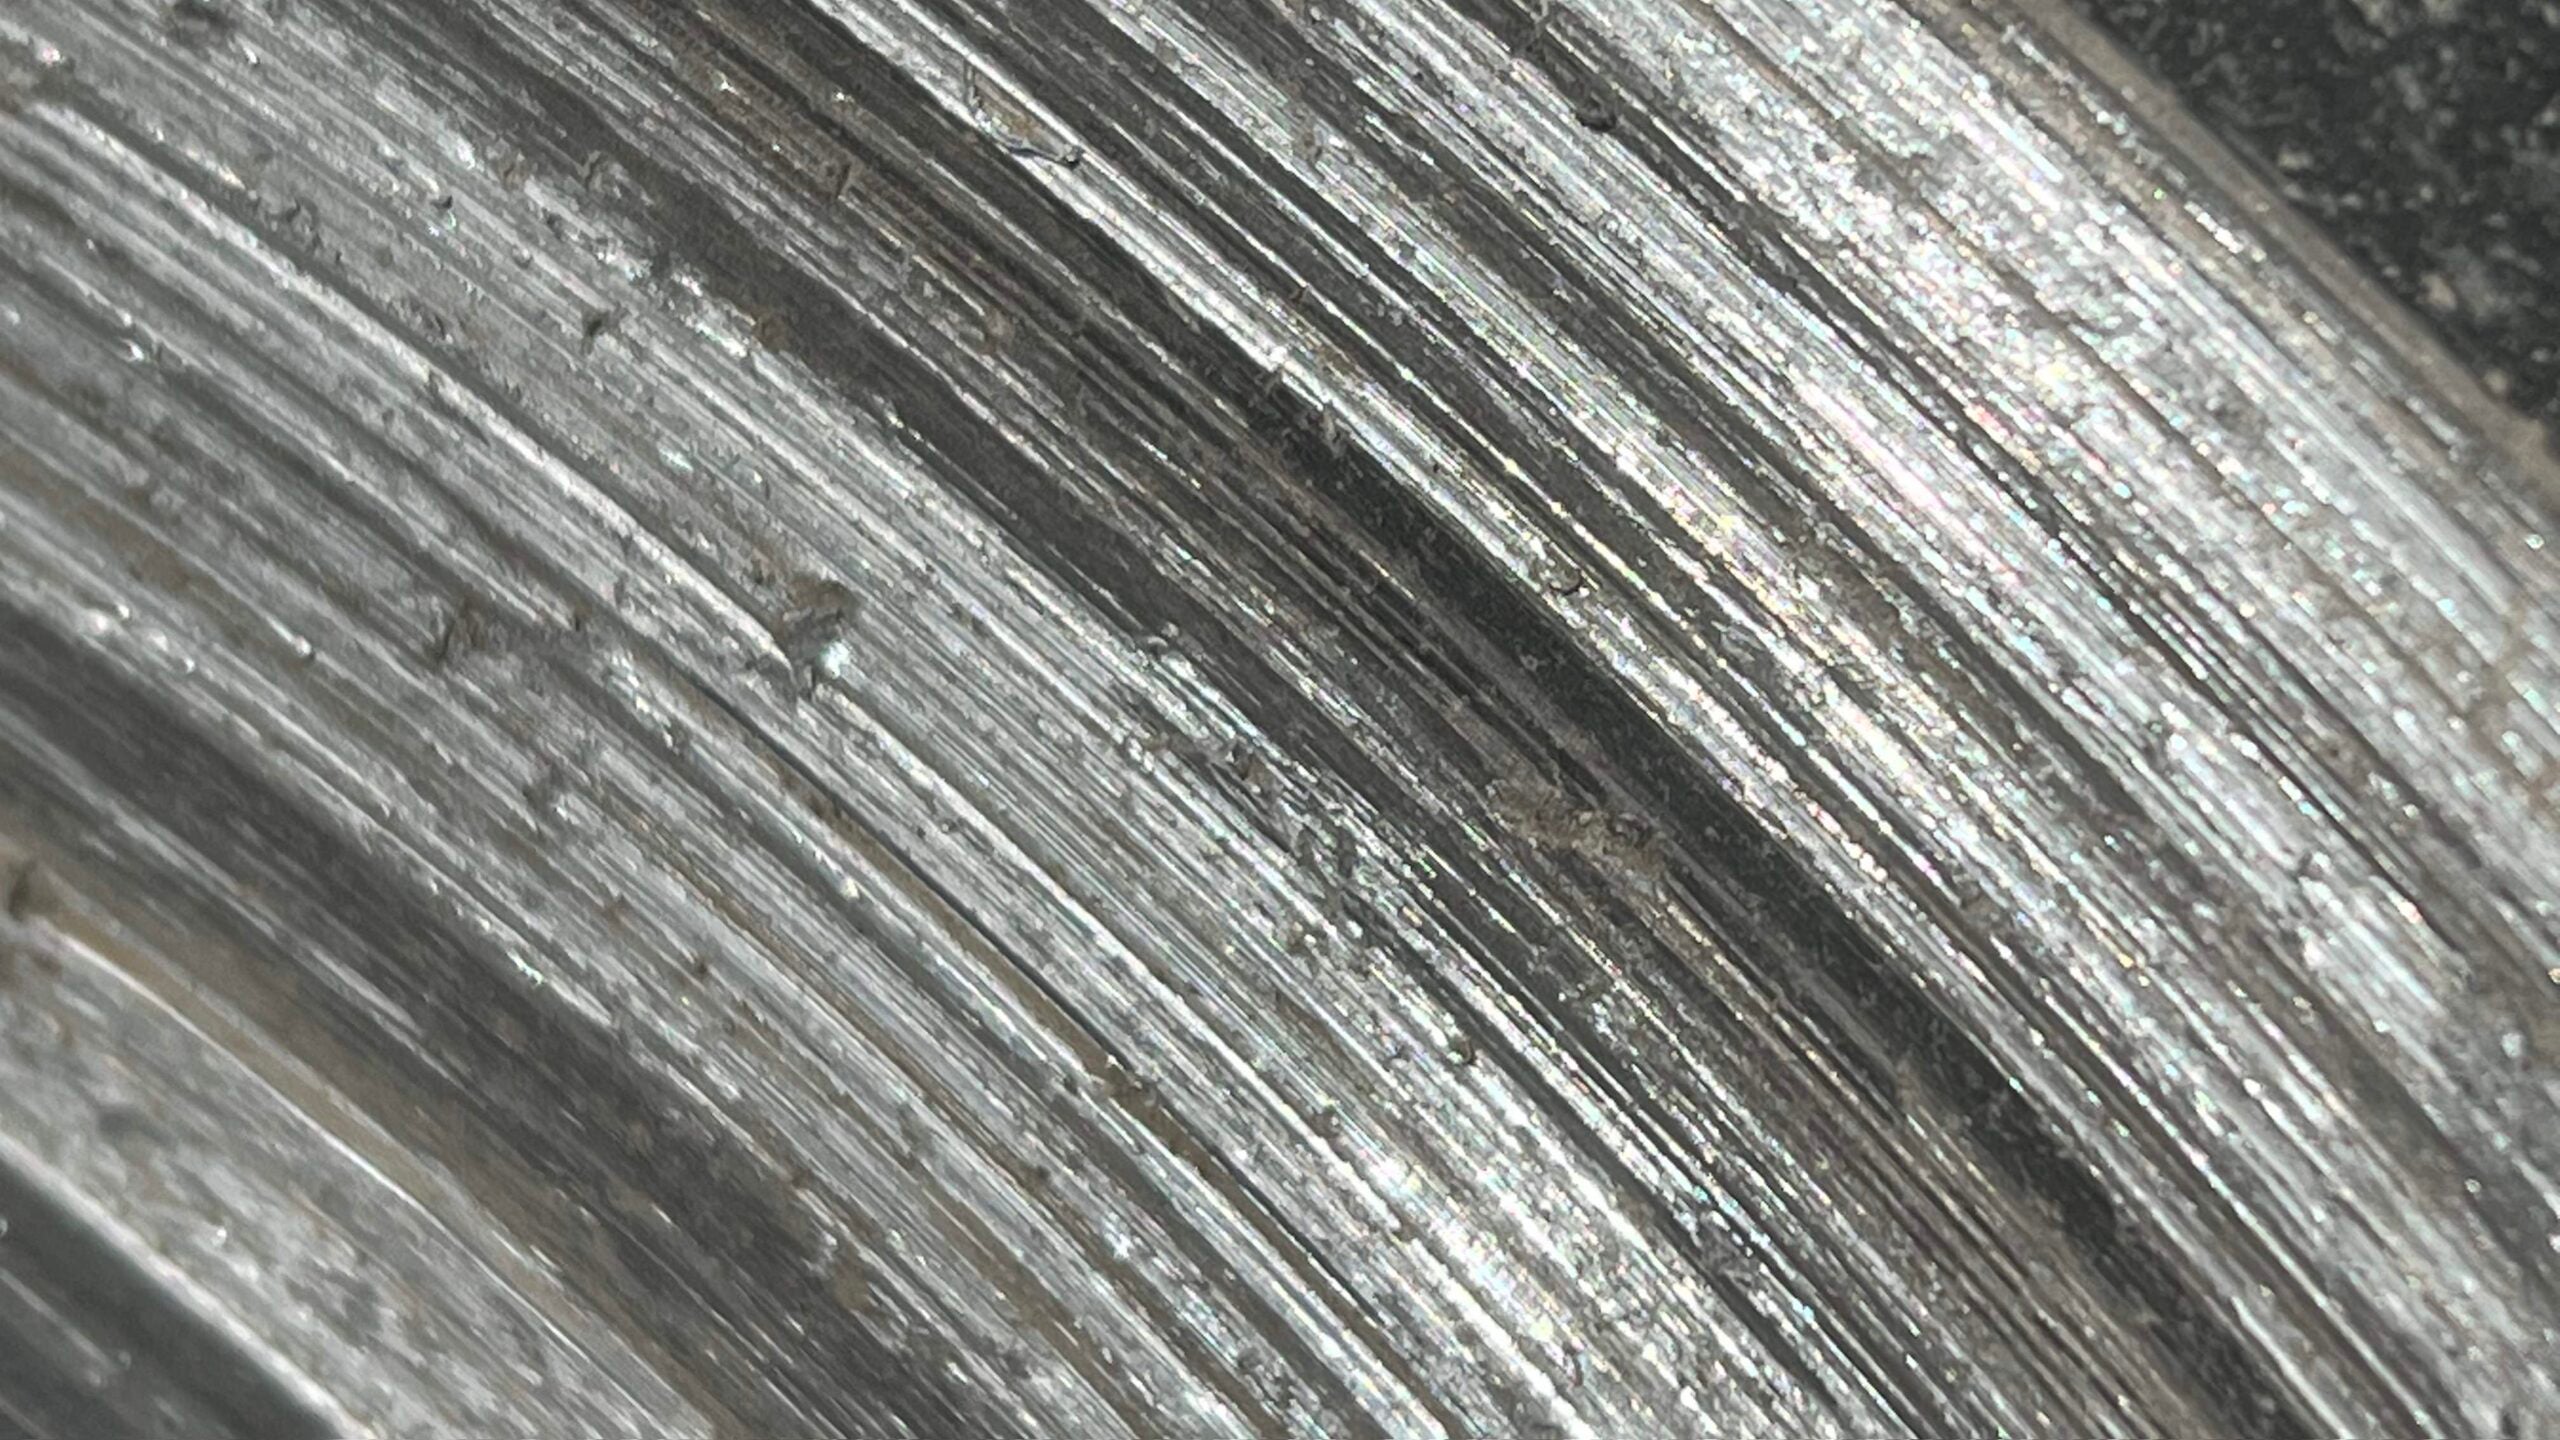
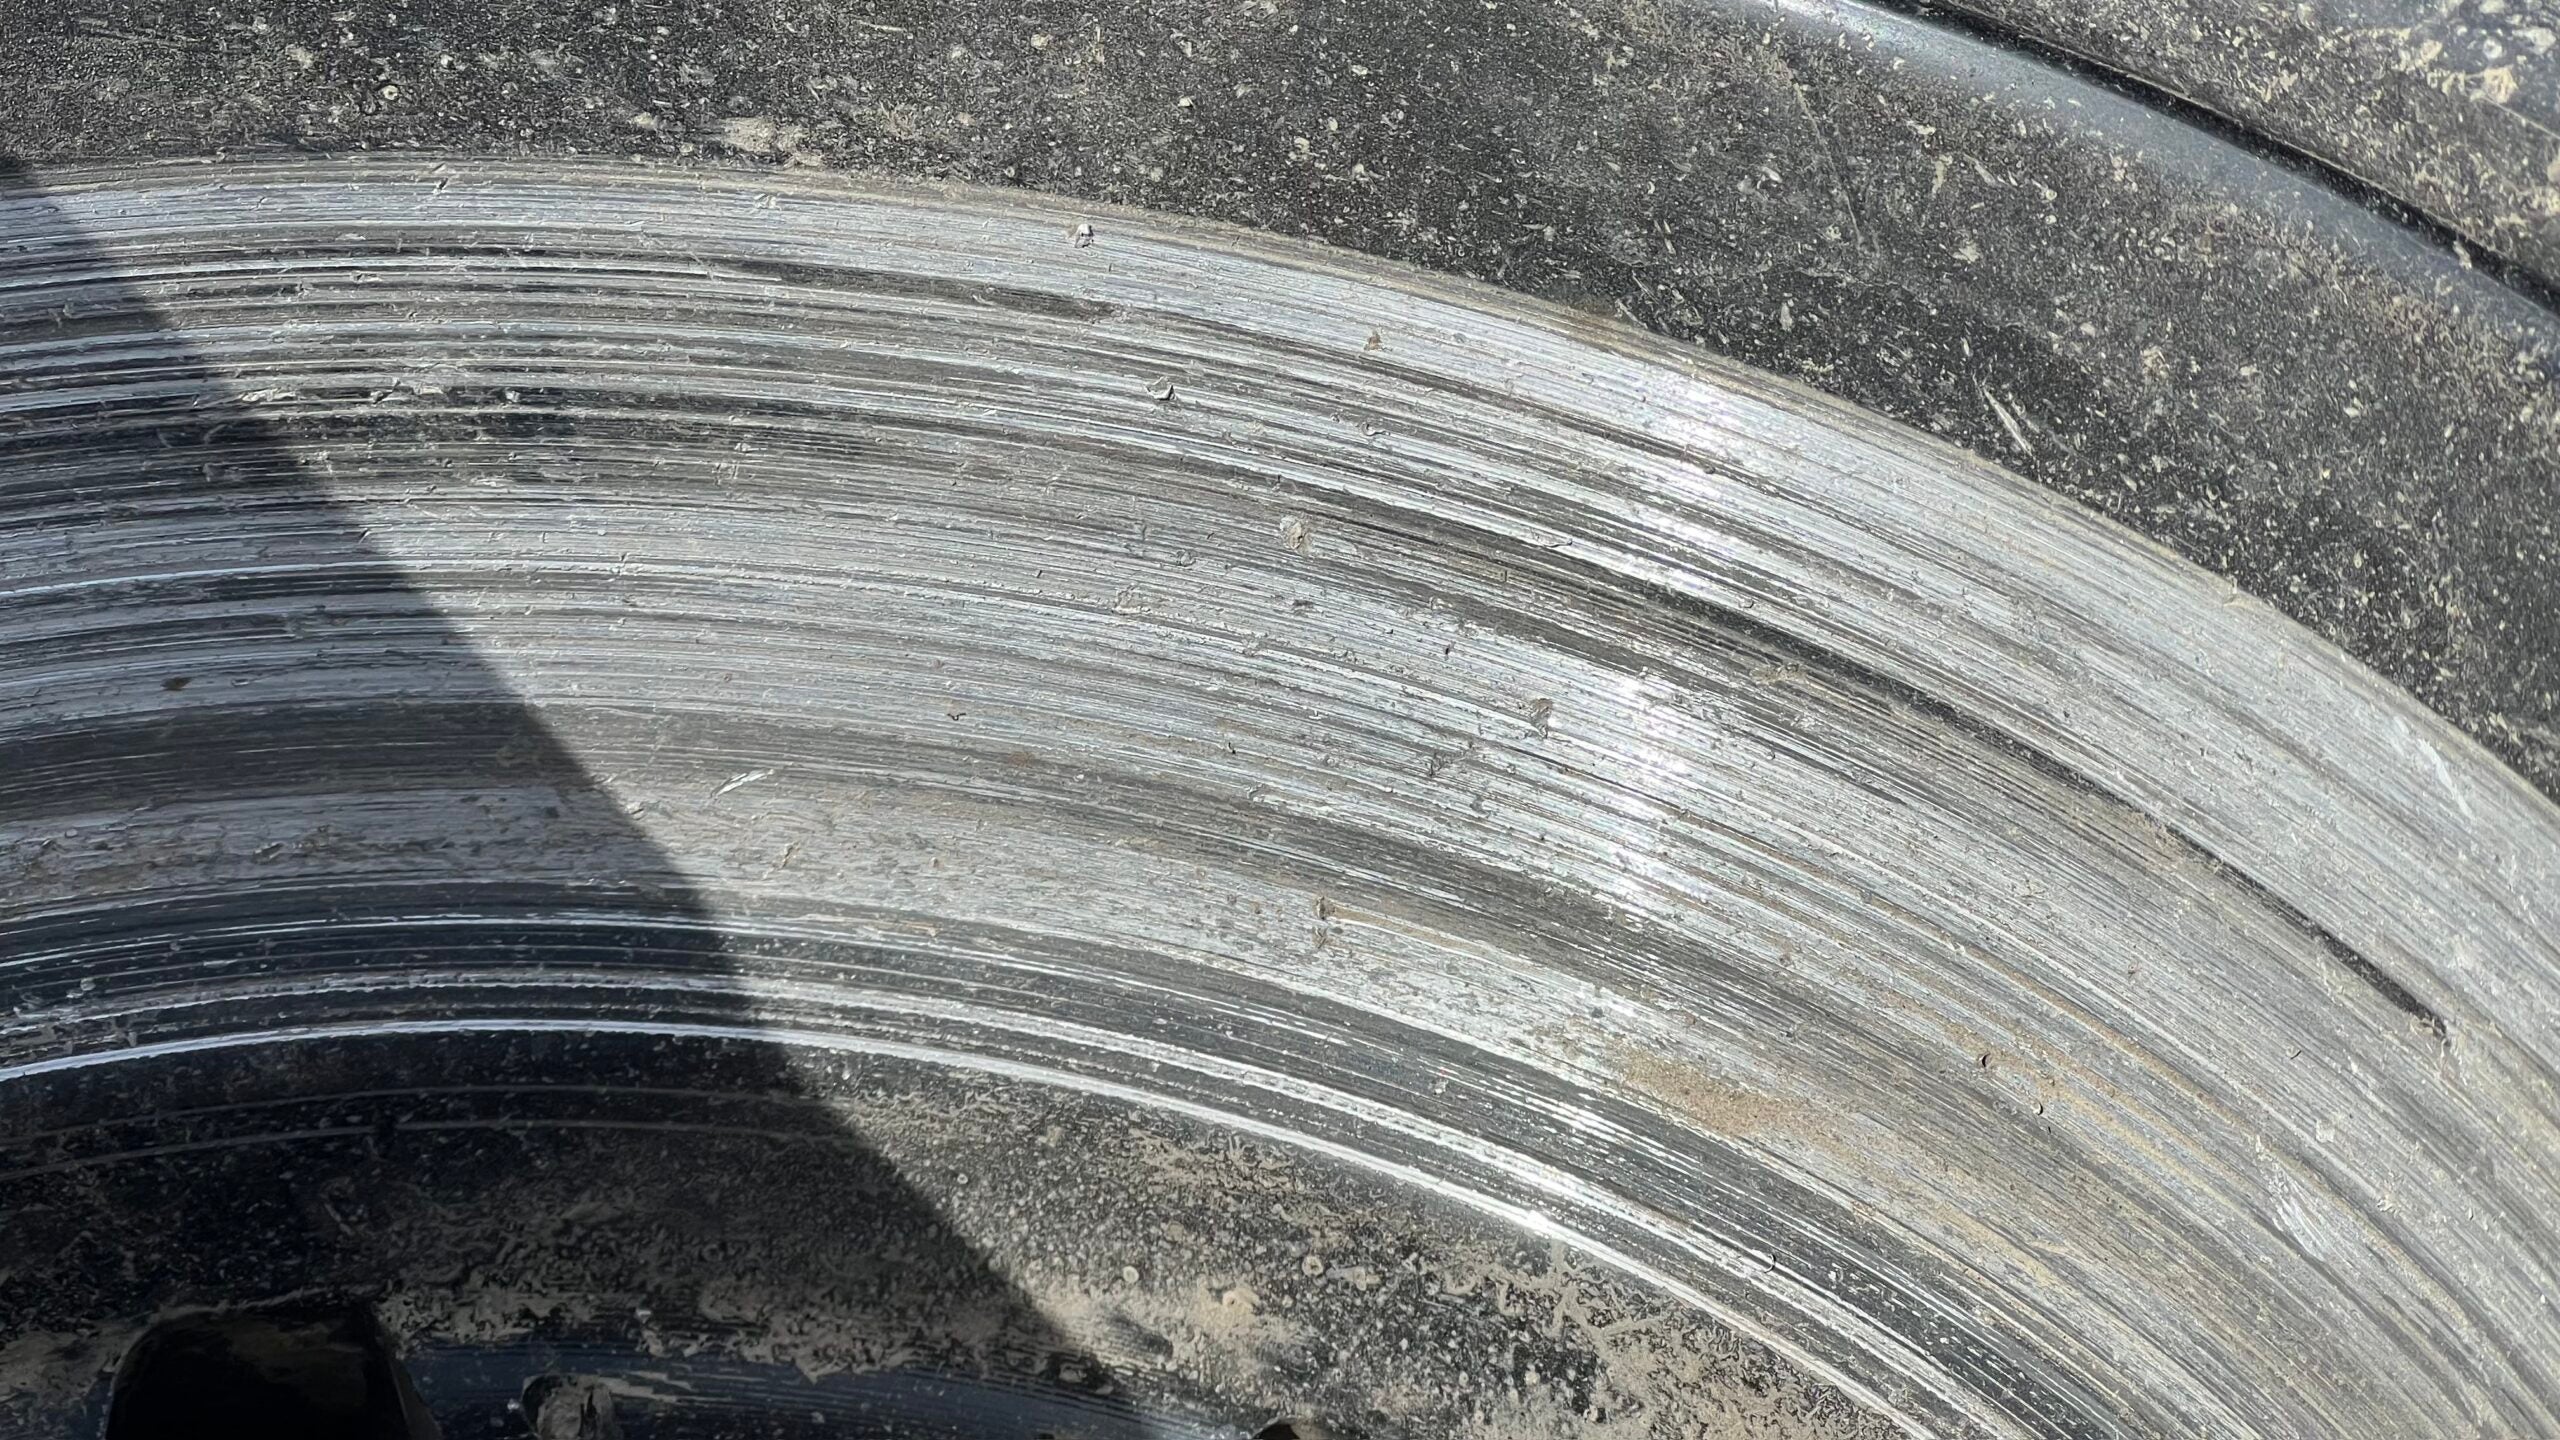
Swapping the wheels and tires also had the added benefit of giving me the chance to inspect the stock wheels. It was immediately apparent that there isn't enough room inside the stock rim for rocks to be expunged, as the wheel’s inner surface looked as Peter Nelson put it "redneck lathed." We'd heard rocks trapped in between the brake caliper and rim numerous times and start to grind, but they’d get expelled quickly. I wasn't expecting this, however, and audibly gasped when I pulled them off.
I’m amazed that they could take that sort of abuse, but I’m not sure they would’ve lasted much longer. Accordxing to the Can-Am forums, this is a pretty common problem for Mavericks. I'm eager to see if these 15s, along with a set of Lonestar Racing mud flaps I installed, will keep the rocks at bay.
Duh, it’s a project car. My next upgrade is a set of Lightforce Striker LED lights that’ll be installed on the Can-Am’s roof rack, but I’m having some issues mating the provided wiring loom with the Can-Am’s accessory power hookups. Getting to the accessory power is hilariously easy, but getting the provided loom to play nice with the Can-Am hasn’t been as simple. I’ve got a call out for help.
Further down? The fender flares and more adventure modifications. I want to really use the Can-Am to go on longer adventures with my family. A tent is already attached to the roof rack, but maybe there’s the possibility of a rooftop tent? I’ve had a few conversations with folks like iKamper, Go Fast Campers, and Thule, but those RTTs weren’t meant for side-by-sides or the Adventure Rack. It’s a long shot, but one that could provide some fun prototyping for a future update.
I’d also like to get it ready for next year when I plan to use it as a base camp for hunting. I plan on bagging myself an elk next season, and the Can-Am would make for a great basecamp vehicle. Otherwise, I need more seat time to see what else is absolutely vital to its next phase. I want to continue my streak of modifications making it better. Fingers crossed.