

This may feel like specialist information, but for serious engine builders and home mechanics with a project themselves, checking the pushrod length may be a pain in the neck, but it's worth doing. Even if you're working with a hydraulic lifter setup, you can quickly put the factory-length pushrods out of spec with just a few upgrades. Milling your heads, having a valve job done, decking the block, all of those little changes can stack up to work against you, as each decreases the necessary pushrod length.
Having too long of a pushrod in any engine can cause all kinds of issues. Valves hanging open, lifters pumping up, damage to the valvetrain, and other performance-killing symptoms are on the menu. These issues are bad for any engine, but it seems like most of the information out there regarding finding pushrod length is shown on a small block Chevy or LS engine. While the information given in that format is generally the same, small changes in the procedure are made when moving to an engine with even slightly different genetics. That's why I want to walk you through how I find pushrod length in a big block Mopar engine with fixed rockers.
Let’s get after it
The Drive and its partners may earn a commission if you purchase a product through one of our links. Read more.
Everything You’ll Need To Measure Pushrods
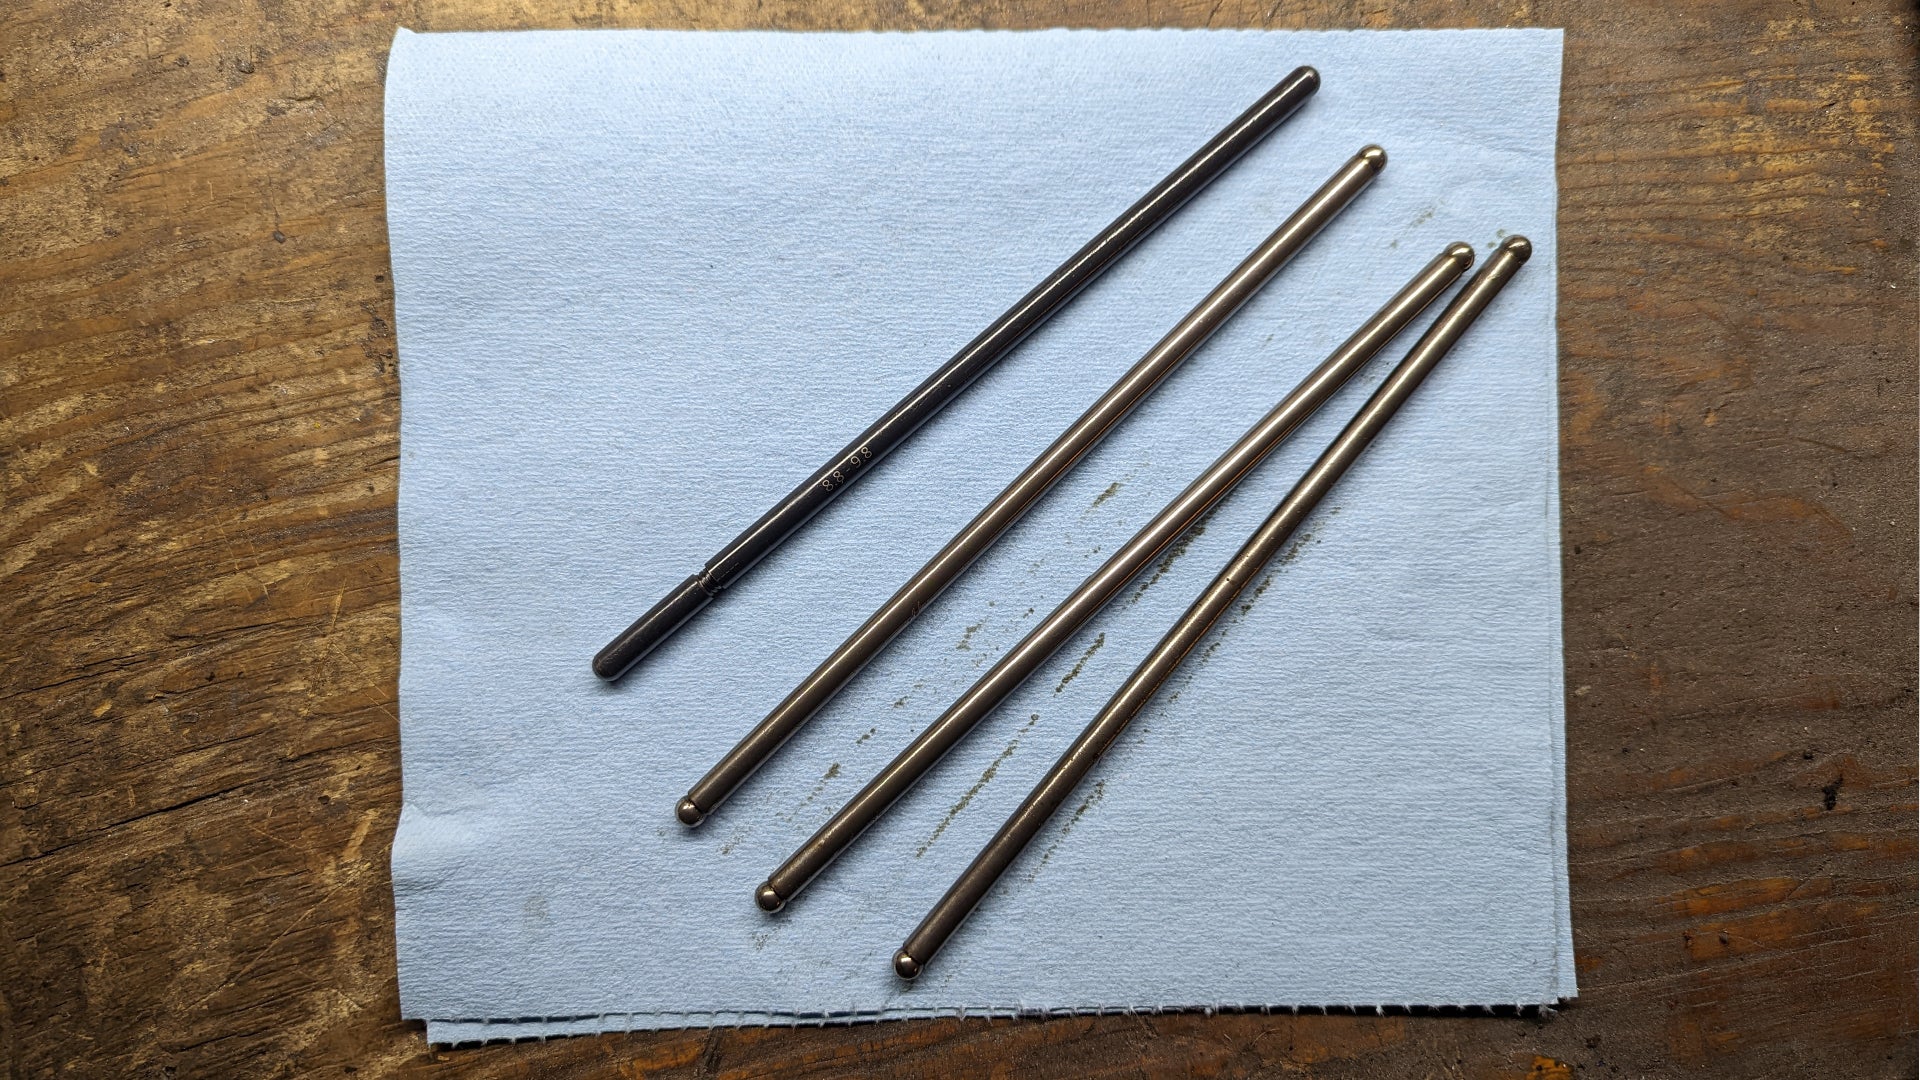
There are a lot of ways to measure pushrod length. Thankfully, the most basic methods are viable for this type of engine. For the record, the 440 we're working on is equipped with a hydraulic flat tappet cam and fixed shaft-mounted rocker arms. In this case, all you really need is a pushrod measuring tool and some basic hand tools to turn the engine over manually and to remove the intake and valve covers, if they're in place.
- Pushrod measuring tool
- 1/2-inch drive ratchet
- Crankshaft nut socket
- Torque wrench
- Caliper (optional)
- Your phone’s calculator and notepad
Organizing your tools and gear so everything is easily reachable will save precious minutes waiting for your handy-dandy child or four-legged helper to bring you the sandpaper or blowtorch. (You won't need a blowtorch for this job. Please don’t have your kid hand you a blowtorch—Ed.)
Here’s How To Measure Pushrods
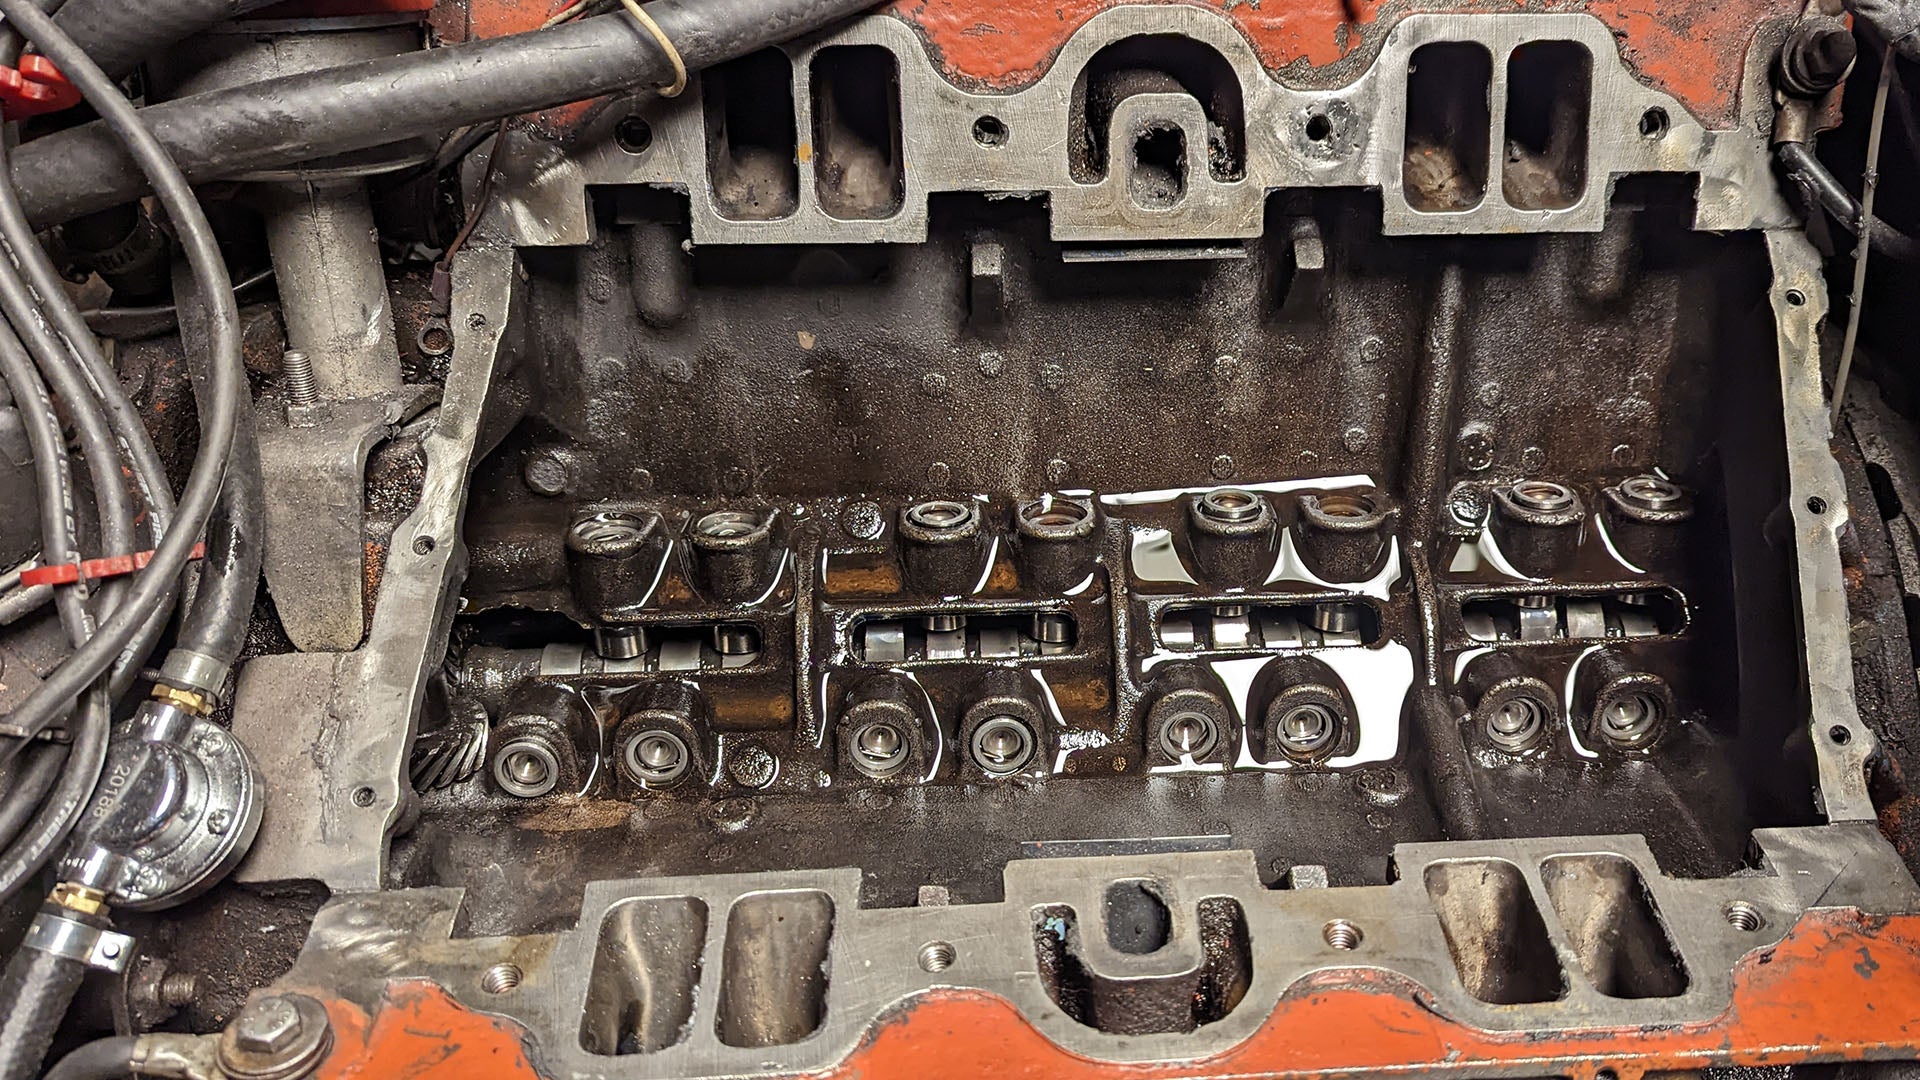
1. Access the Lifter Valley
First things first, get the intake out of the way. If you're building an engine from the bottom up, that's not much of a problem. However, those of us taking corrective measures by addressing pushrod length after the fact just have to bite the bullet. Getting it out of the way gives you plenty of room to work. While you’re at it, remove the valve covers and get the existing pushrods out of the way.
2. Install Rocker Shaft
Next is to set the rocker assemblies up. Bolt them on the heads as they'd normally sit and torque them to spec. If you're working with a Chrysler B or RB engine, 25 lb-ft is your magic number.
3. Remove the Spark Plugs (Optional)
Leaving the spark plugs in place isn't going to change your measurements. It'll just make rolling the engine over harder to do. You can and will save yourself a lot of cursing by just taking them out beforehand.
4. Get On The Base Circle
The correct pushrod length is found with the valve fully closed. That means you need to roll the cam lobe for the valve you're checking onto its base circle. Since we are working with a 440 without the intake, that's something we can physically see on this engine. Though, you can always watch the position of the lifters to be sure. If the opposite valve lifter is rising to its peak, you know the one you're working on is on the base circle.
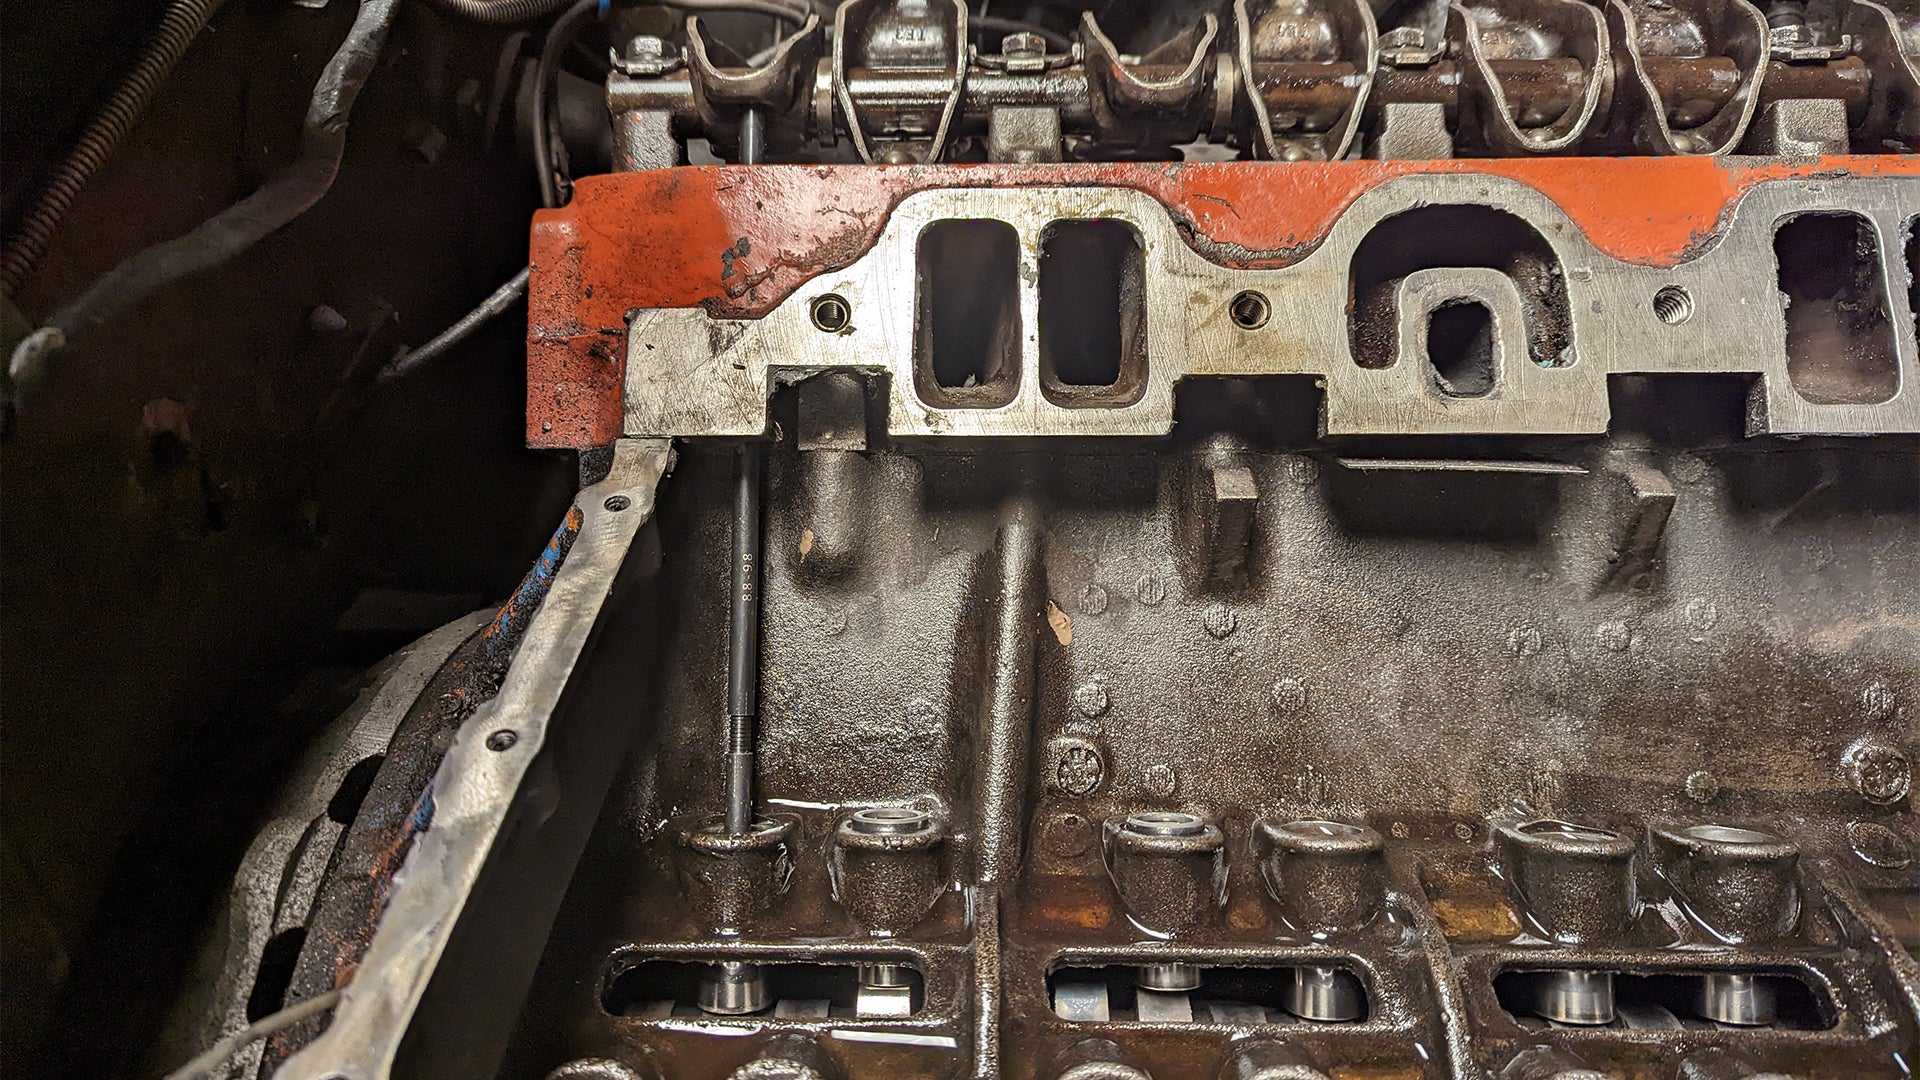
5. Slide Measurement Tool in Place
This is where giving yourself all that room to work is going to start to pay off. Even if the pushrod measuring tool is shorter than stock pushrods before adjustments, some finesse is in order.
I found it easiest to start with the base of the tool in the lifter, then pop it up under the rocker arm. Before you do it, be sure that the end of the tool you take your measurements from is down in the lifter valley, as that makes it much easier to see and work with.
6. Unwind to Zero Lash, Counting Rotations Along the Way
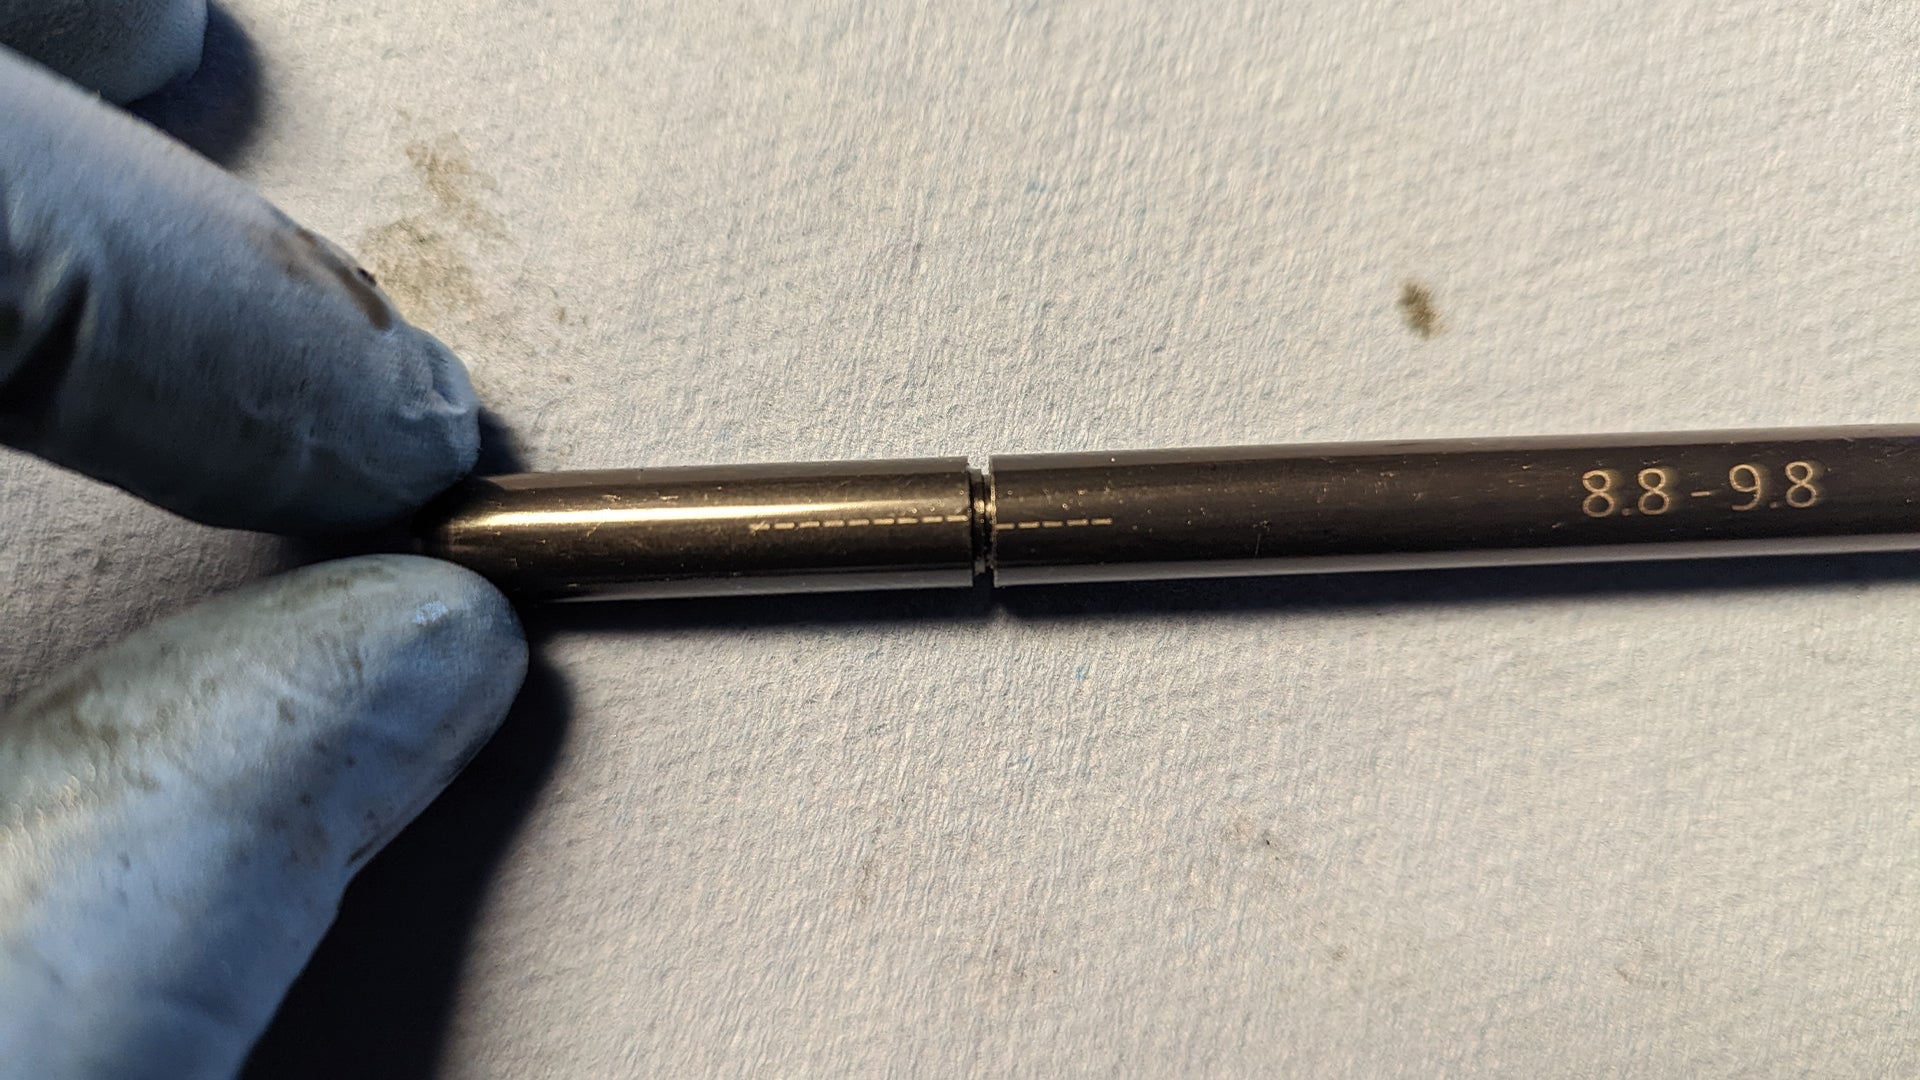
These pushrod measurement tools work fairly simply. They have a threaded end with a scribe that lines up with the main body. Rotating the threaded end counterclockwise effectively extends the length of this pushrod. In most cases, each full rotation, or every time you see the scribed marks line up, it's extended .050 inches. But you don't need to do the math right now. You just need to start with the scribed marks facing you in a position you can easily read them.
Once you're there, start counting rotations counterclockwise until you have no lash or zero slop in the assembly. You're not trying to bind the tool up against the rocker and lifter, just going until there's no play.
7. Add the Value of Rotations to Tool Length
Once you've counted the number of rotations it takes for the pushrod measuring tool to take up the slack in your assembly, it's time to do a little math to find the appropriate pushrod length. You're simply multiplying the number of rotations by the length gained with each rotation and adding that to the minimum length of the tool you're using.
In my case, each rotation gains .050 inches, which will be added to my tool's minimum length of 8.8 inches. If It takes me 9 rotations to reach zero lash, I multiply 9 by .050, giving me a value of 0.45. Next, I add 0.45 to 8.8, telling me that the pushrod measuring tool extended to 9.25 inches.
If you have a caliper with a large enough opening, you can use that to measure this length instead. Simply repeat the number of rotations it took to reach zero lash, and measure the entire length with your calipers.
8. Determine Preload
We're not done with the math homework just yet. We still need to determine how much preload the engine needs. Preload basically refers to the minute amount the pushrod should be compressing the hydraulic lifter while on the base circle.
Thankfully, a range is generally given by the manufacturer of aftermarket or OE lifters, with something like .020-.060 inches of preload being common. With the examples given, we can settle for something down the middle and add .040 inches to the 9.25 inches found earlier, giving us the desired pushrod length of .929 inches.
9. Record and Repeat
Take the desirable overall pushrod length you found, log it into your notepad under the appropriate valve and cylinder, and get ready for more. You will need to check the opposite valve for that cylinder you started on, as intake and exhaust pushrod lengths are subject to variation, especially if you've had valve work done.
Some folks will settle for measurements taken on just one cylinder. Others might work in an 'X' pattern, taking measurements from just the four corners of the block. However, I think it's worth checking them all as you've already come this far, so you might as well collect all the data that you can.
Video
Yeah, we covered a lot of little steps, and all that text can be confusing if you're a visual learner. That's why I popped in the video below. It walks through all the same steps, only on a V6 engine, as opposed to the Chrysler RB engine we're working on. The process is identical, though, and goes to show that it's viable for more than just one application.
More From The Autance
- Here’s what you should buy the gearhead in your life this Holiday season
- Sometimes thread repairs are better left to professionals
- Here’s what that truck nut in your life wants this holiday season
- Now’s the perfect time to add a surplus Toyota Mega Cruiser to your fleet
- You can put your hitch to work breaking tire beads