“Pump it, pump it, hold it!” Remember when your dad would mercilessly fire out those orders as sweat ran into your eyeballs and your leg muscle turned to stone? As much as you wanted to learn, you dreaded hearing him ask you to help bleed the brakes because you knew you were in for the workout of the century.
Thankfully, you’re at the point in your life where you now get to call the shots. Rather than sitting in the cabin crying over cramped calves, you get to lie on the ground and take that pent-up aggression out on someone else.
The only thing is, you have no idea what dad was doing under there, aside from running you through the wringer. Well, that’s what Car Autance is here to help with. Not only are we going to give you the scoop on what it means to bleed your brakes, we’ll also teach you how to give your kids or friends a reason to hate you.
What Is Bleeding Your Brakes?
Bleeding your brakes is simply the process of getting that air out of the braking system. To understand why your brakes need to be bled, let’s first look at the basic components of your disc brake system.
The first thing to know is how brakes bring you to stop. That’s simply achieved by friction. As you depress the brake pedal, pads clamp down on the rotors (disc brakes) or shoes press up against the drums (drum brakes). But where does the pressure behind the shoes and pads come from?
When you press the pedal, it builds pressure in the master cylinder. The pressure then follows the brake lines to the calipers on a car with disc brakes or the wheel cylinders with drum brakes. The vehicle of that pressure is your brake fluid.
For the brake fluid to pressurize, it needs to have an uninterrupted flow. If there is any air in the system, that won’t happen, and the result will be a spongy pedal and sluggish braking.
Bleeding your brakes is simply the process of getting that air out of the system.
How Does Air Get Into the Brake Lines?
There are a few reasons why air might be present in the system, one of the most common being a brake fluid leak. If you have a spongy pedal feel and also visually notice the fluid levels are dropping, it’s important to find out why that fluid is escaping. The most obvious culprit will be a busted brake line, but you should inspect your calipers or wheel cylinders as well, because they will allow fluid to escape when their seals fail.
Any time you replace a brake line, caliper, or wheel cylinder, you will need to bleed the system. These components are going on dry, and you will need to fill them with fluid after installation.
It is worth mentioning that brake systems should be bled periodically, as well. Over time, air can enter the system for many reasons, and it should be dealt with. We recommend bleeding your brakes every two to three years. However, it’s wise to inspect the system’s condition any time the pedal begins to feel spongy.
Safety First
Bleeding your brakes is inherently dangerous due to the caustic properties of the fluid, as well as the nature of working under and around a lifted vehicle. Follow these tips and use the recommended equipment below to stay safe.
- Make sure that you never crawl under a vehicle that isn’t properly secured. Even if the vehicle isn’t jacked up, you should make sure the parking brake is engaged, the transmission is set in park, and the wheels are guarded by chocks. If it is jacked up, make sure to do those things, plus set the vehicle on jack stands before you stick your head under there. And remember, reduce your risk by only putting parts of your body underneath the vehicle when absolutely necessary.
- Brake fluid is some nasty stuff. It’s not sulfuric acid, but you still want to avoid getting it on your bare skin or in your eyes. Keep it away from the paint, while you’re at it.
Gear and Tools
The Equipment You Need To Bleed Your Brakes
If you’re using the traditional two-person method, you might already have many of the basic tools you need for the job. Here’s a checklist to make sure you have what you need.
- Jack or lift
- Impact wrench
- Torque wrench
- Wrench and/or socket sets
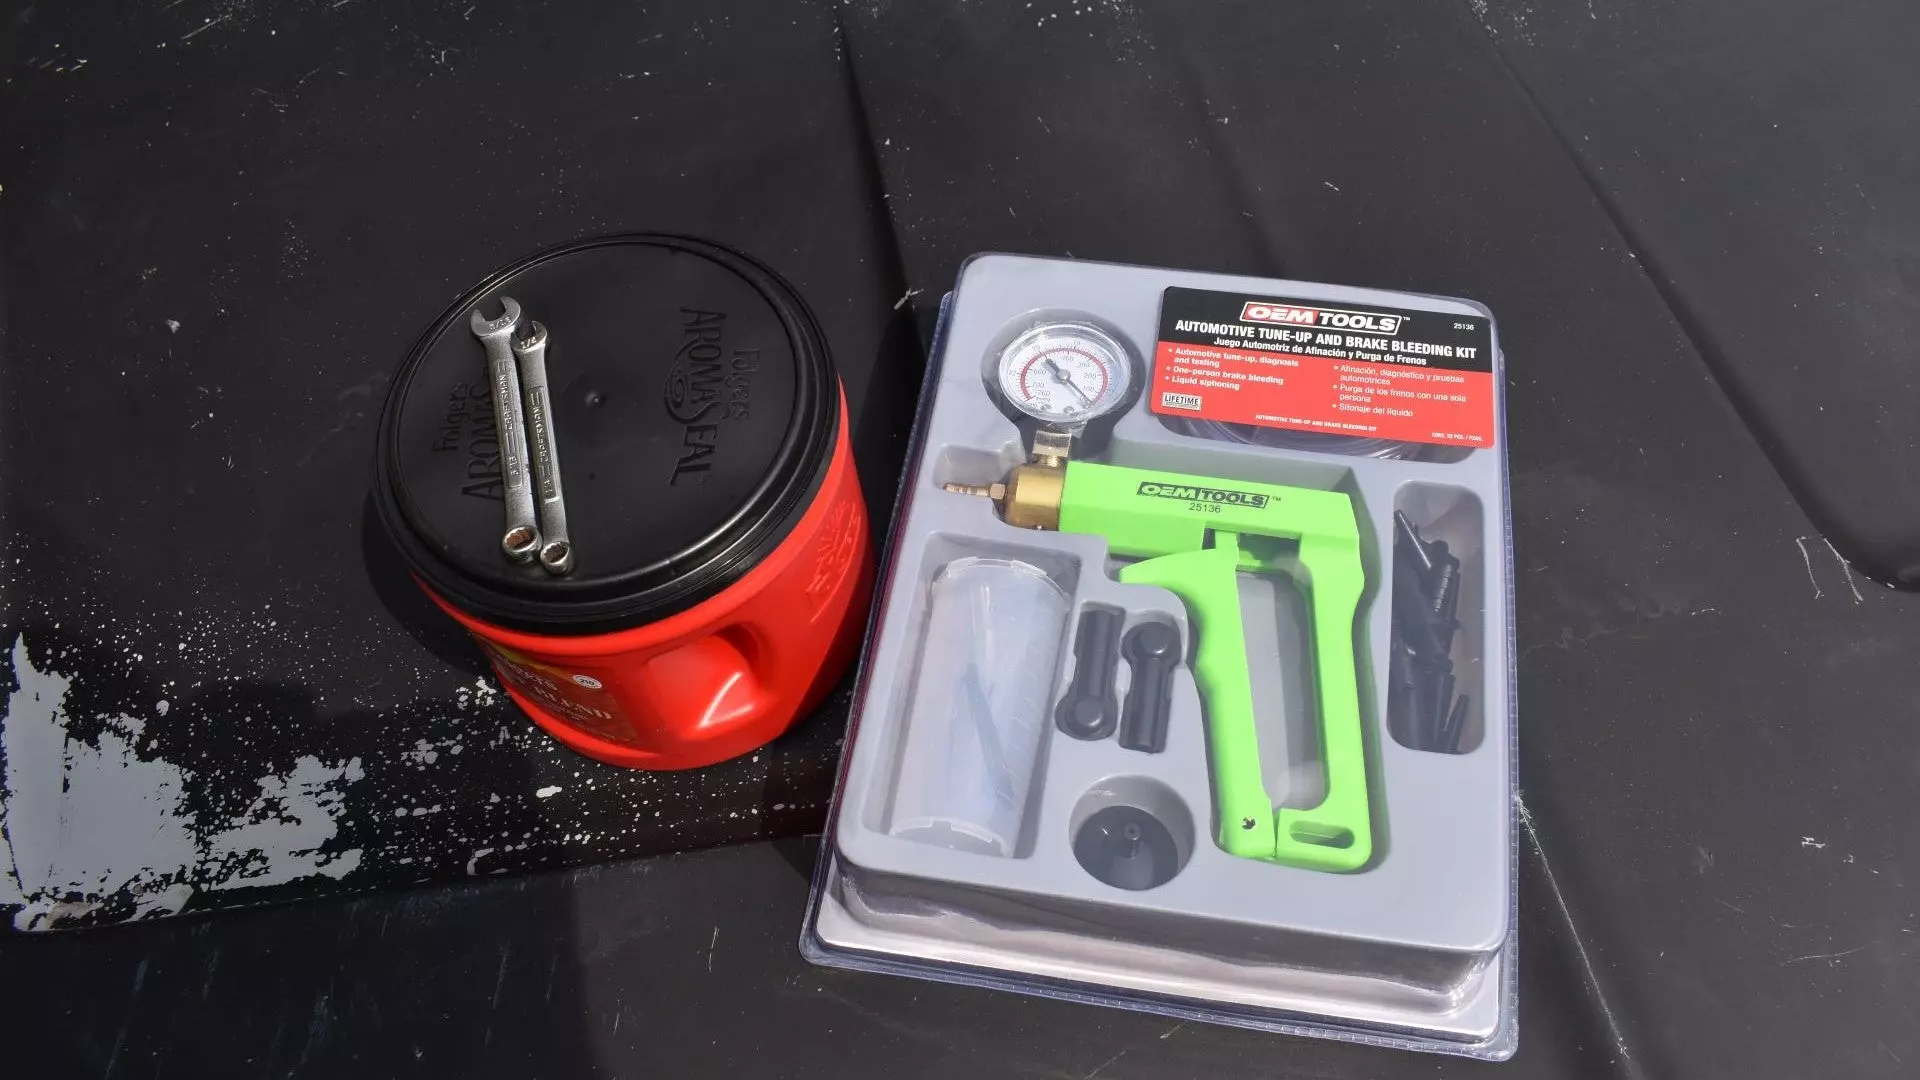
- Catch pan, coffee can, or old bottle to store the old brake fluid
- Brake fluid
- Brake parts cleaner
- A friend
- Brake bleeding tool, if friends aren’t available or you’re staring with an entirely new system without brake fluid
The Job: How To Bleed Brakes
If you have a friend, follow these steps to properly bleed your brakes.
1. Put a friend in the driver’s seat.
Remember, they aren’t going to like you for this. Do your best to give them something in return. Some candy or frosty beverages as a reward are the typical currency.
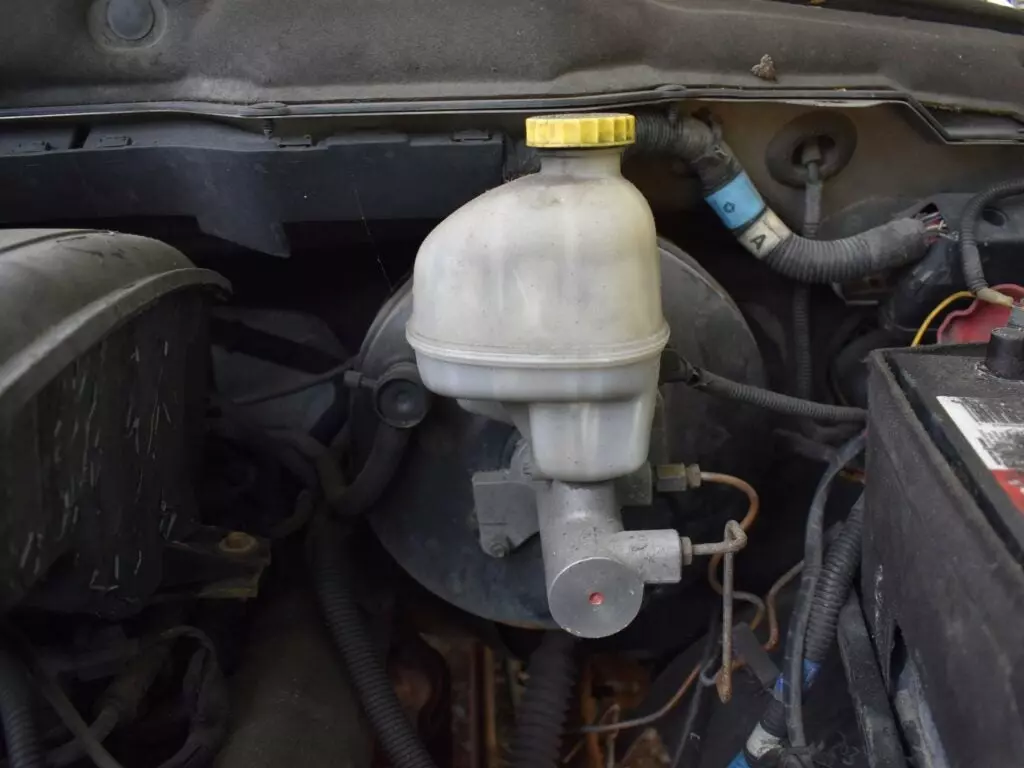
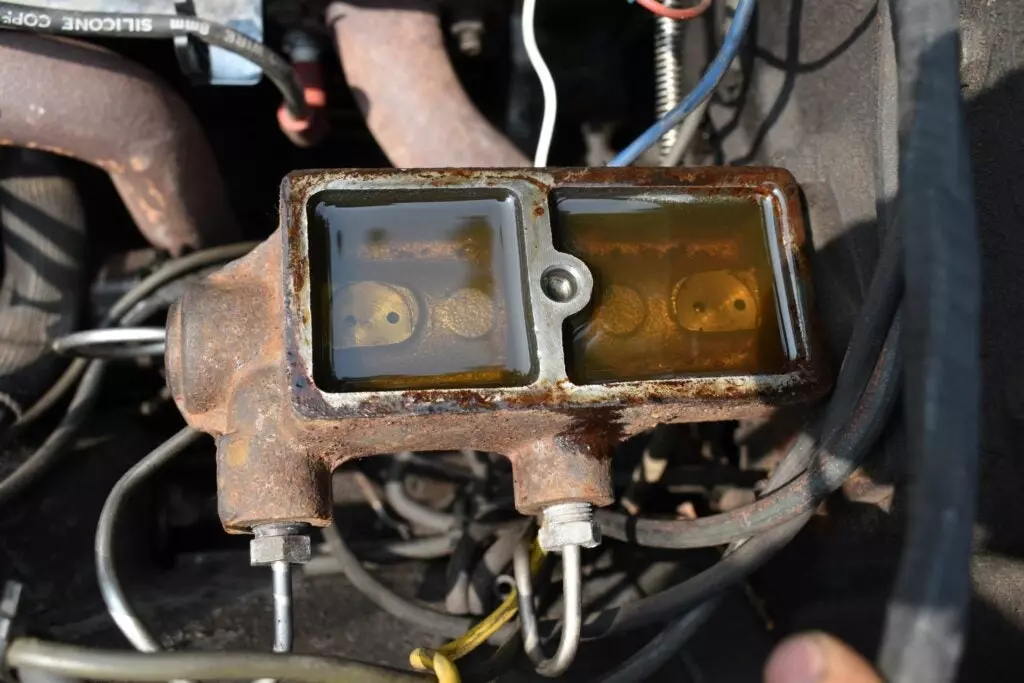
2. Check the master cylinder level.
Make sure the brake fluid level is adequate, take note of the position, and top it off, if necessary. It will lower as you bleed the brakes, and you want to make sure you don’t let it go dry. You might also want to clean up around the cap to make sure no dirt, grime, or contaminants enter the reservoir.
3. Get under the proper wheel.
If you just replaced one brake line, caliper, or wheel cylinder, move to the wheel that part is associated with. If you’re bleeding the system as routine maintenance or you just overhauled the entire system, move to the wheel furthest from the master cylinder — typically the rear passenger side.
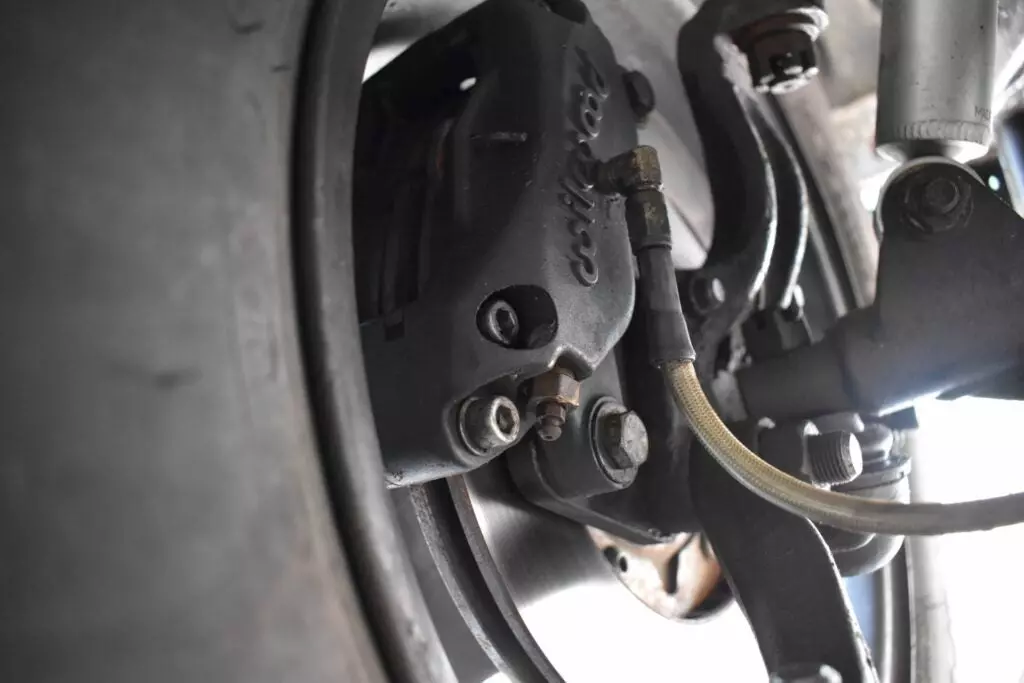
4. Get a wrench on the brake bleeder.
Make sure you use the right wrench. Sometimes, the bleeder is a little sticky, and if you’re off, it will strip things out even by a little. If you can, use a flare nut wrench or the box end of a combination wrench.
5. Have your friend pump the brakes a few times, then hold.
You need to build pressure in the system in order for this to work. Have the person in the driver seat pump the brake pedal until they feel the pedal stiffen up. Then have them hold it when it does.
6. Crack the bleeder, watch the fluid, then tighten it until it’s closed.
Watch the fluid as it flows from the bleeder. If it’s sputtering or filled with bubbles, there’s still air in the system. Sometimes you will need to repeat the process a few times until that air appears.
7. Repeat the previous step until you see a smooth flow of brake fluid.
Keep repeating steps 5 and 6 until there is no more air in the system. A steady stream will tell you the job is done.
8. Top off the master cylinder.
After bleeding the wheel, take the time to top off the master cylinder reservoir. You may want to do this after you crack the bleeder a few times as well. If you let the system run dry, you will need to start from scratch because it presents an opportunity for air to reenter the system. You’ll need to top off the master cylinder after bleeding each wheel, not just the first.
9. Move to the next closest wheel and repeat.
If you need to bleed multiple wheels, clean and button up the first wheel, then move to the next-closest wheel to the master cylinder to continue the bleeding process. Follow this process until all wheels have been bled.
10. Test the brakes before you drive.
Before moving to a road test, make sure the brakes are working. Make sure they build pressure while you’re still in park. After that, give the brakes a pump during a slow roll. This is to make sure the brakes are working before you blindly head to the open road.
Bleeding Brakes with a Brake Bleeding Tool
The process is slightly different if you’re doing the job by yourself. Follow these steps, which include using a brake bleeding tool.
1. Check the master cylinder level.
The rule is the same as before. If you’re starting to bleed a totally new system, simply top off the reservoir to the maximum fill line.
2. Move to the furthest wheel.
Again, you can focus only on the wheel of concern for repairs. Otherwise, go to the rear passenger side tire.
3. Place the hose on the brake bleeder.
Your kit likely comes with a few attachments. Make sure you select the one that provides the tightest fit over the bleeders. Otherwise, air is likely to enter the system, throwing off your visuals and possibly even flowing back into the brake line. If any air gets into the system, you’ll have to start over again.
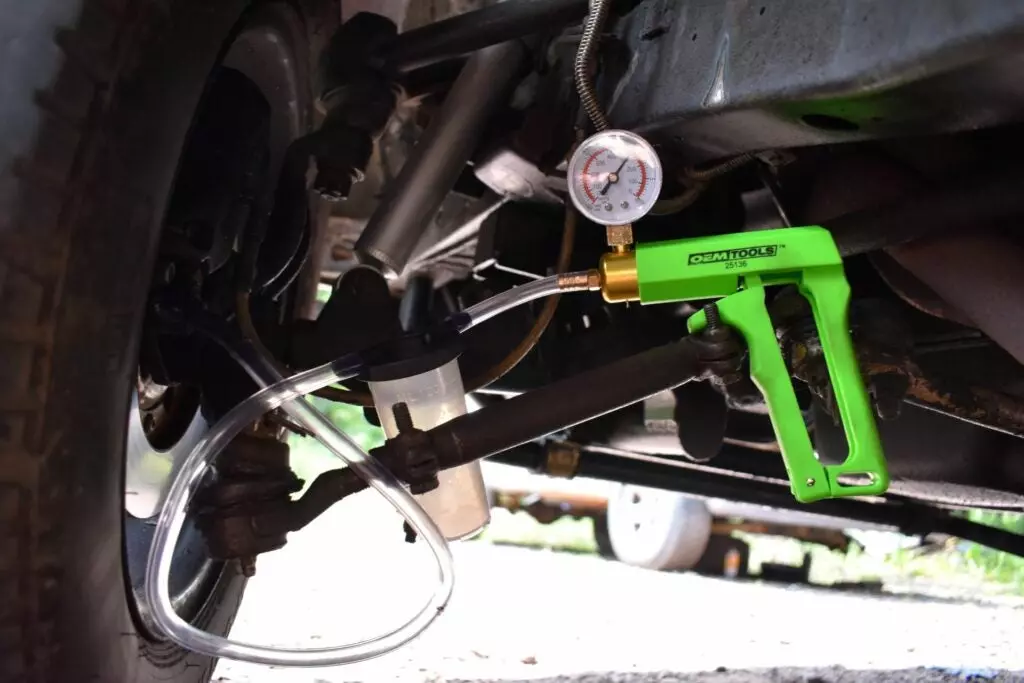
4. Pressurize the system.
Vacuum bleeders work by creating a vacuum on the bleeder. Simply pump the trigger a few times until you get the appropriate reading (refer to the instructions for your specific model).
5. Crack the bleeder.
Simply crack open the bleeder and let that vacuum pull fluid through. It might take a few tries with a totally dry system, so put those patience muscles to work. Remember to also keep an eye on your master cylinder levels and add fluid as necessary.
6. Monitor the fluid flow until the bubbles disappear.
Keep an eye on the fluid as it pulls through. You can see if there are bubbles in the line. If there are, continue the process until they disappear and the stream is straight uninterrupted liquid.
7. Tighten the bleeder and top off the master cylinder.
It’s important to monitor brake fluid levels, as these tools can pull quite a bit though before the bubbles stop. It’s wise to top off the master cylinder after each wheel and to keep an eye on it as you bleed each.
8. Move to the next-closest wheel and repeat.
Move through the same cycle as mentioned earlier if necessary.
9. Use and test the brakes before driving.
Same as before. You need to make sure the brakes work before you go cruising around. Pump up the brakes in park, and during a slow roll. You want to make sure the brakes are doing their job before you go testing them at top speeds.
What About My Anti-Lock Braking System (ABS) Module?
Under normal circumstances, you don’t need to worry about the ABS module, which controls the ABS system. So long as there is already fluid in the system, it should bleed along with each brake line. However, this process likely won’t do when bleeding the system from empty or after installing a new ABS module. In that case, you will need to either have a shop do it for you or bleed the module as the manufacturer calls for. Some feature bleeder screws, while others feature an auto-bleed function performed with the aid of scanner tools.
The Questionnaire: Brake Bleeding FAQs
We know you probably have a few questions, and Car Autance has the answers!
Q. What is the wheel correct order to bleed brakes?
A. The proper order is to work from the furthest wheel from the master cylinder to the closest. In most cases, that means starting with the rear passenger’s side tire, then to the rear driver’s side tire, then to the front passenger’s side tire, and finishing with the front driver’s side tire.
Q. How do you get the air out of the brake lines without bleeding?
A. Gravity bleeding is a technique used to let air exit the system on its own. The idea is to open the master cylinder, then crack the bleeder screw on one wheel at a time. Gravity will naturally push the fluid through the system for you. I’ve never had much luck with this system and definitely recommend manually bleeding them instead.
Q. Do you bleed brakes with the engine on or off?
A. Don’t bleed the brakes with the car running. For one, you’re beneath the thing, and there are too many dangers associated with being under a running vehicle. The pedal will be stiffer with the car off, but it’s the only way to do it. Additionally, it can muffle communication between you and the person pumping the brakes.
Q. What prevents brakes from bleeding?
A. There are a lot of reasons that would prevent the brakes from bleeding. It might be due to a faulty bleeder, a broken line somewhere, a clog in the lines, or simply because you’re not doing it right. Keep in mind that trying to bleed brakes from empty with the pump and hold method might also be the reason the brakes aren’t bleeding, as it’s hard for the fluid to reach the bleeders without the aid of a vacuum tool.
Q. Do I have to bleed all brakes if I replace one caliper?
A. No. you don’t have to bleed all of the brakes if you replace one caliper. However, it’s not a bad idea to do them all if you’re already doing one. It’s an easy enough job to do, and it’s a good way to make sure there is absolutely no air in the system.
Video
We know you’re tired of the same old stuff, so we threw in a video for you to check out. The method used is different from either we mentioned, but it just might be the best option for someone working on their own!
Feature Products
If I could see your tool collection, I’d probably keep my recommendations to myself. But I can’t. So, I’m going to give you a heads up on some products you’ll want to change your brake fluid. Whether you’re doing it on your own or with a buddy, I think it’s worth your time to take a look at the Ares 2-Liter Manual Brake Fluid Pressure Bleeder, OEMTOOLS One-Man Brake Bleeder & Vacuum Pump Test Kit, Gearwrench 6-Piece Flare Nut Wrench Set, Metric, Bosch Brake Fluid, and RC Brakleen Non-Chlorinated Brake Parts Cleaner, all of which are available on Amazon!